Turn trash into treasure! Explore 10 genius cardboard crafts diy ideas, step-by-step crafting tips, and eco-friendly home decor inspiration.
cardboard crafts diy ideas, upcycled cardboard projects, easy recycled crafts, handmade home decor, cardboard activities for kids, eco-friendly crafting
We have all been there. You look at the corner of your living room or garage and realize a mountain of shipping boxes has slowly taken over your home. Ordering online is convenient, but the leftover packaging waste can leave you feeling guilty. You want a fun, cost-effective way to declutter your space, tap into your inner creativity, and engage your family in an eco-friendly project that doesn’t involve staring at a digital screen all day.
The perfect solution is hidden right inside those brown delivery boxes: mastering cardboard crafts diy ideas.
Cardboard is an absolute dream medium for crafters. It is sturdy, incredibly versatile, completely free, and readily available in every household. By learning a few simple cutting, scoring, and structural assembly techniques, you can transform ordinary corrugated packaging into high-end home organizers, stunning wall art, or imaginative toys for children. Upcycling this material stops valuable resources from heading straight to the landfill while giving you a rewarding, tactile creative outlet.
In this comprehensive crafting guide, we will unpack 10 phenomenal cardboard crafts diy ideas that blend artistic flair with practical utility. Whether you are a beginner looking for a quick weekend project or a seasoned maker tackling complex structures, this guide will provide the blueprints, expert tips, and troubleshooting advice you need for success.
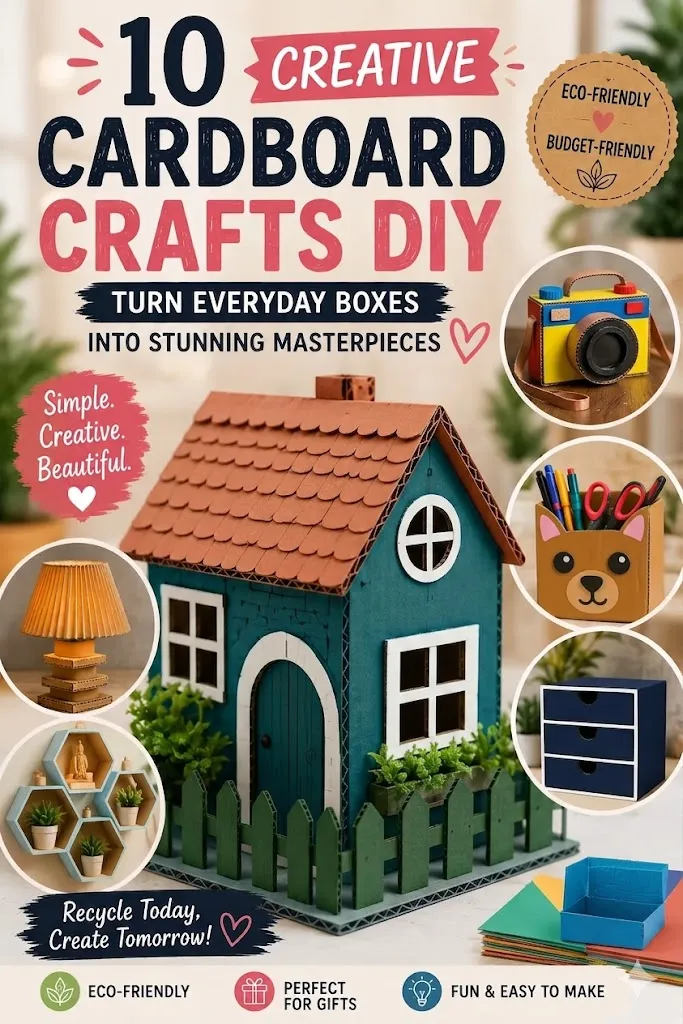
Why Cardboard is the Ultimate Eco-Friendly Crafting Medium
Before we jump into our specific project list, let’s explore why high-quality upcycled cardboard is a favorite among modern sustainable designers:
- Zero-Cost Raw Material: Forget spending hundreds of dollars at a boutique craft supply store. Your raw materials are delivered directly to your doorstep for free.
- Surprising Structural Integrity: Corrugated cardboard features an internal arched paper layer (fluting) trapped between two flat liners. This structural engineering makes it incredibly strong, lightweight, and resilient.
- An Endless Creative Canvas: It can be painted, wrapped in fabric, covered in textured wallpaper, hot-glued, or sliced cleanly into intricate geometric shapes.
Let’s dive into our top 10 cardboard crafts diy ideas to breathe new life into your recycling bin.
10 Genius Cardboard Crafts DIY Ideas to Transform Your Home
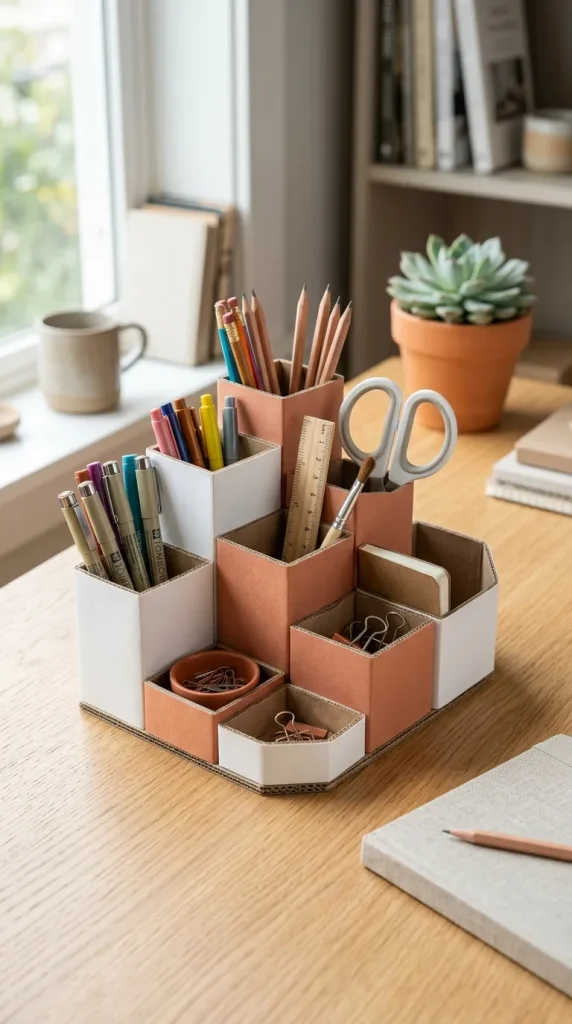
1. The Geometric Modular Desk Organizer
Clutter on a workspace can kill focus and productivity. This project involves cutting multiple cardboard tubes and boxes into varying heights, wrapping them in cohesive decorative paper, and gluing them together on a sturdy cardboard base to hold pens, scissors, and tech cables.
- Who It Suits Best: Remote workers, students, or anyone looking to clean up an office or vanity table with custom compartments.
- Crafting Tips: Use heavy-duty shipping boxes for the bottom base plate. Cut your pen slots out of thick cardboard mailing tubes rather than flimsy toilet paper rolls for a much sturdier feel.
- Benefits: Completely customizable to your specific stationery setup, keeps essential tools at your fingertips, and saves you money on expensive acrylic desk accessories.
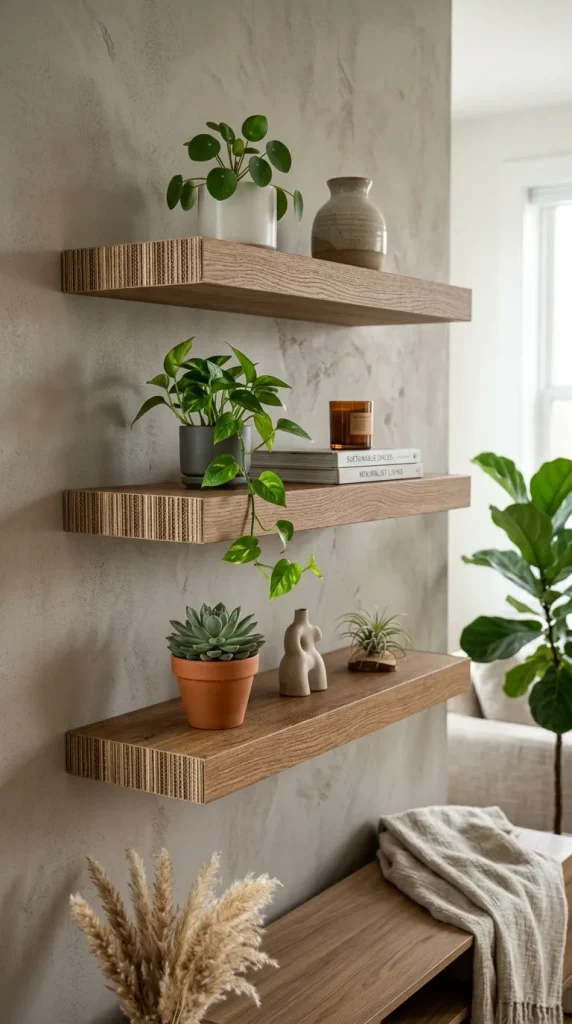
2. The Faux-Wood Floating Wall Shelves
It sounds impossible, but by layering multiple sheets of corrugated cardboard together, you can create a surprisingly strong structural beam. When wrapped in textured wood-grain adhesive vinyl, these lightweight panels look exactly like real timber shelving.
- Who It Suits Best: Renters or budget-conscious decorators who want stylish wall storage without drilling heavy anchors or using expensive wood.
- Crafting Tips: Cut three or four identical shelf shapes out of cardboard and glue them flat against each other using a thin layer of wood glue. Clamp them tightly together while drying to prevent any bowing or warping.
- Benefits: Exceptionally lightweight, meaning they can be hung securely using simple damage-free adhesive strips, while adding beautiful modern dimension to blank walls.
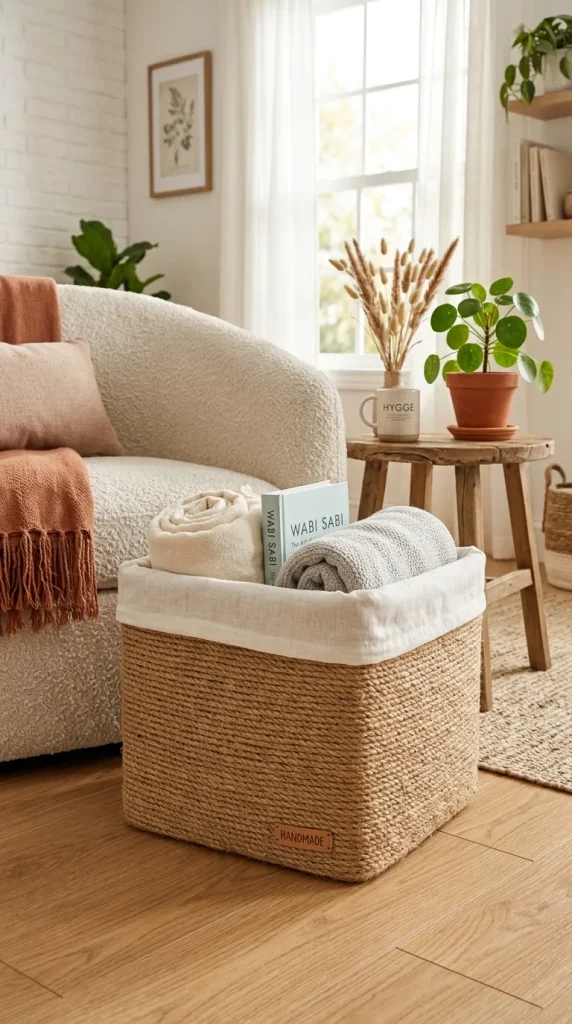
3. The Bohemian Woven Storage Basket
By cutting a rectangular box into a shallow tray and wrapping the exterior in natural jute twine or thick cotton rope, you completely disguise its humble origins. Add a simple linen fabric liner inside to finish the transformation.
- Who It Suits Best: Interior design enthusiasts who love the neutral, organic style of modern bohemian or coastal chic home decor.
- Crafting Tips: Apply a continuous spiral of hot glue around the box as you wrap the rope tightly. Pull the rope firmly to eliminate any gaps that would reveal the brown cardboard underneath.
- Benefits: Looks identical to high-end boutique baskets that cost upwards of fifty dollars, providing beautiful storage for living room blankets or bathroom hand towels.
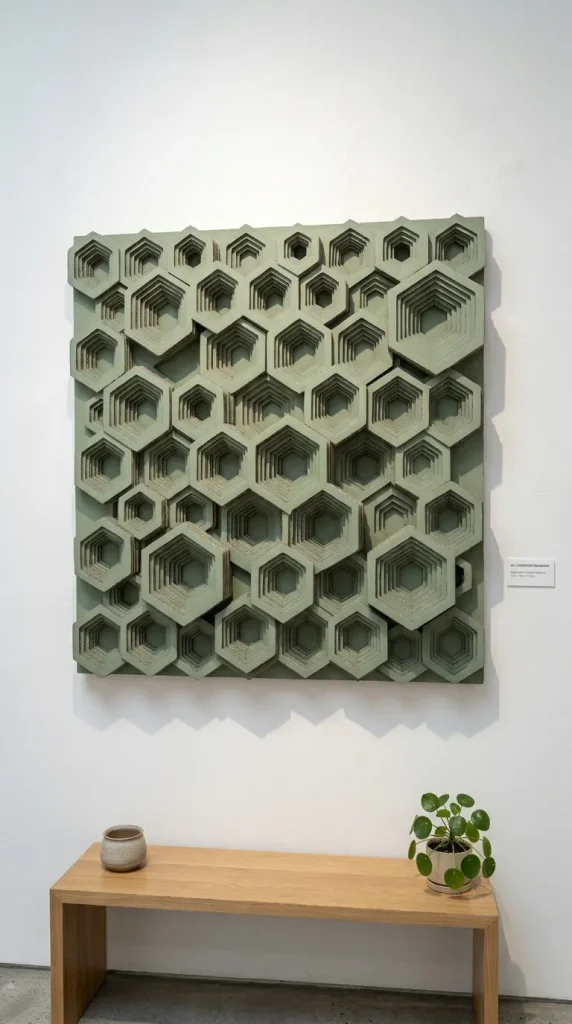
4. The 3D Geometric Wall Art Silhouette
This artistic project utilizes thin, single-wall cardboard sheets. By cutting out repeating geometric patterns (like hexagons or diamonds) and layering them on top of one another using foam tape dividers, you create a beautiful, shadow-casting 3D art piece.
- Who It Suits Best: Intermediate crafters looking to create custom modern art to match their room’s specific accent colors.
- Crafting Tips: Use a brand-new, ultra-sharp utility knife blade for this project. Dull blades will rip and tear the paper layers, leaving ragged, messy edges that ruin the modern aesthetic.
- Benefits: Extremely light to hang, looks highly sophisticated when painted with a consistent matte or metallic spray paint, and fills large wall spaces elegantly.
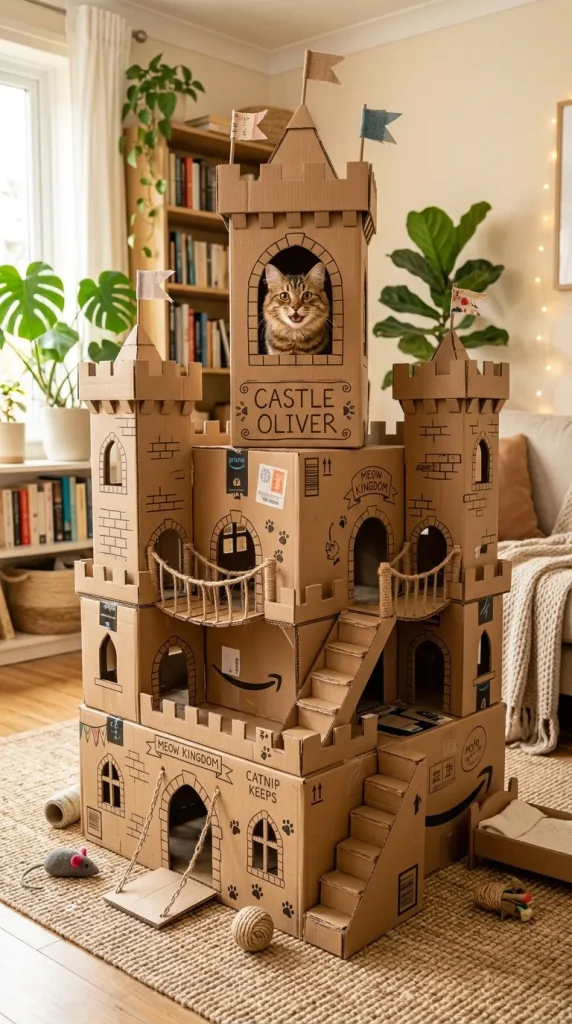
5. The Epic Multi-Level Cat Castle
Cats love boxes instinctively. Take that obsession to the next level by connecting multiple large shipping boxes together with cutout arched doorways, custom viewing windows, and wrapped scratcher pillars made from cardboard sheets.
- Who It Suits Best: Cat parents looking to entertain their feline friends with an expansive play area without buying ugly carpeted scratch towers.
- Crafting Tips: Use a non-toxic, pet-safe PVA glue or heavy-duty paper packing tape for construction instead of smelly hot glue or plastic tapes that cats might chew on.
- Benefits: Provides hours of physical enrichment for your pet, can be easily recycled and replaced when it gets worn down, and can be customized to fit your room’s corner perfectly.
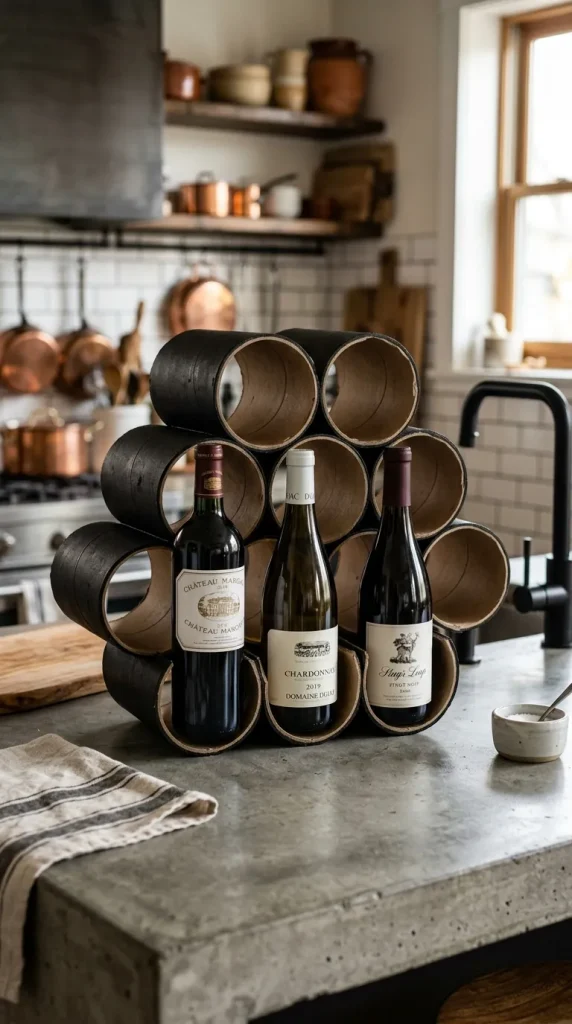
6. The Industrial Hexagonal Wine Rack
By slicing strong, thick cardboard shipping tubes into identical six-inch lengths and gluing them together side-by-side in a honeycomb cluster pattern, you form a visually striking, structurally sound countertop wine rack.
- Who It Suits Best: Minimalists, apartment dwellers, or wine lovers who want a functional countertop display piece with an industrial or geometric look.
- Crafting Tips: Coat the finished assembly in an all-in-one primer and matte black or metallic copper spray paint to reinforce the structural strength and hide the raw edges.
- Benefits: Naturally cradles wine bottles safely, takes up very little counter space, and turns discarded industrial shipping tubes into high-end decor.
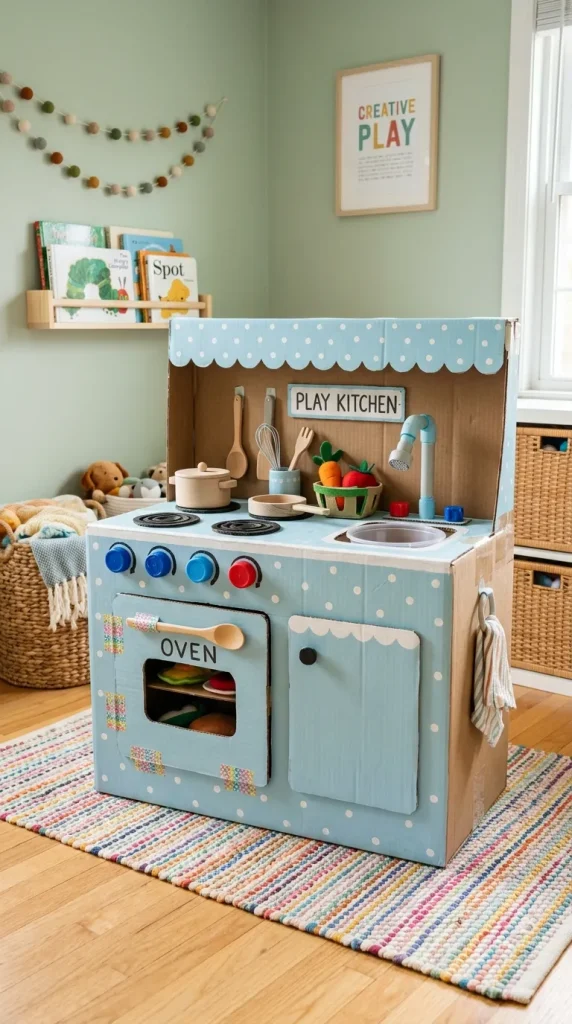
7. The Retro Kids’ Play Kitchen
Using two large kitchen appliance boxes, you can craft a delightful, interactive play kitchen complete with a cardboard sink (using a small plastic bowl insert), a turning faucet (using a painted cardboard tube), and clear plastic windows for an oven door.
- Who It Suits Best: Toddlers and young children who love imaginative play, and parents looking for an affordable, screen-free weekend family activity.
- Crafting Tips: Use plastic bottle caps attached with split pins (brads) for the stove knobs so they can actually turn and click, providing a fun tactile element for little hands.
- Benefits: Costs a fraction of plastic or wooden retail play sets, can be painted or colored entirely by your children, and provides massive sentimental value.
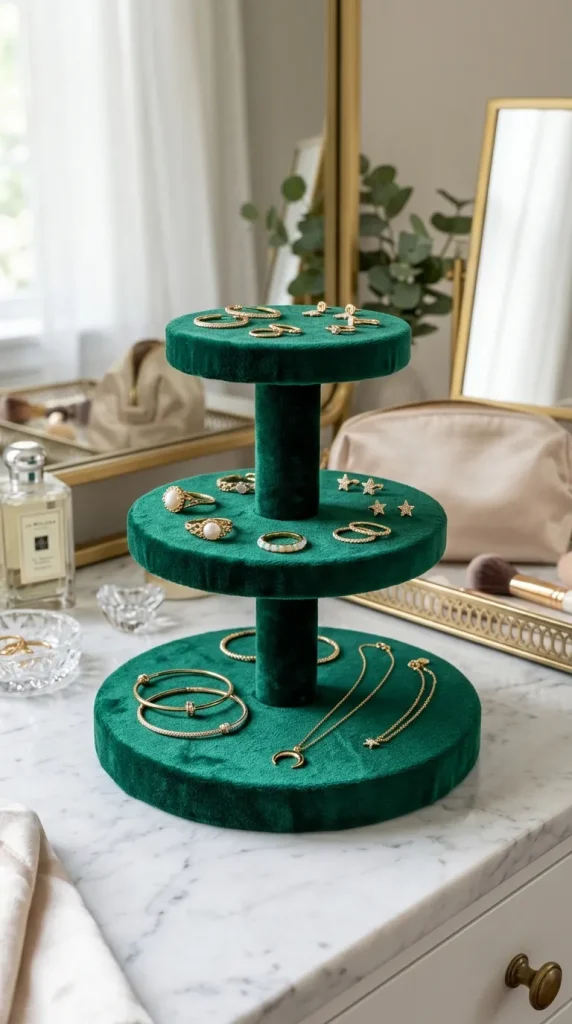
8. The Chic Tiered Jewelry Stand
This elegant vanity addition uses circular cardboard cake bases or cutouts attached along a central wooden dowel or wrapped thick cardboard core. Painted in an elegant white gloss or covered in velvet fabric, it safely holds rings, earrings, and bracelets.
- Who It Suits Best: Jewelry collectors who want a beautiful, organized way to display their daily accessories without tangling necklaces.
- Crafting Tips: Add a rim around each circle using a thin strip of flexible cereal box cardboard to prevent small earrings or rings from rolling off the edges.
- Benefits: Highly functional, prevents damage to your favorite jewelry, and looks incredibly elegant sitting on top of a dresser.
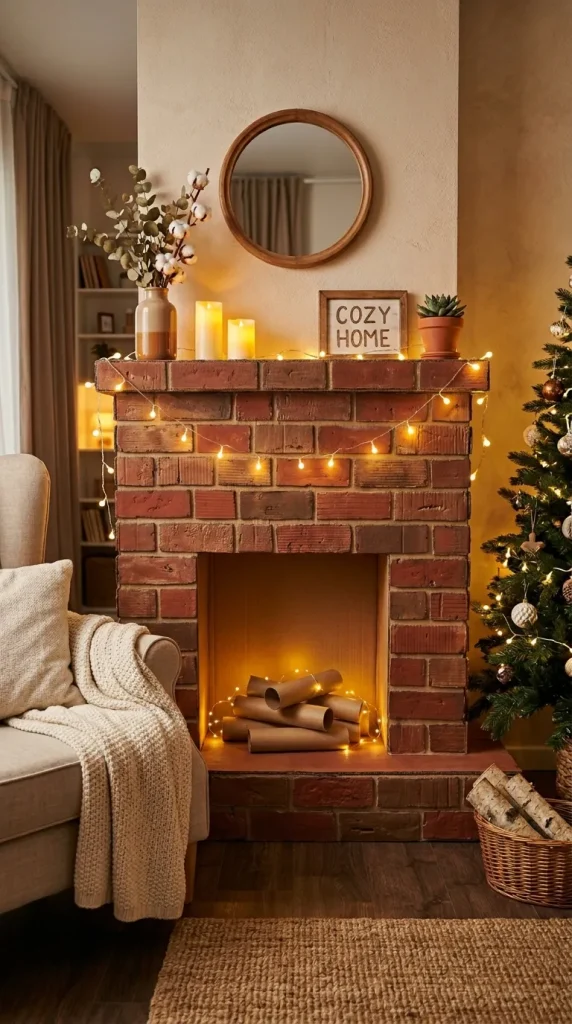
9. The Textured Faux-Brick Fireplace Mantel
A fantastic temporary decor piece for the holidays or a cozy seasonal bedroom accent, this project involves building a large three-sided U-frame out of heavy boxes and gluing on hundreds of small rectangular cardboard “bricks” painted in textured terra-cotta hues.
- Who It Suits Best: Festive decorators, photographers looking for a budget-friendly photo studio backdrop, or renters missing a cozy architectural feature.
- Crafting Tips: Sponge-paint the bricks with a mixture of red, brown, and white paint mixed with a spoonful of real sand to mimic the matte, rough texture of authentic masonry.
- Benefits: Adds immense warmth and seasonal charm to a room, is fully movable, and can be collapsed down flat for simple storage when the season ends.
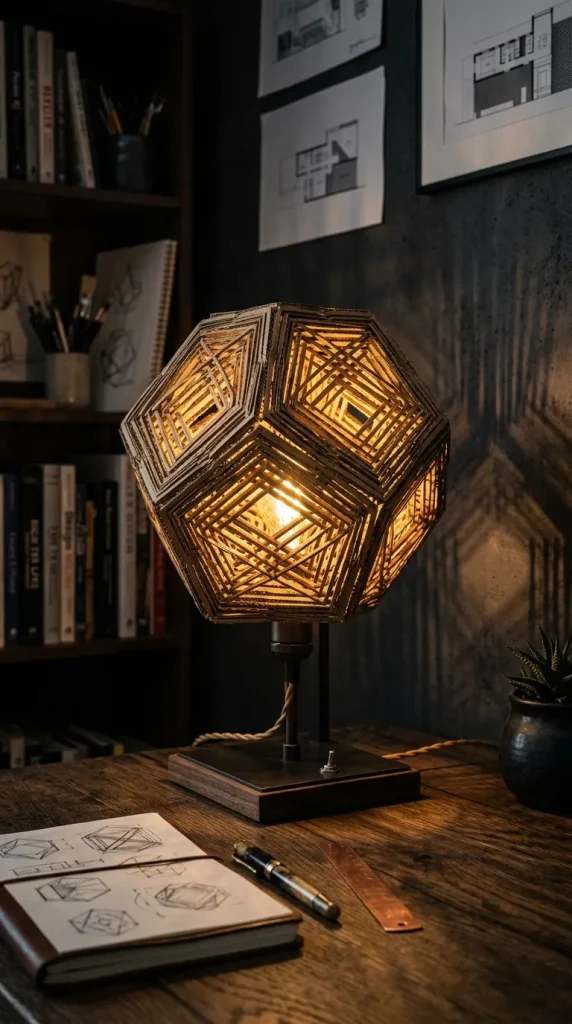
10. The Architectural Desk Lamp Accent
By slicing thin strips of clean cardboard and gluing them together in an open, alternating crisscross pattern, you can build a stunning geometric lampshade. When placed over a cool-burning LED bulb base, it casts gorgeous linear shadows across the room.
- Who It Suits Best: Advanced makers, lighting designers, or fans of mid-century modern and Scandinavian interior design.
- Crafting Tips: Only ever use a low-wattage, cool-touch LED bulb for this fixture. Traditional incandescent bulbs produce too much radiant heat, which poses a serious fire hazard with paper structures.
- Benefits: Creates a luxurious, high-end ambient light source, sparks amazing conversations, and highlights the beautiful internal texture of corrugated paper.
Comparing DIY Cardboard Craft Features
To help you decide which project to tackle first based on your time and skill level, check out this quick-reference matrix.
| Cardboard Craft Idea | Time Investment | Difficulty Level | Durability / Lifespan | Core Tools Required |
| Modular Desk Organizer | 1 – 2 Hours | Beginner | Medium to High | Scissors, Glue Stick, Decoupage Paper |
| Faux-Wood Floating Wall Shelves | 3 – 4 Hours | Intermediate | High (Layered structure) | Utility Knife, Wood Glue, Vinyl Wrap |
| Woven Storage Basket | 1 Hour | Beginner | High | Hot Glue Gun, Jute Rope, Fabric |
| 3D Geometric Wall Art | 2 – 3 Hours | Intermediate | High | Precision Knife, Foam Tape, Spray Paint |
| Multi-Level Cat Castle | 3 – 5 Hours | Intermediate | Medium (Will wear down) | Paper Packing Tape, Cutting Tool |
| Hexagonal Wine Rack | 2 Hours | Beginner to Inter. | High | Thick Postal Tubes, Heavy Duty Glue |
| Retro Kids’ Play Kitchen | 4 – 6 Hours | Advanced | Medium | Large Appliance Boxes, Fasteners |
| Tiered Jewelry Stand | 1.5 Hours | Beginner | Medium to High | Cardboard Circles, Dowel, Hot Glue |
| Faux-Brick Fireplace | 5 – 8 Hours | Advanced | Low to Medium | Multiple Large Boxes, Sponge, Paints |
| Architectural Desk Lamp | 3 – 4 Hours | Advanced | High | Thin Cardboard Strips, LED Base Light |
Pro-Tips for Salon-Quality Cardboard Crafting
Working with cardboard can occasionally look messy if you use the wrong methods. Incorporate these insider design rules to elevate your cardboard crafts diy ideas from “school project” to a piece of professional boutique decor.
Master the Art of “Scoring”
When you need to make a perfectly crisp, sharp fold in thick cardboard, never just bend it by hand—this will cause the paper layers to crush and warp unevenly.
- The Fix: Use a metal ruler as a guide, and run the back of your utility knife blade or an old empty ballpoint pen down the fold line using light pressure. This indents the top liner without cutting through the internal fluting, allowing you to fold it into a flawless 90-degree corner.
Prime Before You Paint
Cardboard is incredibly porous and acts like a giant sponge. If you apply water-based acrylic paint or heavy spray paint directly to raw cardboard, the paper will absorb the moisture rapidly, causing the entire panel to buckle, twist, and lose its flat shape.
- The Fix: Always seal your cardboard pieces first with a thin, light layer of specialized gesso primer, a dedicated shellac-based primer, or even a light coat of clear Mod Podge. Once this barrier dries completely, your decorative paint will apply smoothly without causing any structural warping.
⚠️ Common Crafting Mistakes to Avoid
- Using the Wrong Cutting Tool: Scissors crush the internal corrugated fluting of heavy boxes, leaving bruised and flattened edges. Always use a utility knife or box cutter held at a low 45-degree angle, making two or three shallow passes rather than trying to force the blade through in one heavy chop.
- Overloading with Hot Glue: While a hot glue gun is amazing for instant adhesion, applying massive, thick globs of it will leave visible lumpy ridges under thin decorative papers or fabric finishes. Spread the glue thin, or switch to a high-quality PVA wood glue applied with a small brush for perfectly flat laminations.
- Neglecting the Corrugation Direction: Just like real wood grain, cardboard has a distinct structural grain direction running parallel to the internal fluting. If you are building a shelf or a box that needs to bear weight, make sure the internal vertical fluting lines run vertically (up and down) to provide maximum load-bearing support.
Frequently Asked Questions (FAQs)
How do I make my cardboard crafts completely waterproof?
Because cardboard is paper-based, it can quickly degrade if exposed to high humidity or spills. To make your items water-resistant, seal the completed and painted project with two or three light coats of a clear acrylic sealing spray, polyurethane varnish, or a waterproof decoupage medium like outdoor Mod Podge. This creates a wipeable plastic shield over your work.
Where can I find thick, heavy-duty cardboard for free?
If your household delivery boxes are too thin or small, stop by local appliance stores, supermarkets, or bicycle shops. They frequently discard massive, incredibly thick, double-walled shipping boxes that are ideal for heavy-duty structural furniture and shelving projects. Most store managers are more than happy to let you take them for free.
Can cardboard furniture or shelving actually hold significant weight?
Yes, it can! The secret lies in architectural lamination. If you glue multiple panels of cardboard flat against one another with the grain directions crossed at 90-degree angles (similar to how commercial plywood is manufactured), you create an incredibly stiff, strong composite board capable of holding heavy books, plants, or wine bottles without bending.
Time to Clear Out Those Boxes!
Transforming a messy stack of recycling into gorgeous, functional home decor is one of the most satisfying ways to embrace sustainable living. With these 10 distinct cardboard crafts diy ideas, you have a creative roadmap to declutter your living space while building custom, high-end accent pieces entirely from scratch.
Don’t let those delivery boxes sit around gathering dust. Grab a sharp utility knife, heat up your hot glue gun, and start planning your first upcycled masterpiece this weekend. Your home, your wallet, and the planet will thank you!
Which creative upcycled project are you excited to build first? Let us know in the comments section below!