Sparkle this Independence Day! Explore 10 unique 4th of July nail ideas, expert manicure tips, and long-lasting red, white, and blue designs.
The peak of summer is an absolute vibe. Long, sun-drenched afternoons by the pool give way to smoky backyard barbecues, cool evening breezes, and the highly anticipated crackle of fireworks illuminating the night sky. Independence Day is the crown jewel of the summer season, offering the perfect excuse to gather with your favorite people, dress up in your finest Americana style, and celebrate in style. However, as you lock down your holiday outfit, choose your accessories, and plan your beauty routine, you are highly likely to hit a frustrating style roadblock—how to execute a flawless festive manicure that looks sophisticated rather than cheesy, and stays perfectly intact through all your holiday activities.
We have all been there. You get struck by holiday inspiration and attempt a DIY festive manicure, only to end up with clumpy layers of red and blue lacquer, uneven star smudges, and chips that appear before you even finish prepping the potato salad. Alternatively, you go to a salon but struggle to communicate what you want, ending up with a loud, elementary design that clashes horribly with your everyday wardrobe once the holiday weekend concludes. Finding the sweet spot between festive patriotism and chic, high-end nail design can feel like an impossible balancing act under the hot July sun.
The solution is easier than you think. By leaning into modern nail trends—such as negative space art, subtle chrome glazes, minimalist fine-line geometry, and sophisticated tonal variations—you can sport a manicure that is deeply patriotic yet undeniably elegant. Whether you are rocking short natural nails, long almond gel extensions, or sturdy acrylics, these creative 4th of July nail ideas will elevate your style canvas and keep your fingertips looking flawless from the morning neighborhood parade to the late-night grand finale.

The Philosophy of the Modern Festive Manicure: Elevating Holiday Art
A truly successful festive manicure does more than just flash thematic colors; it acts as a curated extension of your personal style. In the past, holiday nail designs were restricted to literal, heavy-handed interpretations. Today, the art of styling festive nails focuses on balance, depth, and structural integrity.
When brainstorming your next salon appointment or DIY session, think of your nails as a premium fashion accessory. By combining classic red, white, and blue shades with sophisticated finishes like velvet cat-eye magnets, high-shine holographic glazes, or milky translucent bases, your manicure transitions seamlessly from a festive pool party to a formal summer office setting.
💡 Featured Snippet Optimization: Designing the Perfect Holiday Manicure
The most effective approach to 4th of July nail ideas combines a high-quality, long-lasting foundation (such as a structured builder gel or a professional acrylic overlay) with minimalist, strategic patriotic motifs. Prioritizing fine line work, negative space designs, and subtle metallic chrome accents allows you to naturally channel the traditional red, white, and blue palette while ensuring the manicure remains sophisticated, modern, and chip-resistant throughout heavy summer outdoor activities.
10 Trendy 4th of July Nail Ideas to Try This Summer
Explore these ten distinct patriotic nail design concepts, featuring step-by-step styling advice, ideal nail shapes, and the unique benefits of each holiday look.
1. The Modern Liberty French
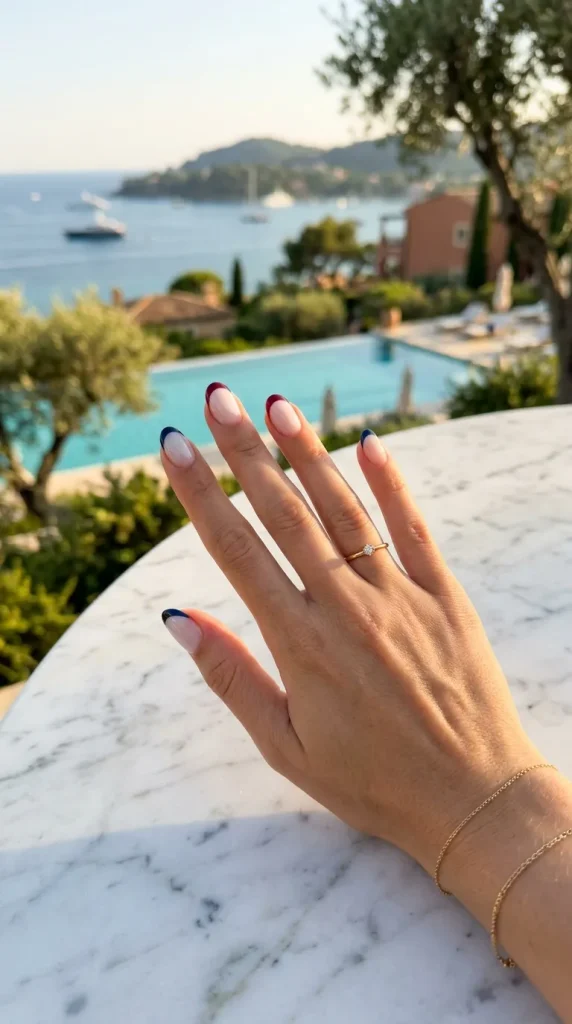
A sophisticated, high-fashion reimagining of the classic French manicure. This design features a clean, milky-white or sheer pink base coat accented by alternating ultra-fine micro tips in deep navy blue and vibrant cherry red. A singular, minimalist metallic silver star is placed precisely at the lunula (the base moon) of the ring finger.
- Who It Suits Best: Lovers of timeless, minimalist beauty, corporate professionals who need a subtle holiday look, and individuals with short-to-medium square or oval natural nails.
- Styling Tips: Use an ultra-thin, long-haired striping brush to apply the colorful tips. Keeping the line as thin as possible ensures the look remains elegant and elongates the appearance of your nail beds.
- Benefits: Grows out beautifully without a harsh line of demarcation, matches every single outfit in your closet, and provides a quiet luxury approach to patriotic style.
2. Star-Spangled Matte Velvet
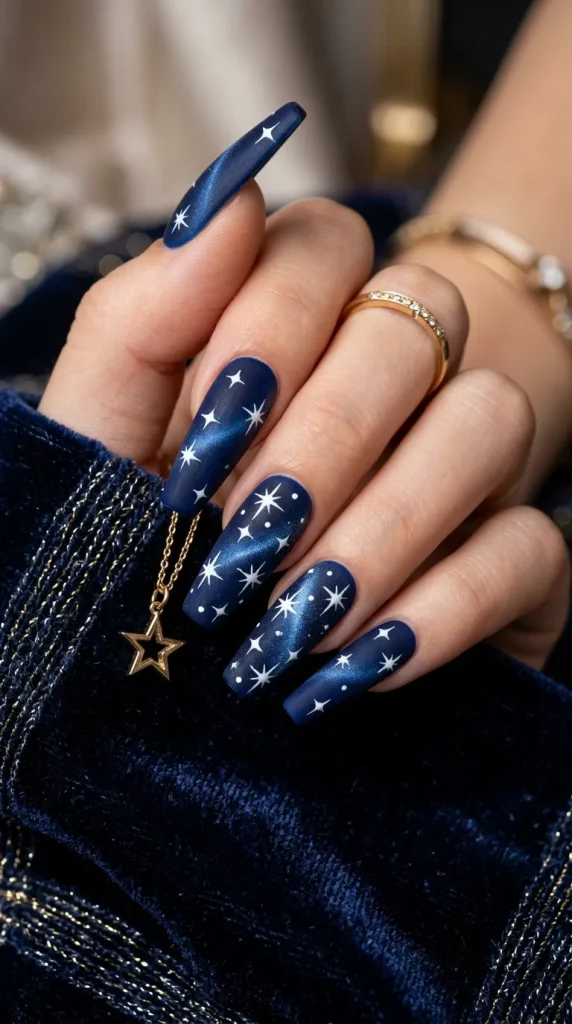
An incredibly tactile, multi-dimensional design that plays with contrasting finishes. This look utilizes a deep sapphire blue magnetic “cat-eye” gel polish as the base, which is pulled into a shimmering velvet effect using a styling magnet. The entire nail is finished with a velvety matte top coat, while crisp, high-gloss white stars are hand-painted on top to pop against the dull background.
- Who It Suits Best: Trendsetters who love modern textures, long coffin or stiletto nail shapes, and anyone wanting a dramatic, eye-catching evening look for the fireworks show.
- Styling Tips: Apply your matte top coat first and cure it completely. Then, use a non-wipe glossy white gel paint to draw your stars; leaving the stars uncured while dusting them with fine clear acrylic powder before the final bake adds an embossed 3D texture.
- Benefits: Offers incredible visual depth that changes dramatically under natural sunlight, hides minor surface scratches, and makes a bold fashion statement.
3. The Vintage Americana Denim Glaze
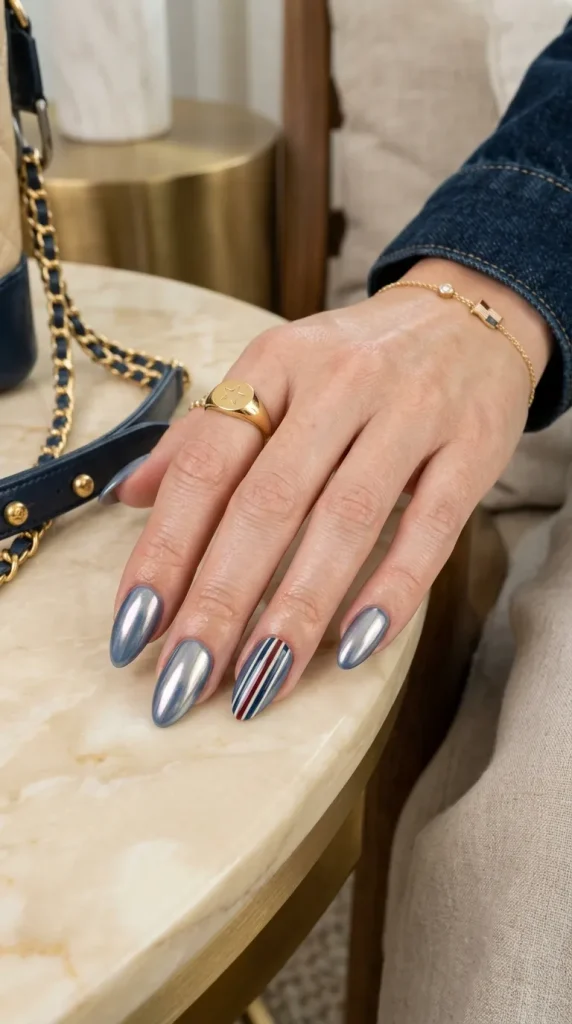
Inspired by classic, weathered American style, this manicure uses a dusty, muted slate-blue gel base rather than a bright primary navy. The blue is layered with a fine pearl or white chrome powder to give it a luminous, glazed donut finish, paired with subtle red and cream pinstripes on the thumb and ring fingers.
- Who It Suits Best: Fans of rustic farmhouse aesthetics, casual denim lovers, and individuals with classic almond-shaped gel extensions.
- Styling Tips: Ensure your base gel color is completely smooth and free of lint before applying your chrome powder. Use a silicone tool or your fingertip to burnish the chrome firmly into the cured, non-wipe top coat for a mirror-like shine.
- Benefits: Blends effortlessly with casual summer streetwear, softens the bold primary holiday colors into a universally flattering tone, and delivers a stunning high-gloss shine.
4. The Freedom Fireworks Ombré
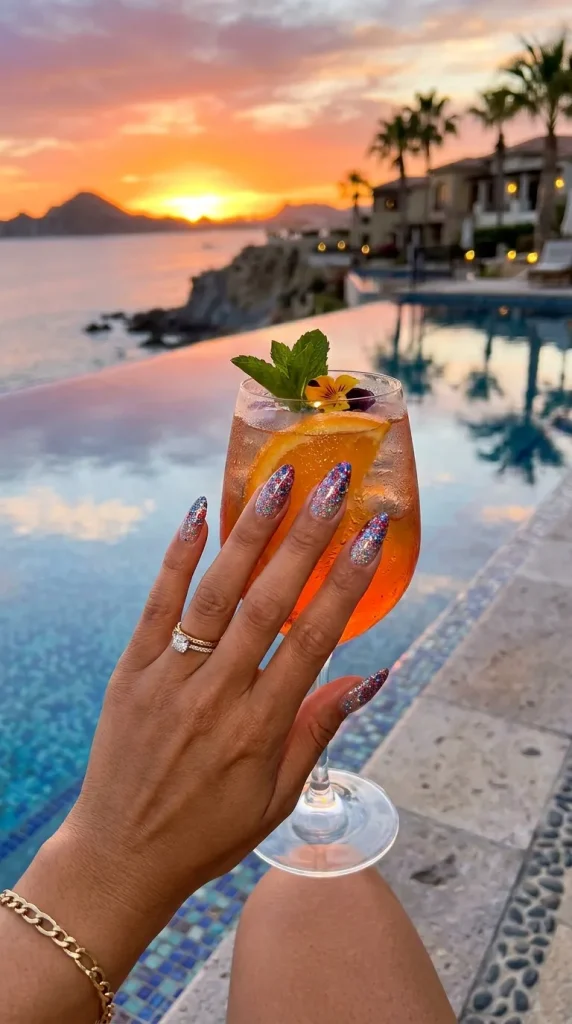
A dynamic, celebratory design that mimics the spectacular bursts of a late-night sky. A crystal-clear or soft nude base transitions smoothly into a concentrated explosion of holographic red, silver, and blue chunky glitter at the free edge of the nail, creating a modern, inverted glitter gradient.
- Who It Suits Best: Active swimmers, beachgoers, or anyone hosting high-energy outdoor parties where standard lacquers are prone to chipping.
- Styling Tips: Dab the glitter gel onto the tips of the nails using a small makeup wedge sponge rather than a standard brush. The sponge absorbs excess clear base gel, leaving a dense, highly concentrated pack of glitter exactly where you want it.
- Benefits: Incredibly forgiving of tip wear and chipping, sparkles brilliantly under water and bright sunlight, and is very simple to execute at home.
5. Festive Negative-Space Abstract
A highly artistic, contemporary manicure that embraces the beauty of natural nails. This design leaves large sections of the nail bed bare, decorated with organic, free-flowing abstract waves, swoops, and dots in alternating shades of cobalt blue, bright crimson, and crisp opaque white.
- Who It Suits Best: Creatives, art enthusiasts, and individuals with short natural nails who want a low-maintenance look that doesn’t require frequent salon touch-ups.
- Styling Tips: Always apply a high-quality rubberized base coat first to uniform the natural nail plate’s color and texture. When painting your abstract waves, vary the thickness of the lines to create a sense of movement.
- Benefits: Completely masks new nail growth at the cuticle line, feels lightweight, and avoids looking overdone or cluttered.
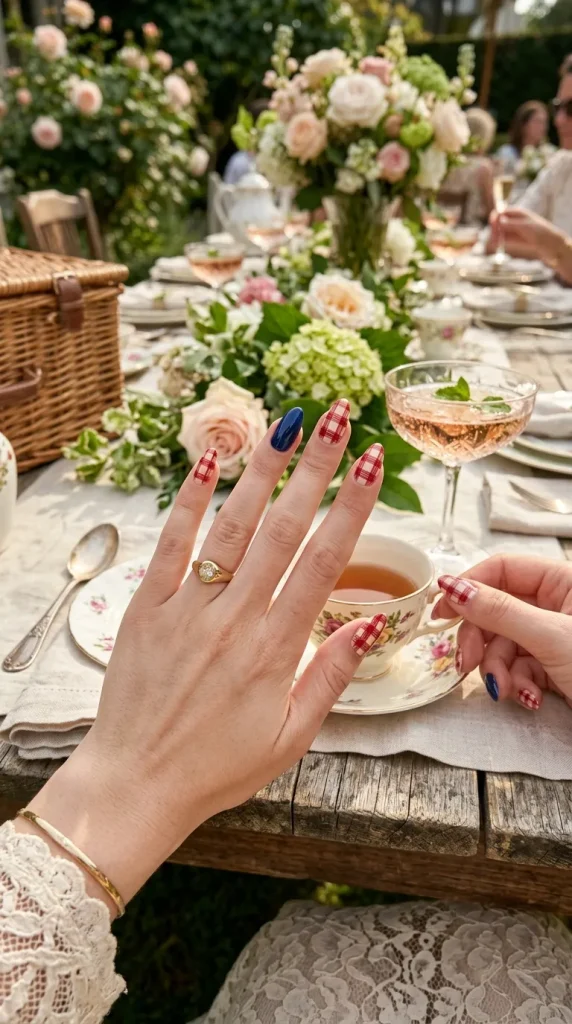
6. Old Glory Retro Gingham
A nostalgic, picnic-ready design that channels mid-century summer charm. This style features a meticulously hand-painted red and white gingham plaid pattern on select accent nails, balanced by solid navy blue nails on the remaining fingers, finished with a super-glossy glass top coat.
- Who It Suits Best: Vintage fashion lovers, pin-up style enthusiasts, and those attending traditional community barbecues and family holiday gatherings.
- Styling Tips: To create the perfect transparent overlap look of gingham, mix your primary red gel polish with a small amount of clear base gel to create a semi-translucent syrup polish for the intersecting grid lines.
- Benefits: Highly photographic, coordinates perfectly with traditional holiday summer dresses, and offers a fun, structured pattern.

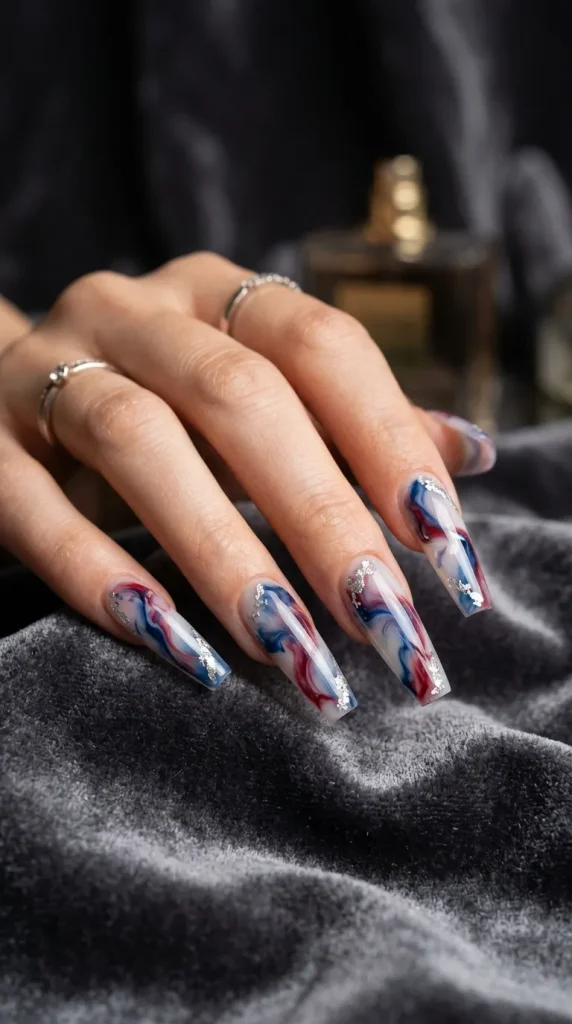
7. Tricolor Marble Smoke
A luxurious, organic design that mimics the fluid, swirling motion of colorful smoke art or premium quartz crystal. Wisps of deep navy, scarlet red, and bright white are swirled together over a soft milky-white canvas using a fine detailing brush dipped in alcohol, accented by tiny flakes of genuine silver leaf.
- Who It Suits Best: High-end beauty lovers, fans of marble textures, and individuals with long, elegant ballerina or almond-shaped acrylic extensions.
- Styling Tips: Drop small beads of your colored gel polishes into a layer of wet, uncured blooming gel. Allow the colors to naturally spread and melt outward for 10 seconds before curing to achieve a flawless, smoky look.
- Benefits: Every single nail is completely unique, hides natural nail staining or imperfections beautifully, and delivers an incredibly luxurious, high-end studio aesthetic.
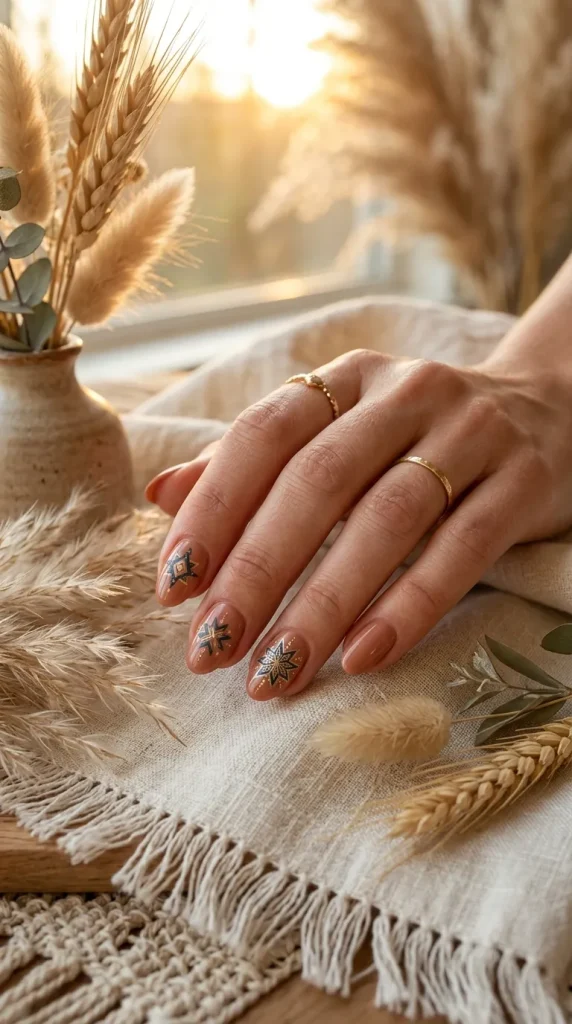
8. Bohemian Prairie Star Minimalist
An earthy, relaxed interpretation of traditional patriotic style. The design uses a matte terracotta or warm nude base coat, decorated with a single, hand-painted four-point star in dusty navy on the center of each nail, finished with a delicate metallic gold dot at the core.
- Who It Suits Best: Desert dwellers, fans of bohemian fashion, and individuals who want a subtle nod to the holiday without wearing bold primary colors.
- Styling Tips: Use a steady hand and a dotting tool to place your center gold point first. Then, pull the four star points outward from that central dot using a micro-detail brush for perfect symmetry.
- Benefits: Highly understated, transitions perfectly into the remaining months of summer, and complements gold jewelry beautifully.
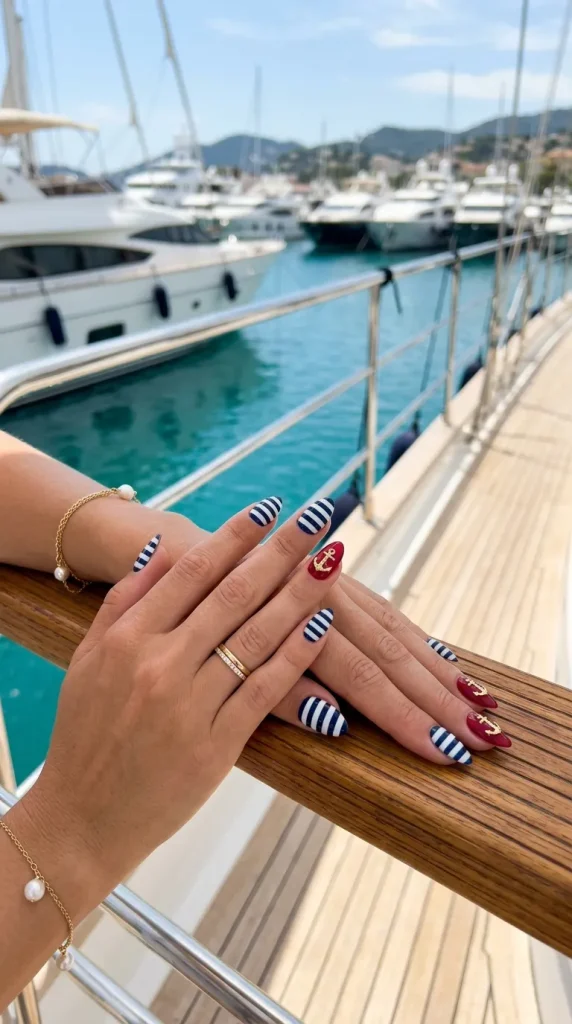
9. The Cape Cod Nautical Stripe
A crisp, preppy look that draws inspiration from classic East Coast maritime living. This design features bold, parallel horizontal navy-and-white stripes across the nail plate, beautifully tied together by a solid crimson accent nail on the ring finger featuring a tiny stamped anchor icon.
- Who It Suits Best: Boaters, lake-house hosts, fans of classic prep style, and anyone spending their holiday weekend near a marina or coastal beach.
- Styling Tips: Utilize thin nail vinyls or striping tape to map out your lines before painting. Ensure the base color is completely dry before applying the tape, and pull the tape away immediately while the top color is still wet for crisp, sharp edges.
- Benefits: Provides a classic, sporty appearance, structure hides wide nail beds, and stands up wonderfully to salty ocean air and sand.
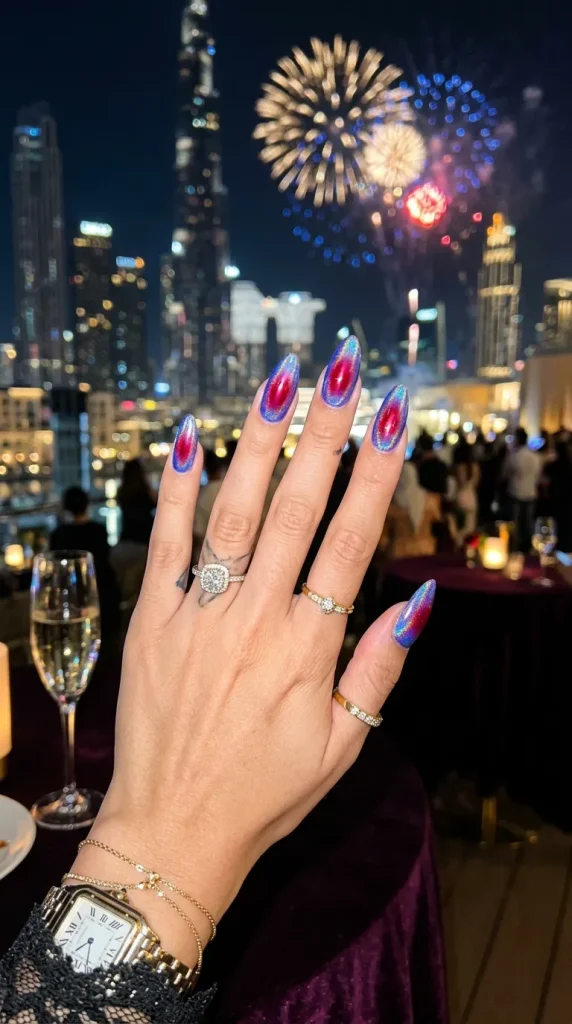
10. The Fireworks Aura
A mesmerizing, futuristic look created using an airbrush technique. A soft cream base is decorated with a diffused, glowing circular gradient (an aura) of deep red in the center, which blends seamlessly into an outer ring of cobalt blue, topped with a high-shine holographic top coat.
- Who It Suits Best: Gen-Z style icons, festival-goers, and anyone who loves experimental nail art and futuristic beauty trends.
- Styling Tips: If you do not own a professional airbrush gun, you can easily replicate this look at home by using a tiny eyeshadow applicator sponge to gently tap and diffuse your colored gel polishes onto a tacky base layer.
- Benefits: Creates a beautiful, glowing optical illusion, looks incredibly modern, and reflects a stunning rainbow shift under flashlight or camera flashes.
Manicure Feature & Performance Comparison Matrix
To help you choose the best nail look for your specific holiday schedule, venue, and skill level, evaluate this practical breakdown of application time, technical difficulty, and maintenance requirements:
| Manicure Concept Design | Prep Time | Difficulty Level | Maintenance Level | Best Celebration Environment |
| Modern Liberty French | 30 Mins | Medium | Low (Hides growth) | Corporate Offices & Luncheons |
| Star-Spangled Velvet | 45 Mins | High | Low (Matte finish) | Nighttime Fireworks & Concerts |
| Vintage Denim Glaze | 35 Mins | Medium | Medium (Avoid scratches) | Backyard BBQs & Street Fairs |
| Freedom Fireworks Ombré | 25 Mins | Very Low | Exceptionally Low | Beachfronts, Lakes, & Poolsides |
| Negative-Space Abstract | 20 Mins | Low | Exceptionally Low | Active Camping & Lawn Games |
| Old Glory Retro Gingham | 50 Mins | High | Medium | Family Picnics & Classic Car Shows |
| Tricolor Marble Smoke | 40 Mins | Medium / High | Low | High-End Rooftop Cocktail Parties |
| Bohemian Prairie Star | 20 Mins | Low | Low | Music Festivals & Desert Glamping |
| Cape Cod Nautical Stripe | 45 Mins | Medium | Medium | Sailing, Marinas, & Coastal Resorts |
| The Fireworks Aura | 35 Mins | Medium | Low | Late-Night Parties & Club Events |
Pro Tips Section: Keep Your Holiday Manicure Flawless
💡 Expert Tip on Sunscreen and Polish Protection
Many traditional outdoor sunscreens contain active chemical ingredients (like avobenzone or oxybenzone) that can chemically react with your nail polish’s top coat, causing it to turn yellow, lose its shine, or become sticky within hours. To protect your patriotic manicure, always wash your hands thoroughly with soap or use a wet wipe to clean your nail plates immediately after applying your sunscreen.
- Cap Your Free Edges Every Time: Whether you are applying standard lacquer or gel polish, always run your brush horizontally along the very front edge (the tip) of your nail. This simple sealing step creates a protective barrier that significantly prevents water from seeping under the polish while swimming.
- Invest in a High-Quality Cuticle Oil: The combination of dry summer heat, chlorine from swimming pools, and salty ocean water can rapidly dry out your cuticles, making even the most beautiful manicure look ragged. Apply a drop of jojoba-based cuticle oil to your nail perimeters every evening to maintain a fresh-out-of-the-salon glow.
- The Ice Bath Drying Trick: If you are using standard nail polish for a quick DIY look before the parade, let your nails air dry for three minutes, then submerge your hands into a bowl filled with ice water for two minutes. The freezing temperature instantly hardens the lacquer through to the base layer, preventing accidental smudges.
Common Mistakes to Avoid
❌ Critical Mistake: Applying Gel Polish Too Thickly
When trying to build up bright, opaque red or white tones, it is incredibly tempting to apply thick, heavy coats of polish. However, if gel polish is applied too thickly, the UV light cannot penetrate to the bottom layers, leaving uncured, wet polish trapped beneath the surface. This leads to rapid peeling, bubbling, and can potentially cause a chemical skin allergy over time. Always apply thin, even layers.
- Skipping the Dehydrator Phase: Summer skin naturally produces extra sweat and oils. If you paint over a nail plate that still has natural oils on it, your polish will fail to bond correctly, leading to lifting within 48 hours. Always wipe your bare nails down with pure acetone or a dedicated nail dehydrator right before applying your base coat.
- Using Nails as Tools to Open Cans: Holiday barbecues involve opening countless aluminum soda and beer cans. Using the tips of your freshly styled nails to pry open tab rings applies intense leverage to the free edge, causing acrylics to snap, gels to crack, and standard polish to chip instantly. Always use a butter knife, a key, or the pad of your finger to open cans safely.
- Neglecting Proper Curing Times: Different gel polishes require specific curing times depending on whether you are using an LED or UV lamp. Rushing the process and cutting your cure time short results in a soft, structurally weak manicure that will quickly dull and tear when exposed to pool water and outdoor activity.
Conclusion: Ready to Flash Your Festive Fingertips?
An unforgettable Independence Day celebration is built on the joy of getting dressed up, embracing community tradition, and expressing your unique style from head to toe. By skipping the cheap, generic plastic nail stickers and opting for a curated, modern patriotic manicure design, you elevate your entire summer aesthetic. Choose the concept from our guide that best matches your personal style and holiday plans, schedule your salon trip or DIY afternoon, and step into the holiday weekend with absolute confidence!
What is your absolute favorite color combination or design trick for summer nail art? Share your thoughts, advice, or your own festive nail photos in the comments section below. Don’t forget to save this guide and share it with your friends as you get ready for a beautiful 4th of July celebration!
Frequently Asked Questions (FAQs)
1. How long before the 4th of July should I get my holiday manicure done?
If you are getting a professional gel manicure, structured builder gel, or acrylic extensions, booking your appointment 2 to 3 days before the holiday is ideal. This ensures your nails look fresh and flawless for your events, while giving the product plenty of time to fully bond before being exposed to pool chlorine or outdoor activities.
2. Can I achieve these intricate star designs at home if I don’t have a steady hand?
Absolutely! If hand-painting fine stars feels too difficult, you can easily use high-quality nail water decals or ultra-thin vinyl stencils. Simply apply your base color, press the star decal firmly onto a dry or cured nail plate, smooth out any air bubbles, and seal it with two coats of premium top coat to lock it in place seamlessly.
3. Why does my white nail polish always look streaky, and how can I fix it?
White polish contains a high level of white titanium dioxide pigment, which naturally makes the formula thicker and more prone to streaking. To fix this, always apply a ridge-filling base coat first. When applying the white polish, use a light hand, keep the brush parallel to your nail, and accept that the first coat will look uneven—the second and third thin coats will smooth out the color completely.
4. How do I safely remove glitter polish without scraping and damaging my natural nails?
Chunky festive glitters can be stubborn to remove. The safest method is the foil technique: saturate a small cotton ball in pure acetone, place it directly over your nail plate, wrap the finger tightly in a small square of aluminum foil, and let it sit undisturbed for 10 minutes. The glitter will slide off effortlessly without requiring any damaging scraping.