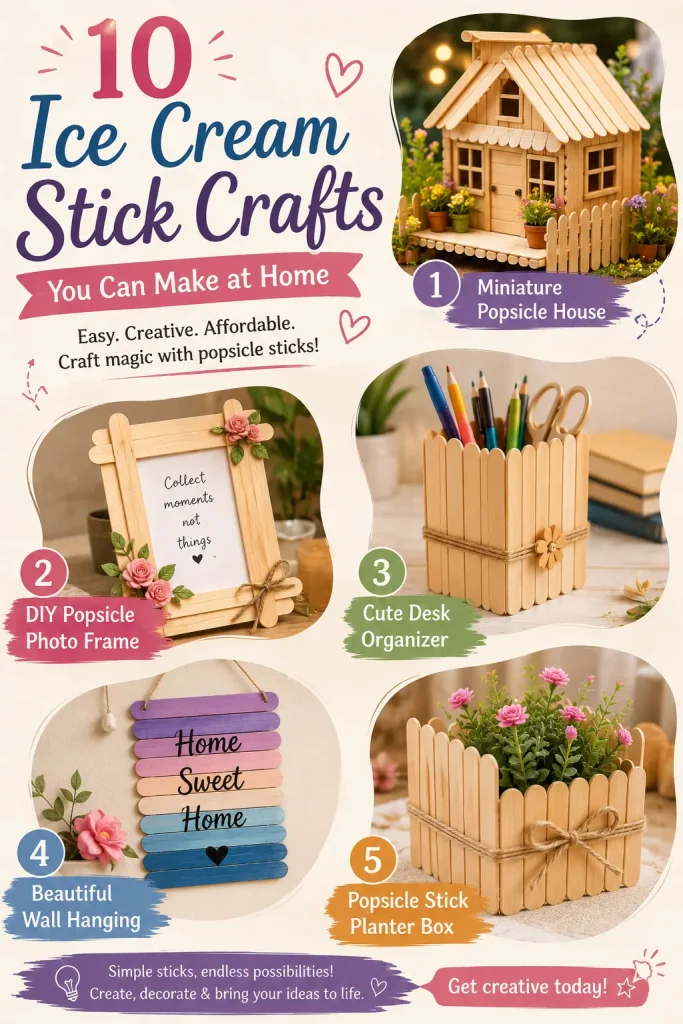
10 Beautiful Ice Cream Stick Crafts Ideas You Can Make at Home
Discover creative ice cream stick crafts that are easy, affordable, and perfect for DIY lovers. Explore beautiful popsicle stick craft […]
Discover creative ice cream stick crafts that are easy, affordable, and perfect for DIY lovers. Explore beautiful popsicle stick craft […]
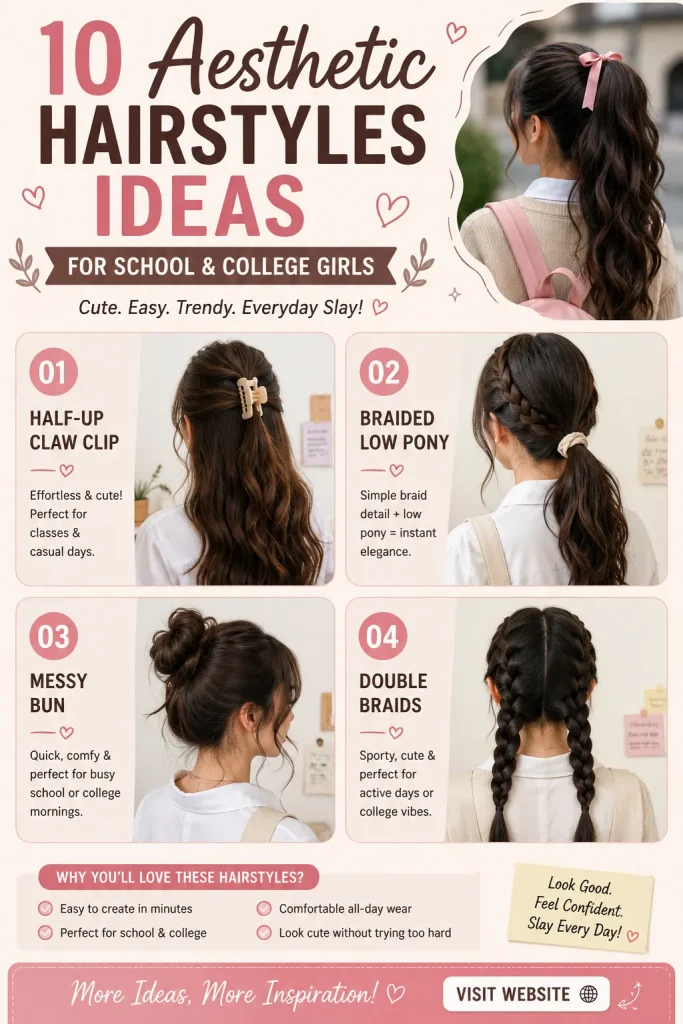
Discover 10 aesthetic hairstyles for school and college girls that are cute, trendy, and easy to create. Explore everyday hairstyle
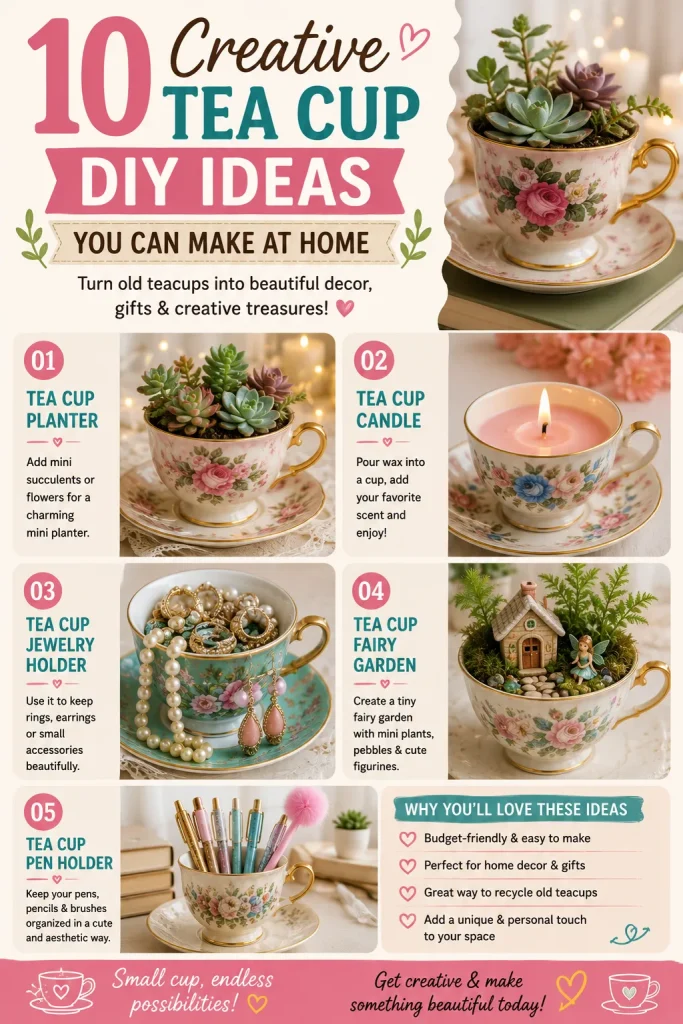
Discover creative tea cup DIY ideas to transform old cups into beautiful home decor, crafts, and handmade gifts. Explore unique
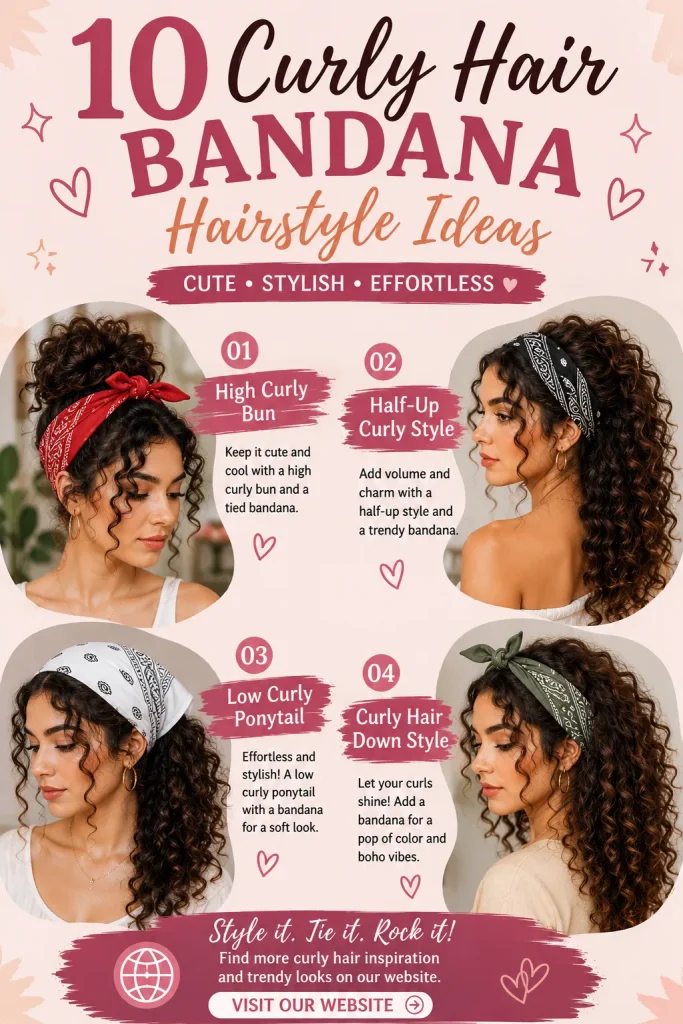
Discover beautiful curly hair bandana hairstyle ideas that are trendy, cute, and perfect for everyday looks. Explore stylish ways to
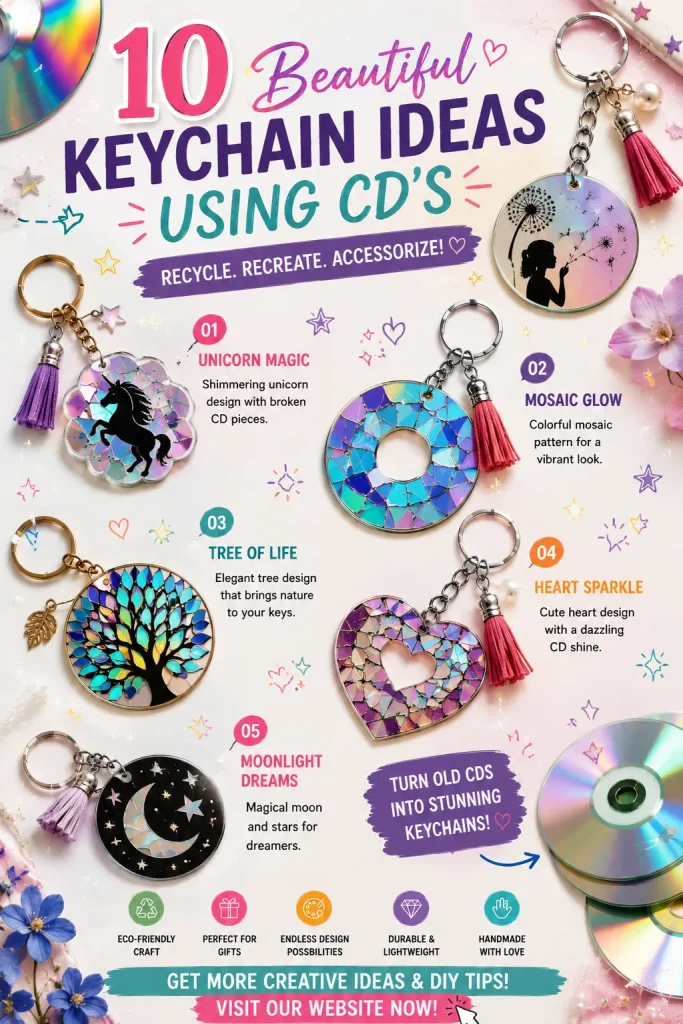
Discover creative DIY keychain ideas using old CDs and turn recycled materials into beautiful handmade accessories. Explore unique CD craft
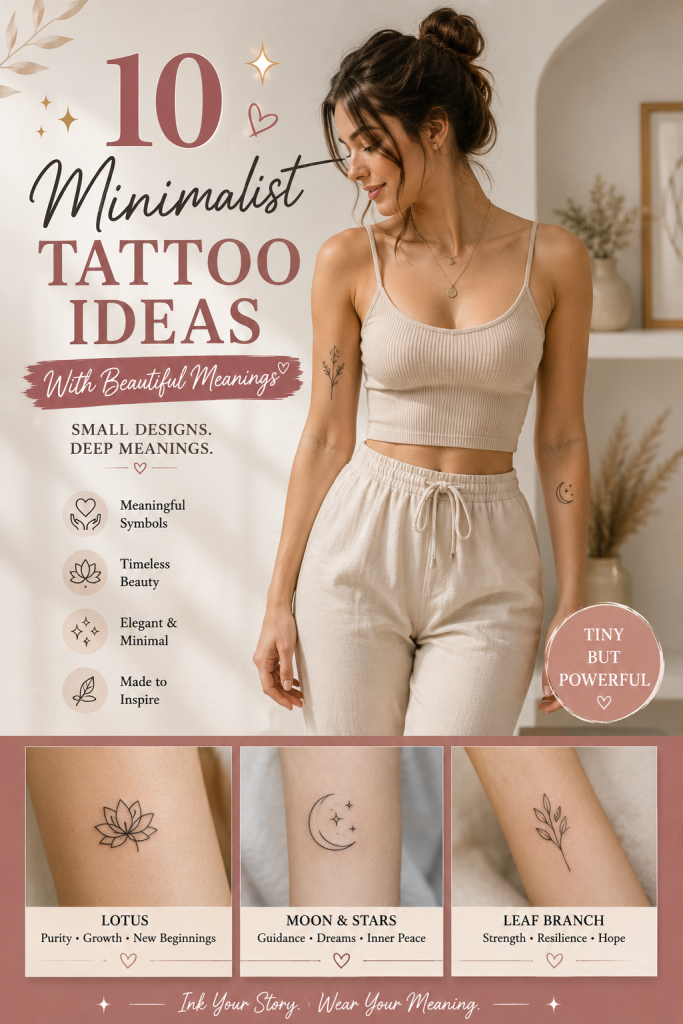
Discover beautiful minimalist tattoo ideas with meaningful symbols, elegant designs, and timeless inspiration. Explore small tattoo styles that represent love,

Create beautiful luxury home decor and handmade projects with these easy DIY ideas. Discover affordable crafts that look expensive, elegant,
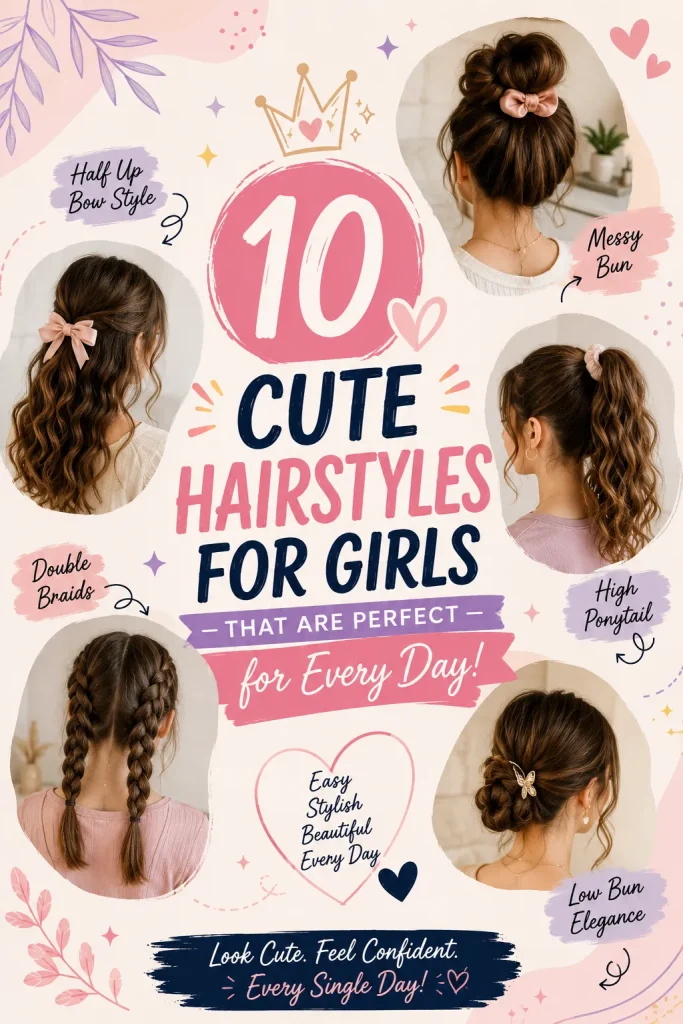
Discover cute hairstyles for girls that are easy, stylish, and perfect for everyday looks. From braids and ponytails to simple
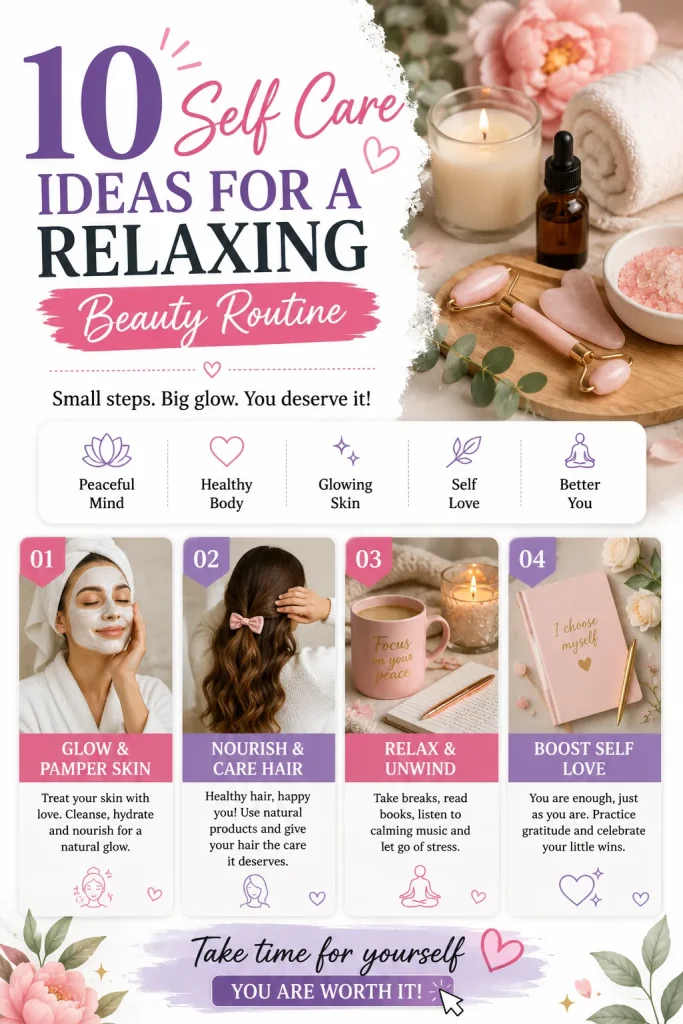
Create a peaceful beauty routine with these self care ideas. Discover relaxing skincare, haircare, wellness, and beauty habits to feel
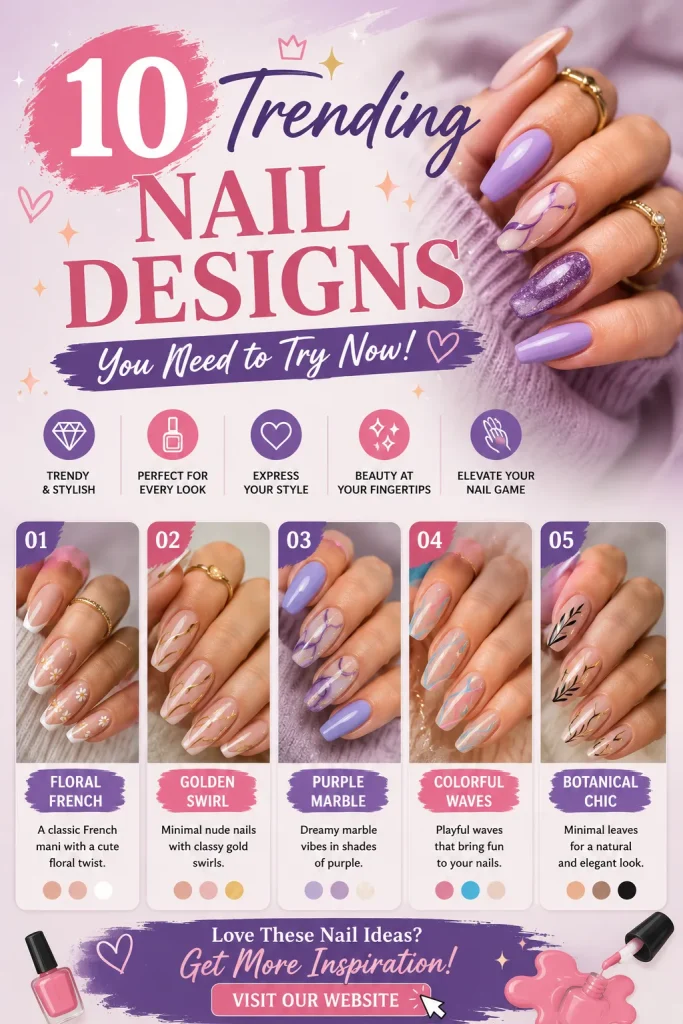
Discover the most beautiful trending nail art ideas that are stylish, creative, and perfect for every occasion. Explore aesthetic, classy,