10 Elegant Hairstyles for Wedding Guests: Easy Glam Looks
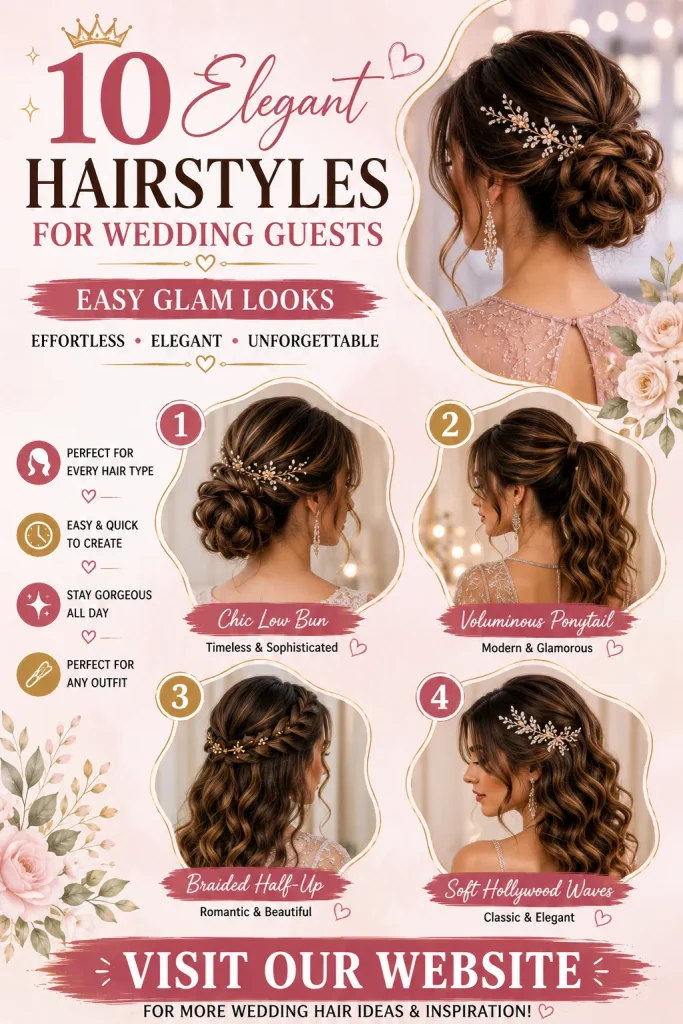
Discover 10 elegant hairstyles for wedding guests that are easy, glamorous, and perfect for every hair type. Find beautiful updos, […]
Discover 10 elegant hairstyles for wedding guests that are easy, glamorous, and perfect for every hair type. Find beautiful updos, […]
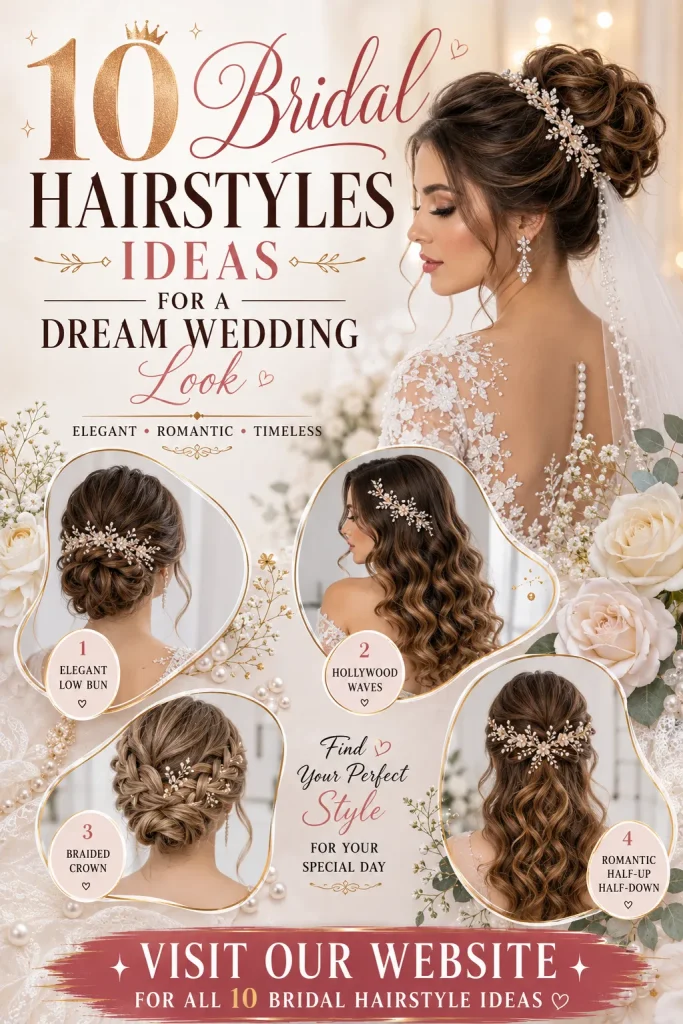
Discover 10 stunning bridal hairstyle ideas for your dream wedding look. Explore elegant buns, romantic curls, braided styles, and modern
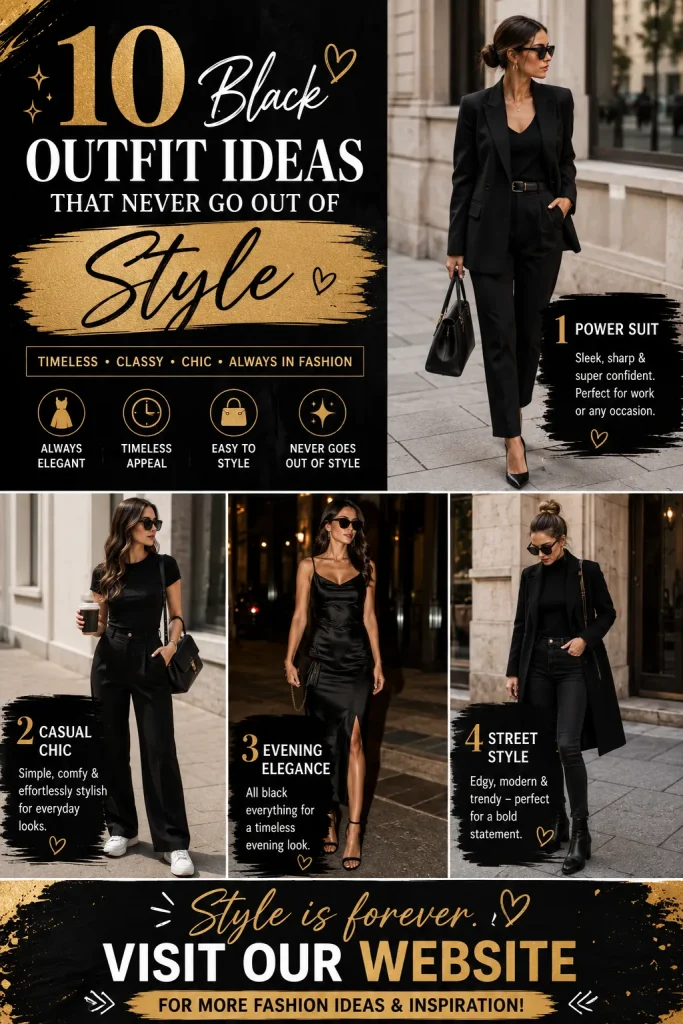
Discover 10 timeless black outfit ideas that never go out of style. From casual chic to elegant evening looks, explore
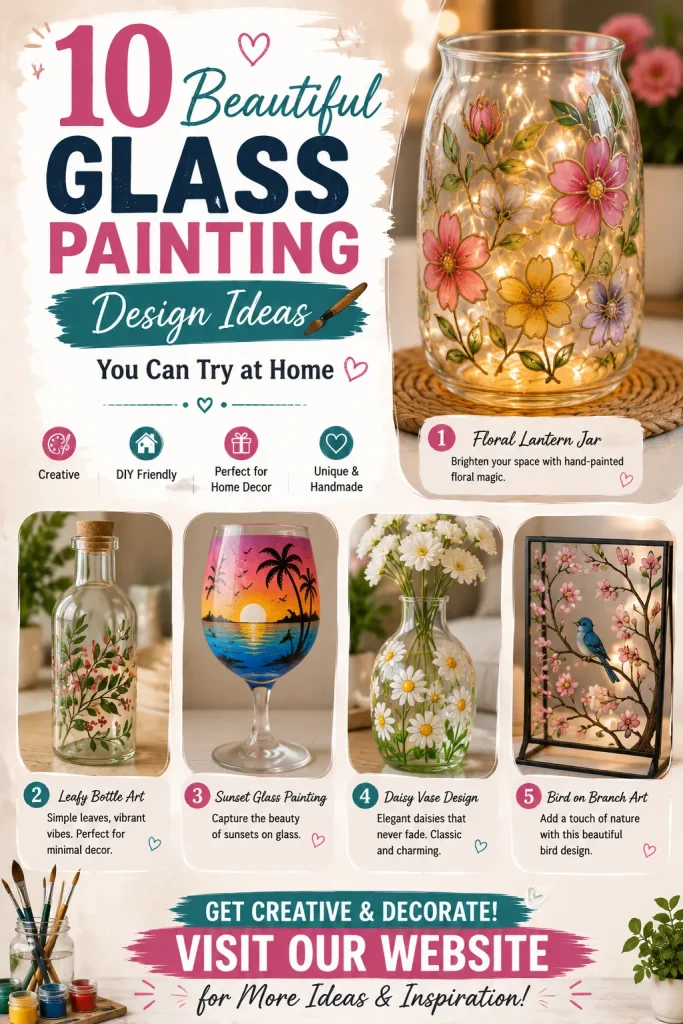
Explore stunning glass painting design ideas that are creative, elegant, and perfect for home decor. Discover beautiful glass art inspirations

Discover creative glue gun craft ideas that are easy, affordable, and perfect for DIY lovers. Explore beautiful handmade projects using
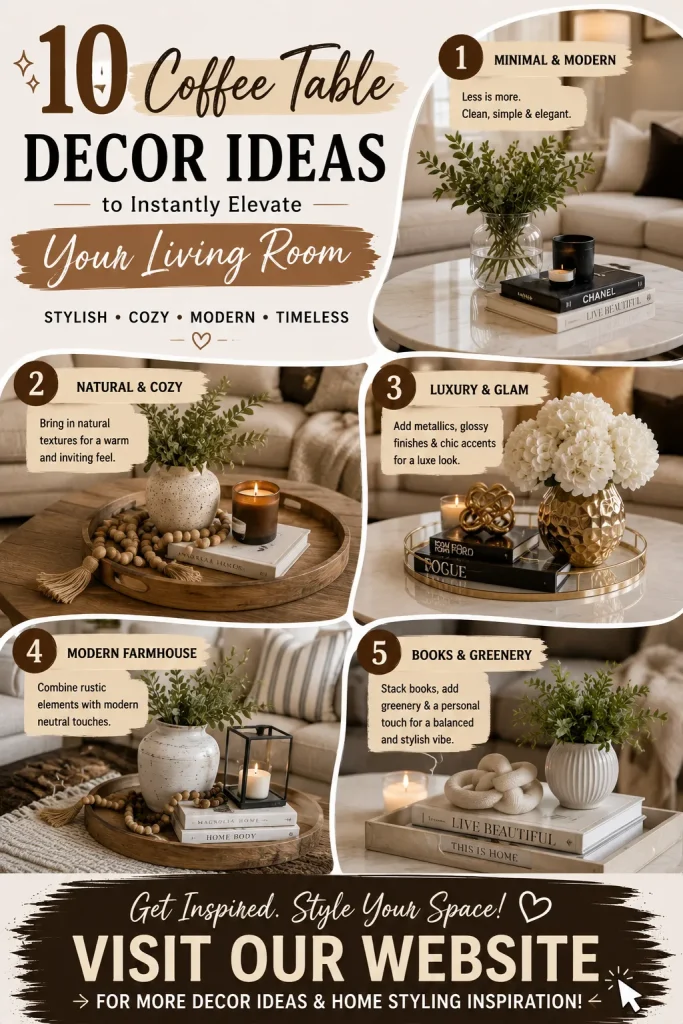
Discover 10 stylish coffee table decor ideas to create a beautiful and inviting living room. Explore modern, minimalist, cozy, and
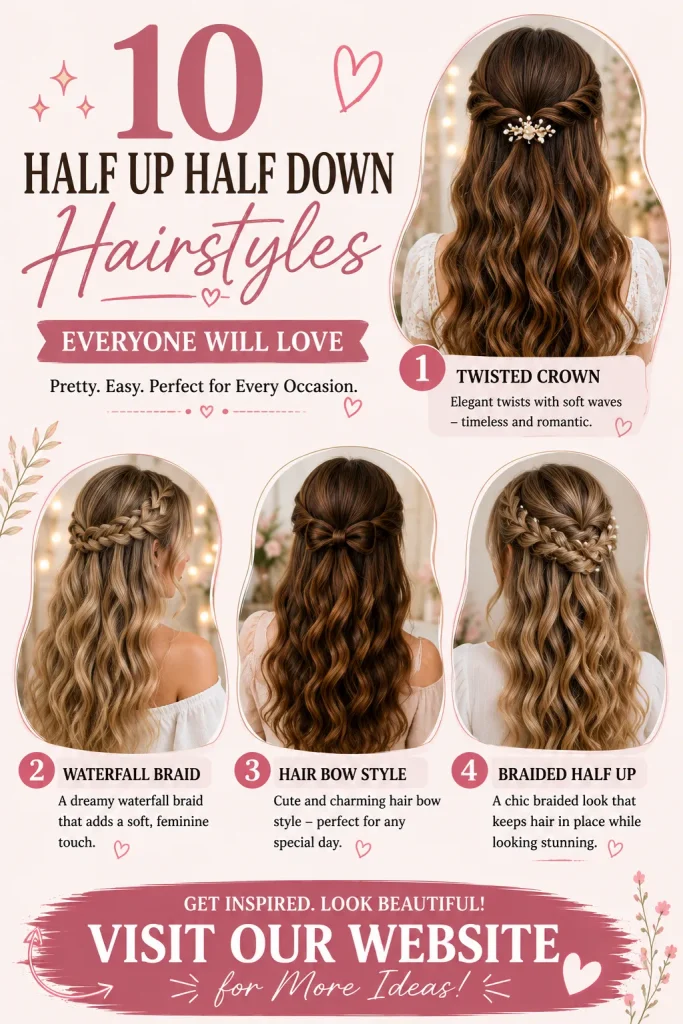
Discover 10 beautiful half up half down hairstyles that are trendy, elegant, and easy to style. Find inspiration for weddings,
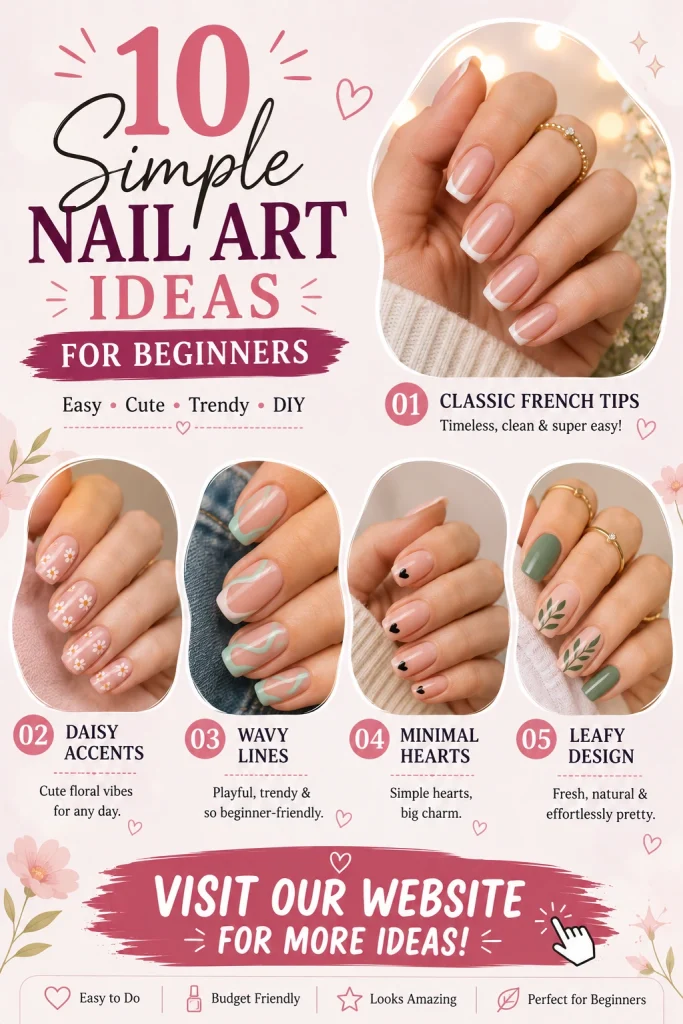
Discover 10 simple nail art ideas for beginners that are easy, trendy, and perfect for DIY manicures. Get inspired with
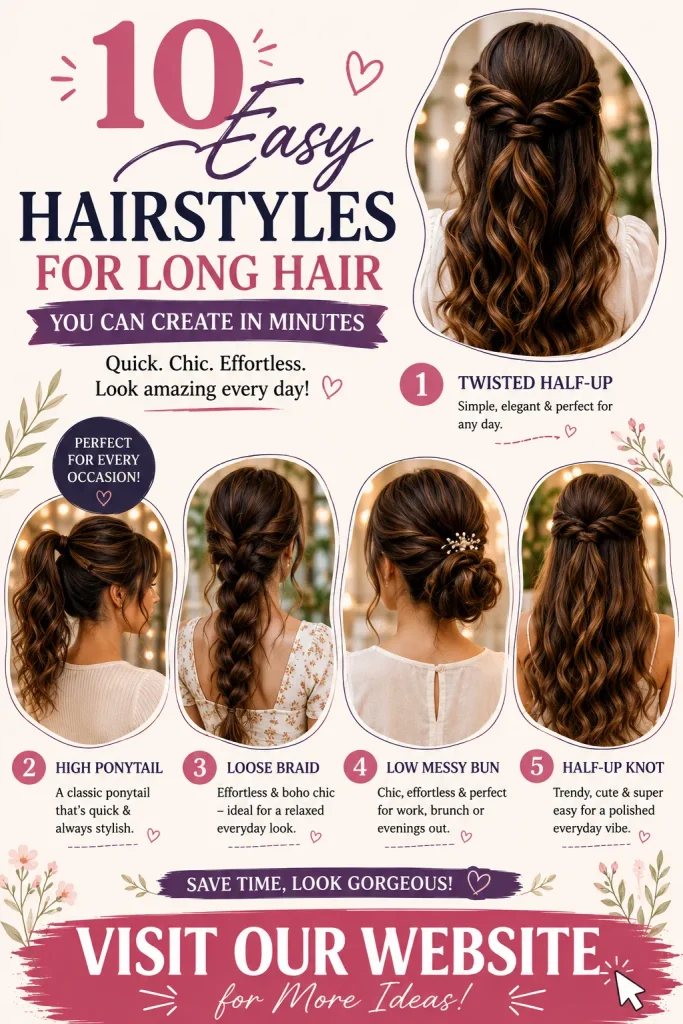
Discover 10 easy hairstyles for long hair that you can create in minutes. From elegant buns and braids to quick
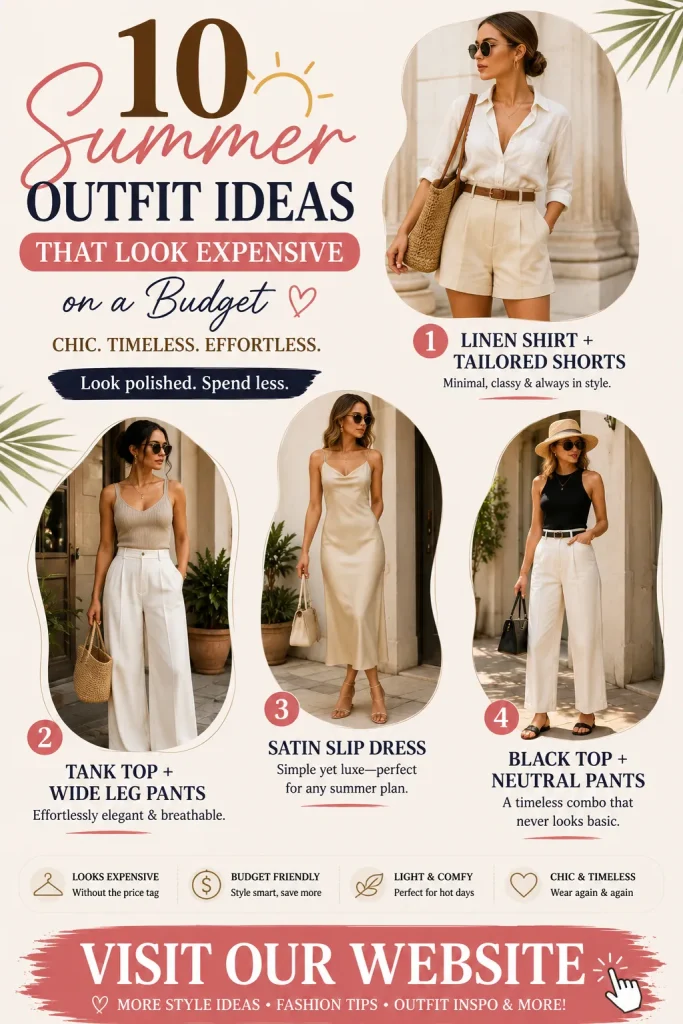
Discover 10 summer outfit ideas that look expensive without breaking the bank. Explore chic, affordable, and timeless fashion inspiration for