Master your next portrait session with 10 creative studio photography poses ideas. Discover flattering angles, lighting tips, and pro modeling hacks.
studio photography poses ideas, portrait photography posing tips, professional studio poses, indoor photoshoot ideas, modeling poses for beginners, fine art studio portraits.
Stepping into a professional portrait studio can be an absolute thrill. The sprawling seamless backdrops, the massive softboxes, the high-end strobe lights, and the crisp click of a high-resolution camera lens—it is an environment custom-built to make you look spectacular. But the second you step directly into the center of that stark white background roll and the flash modeling lamps lock onto you, a sudden wave of panic often sets in.
“What do I do with my hands? Where should I look? How should I stand?” Suddenly, your body feels completely foreign. Your posture stiffens, your shoulders creep up toward your ears, your smile feels forced, and your hands default to awkward, frozen positions. It is a incredibly common problem. Unlike outdoor location photography where you can interact with trees, wind, or architecture, a blank indoor studio offers no natural distractions. Every single micro-movement, angle, and expression is magnified under professional studio lighting setups.
If you are tired of your portrait shoots looking like stiff corporate ID badges or awkward high school yearbook photos, help has arrived.
The secret to conquering an indoor shoot isn’t about being a professional model—it is about understanding how to create lines, use geometric spatial shapes, interact with minimal studio props, and work with directional light fall-off. In this comprehensive guide, we pull back the curtain on 10 highly flattering, easy-to-recreate studio photography poses ideas. These looks will immediately dissolve your camera anxiety, highlight your best features, and elevate your photography portfolio to a professional editorial standard.
The Studio Posing Reference Sheet
Mastering indoor portraiture requires different approaches depending on the clothing style, mood, and available studio furniture. Use this quick-reference guide to select the perfect stance for your session’s specific goals.
| Posing Idea | Primary Modifier / Prop | Difficulty Level | Mood & Aesthetic | Best For |
| The Asymmetric Stool Perch | High Wooden/Metal Stool | Beginner | Casual, Approachable | Clean headshots & lifestyle branding |
| The Classic 45-Degree Twist | None (Standing) | Beginner | Professional, Timeless | Corporate headshots & clean portraits |
| The Editorial Floor Crouch | Seamless Backdrop Floor | Advanced | High-Fashion, Edgy | Streetwear, modeling portfolios, fashion |
| The Minimalist Chair Lean | Sleek Apple Box or Chair Back | Intermediate | Thoughtful, Introspective | Creative professionals, fine-art looks |
| The Dynamic Walking Simulation | None (Motion-Based) | Intermediate | Energetic, Candid | Lifestyle blogging & relaxed fashion |
| The Structured Suit Lapel Hold | Structured Jacket/Blazer | Beginner | Powerful, Commanding | Business executives & high-end branding |
| The Fine-Art Profile Silhouette | Dramatic Rim Lighting | Advanced | Moody, Ethereal | Dramatic portraits, dancers, maternity |
| The Over-the-Shoulder Glance | Solid Color Backdrop Roll | Beginner | Flirtatious, Cinematic | Glamour shoots & casual social media grids |
| The Seated Cross-Legged Fold | Low Apple Box or Floor | Intermediate | Relaxed, Grounded | Creative portraits, artists, knitwear |
| The Hands-on-Face Frame | Macro Lens / Tight Crop | Advanced | Intimate, Expressive | Makeup artistry, jewelry, high-contrast |
10 Creative Studio Photography Poses Ideas to Elevate Your Shoot
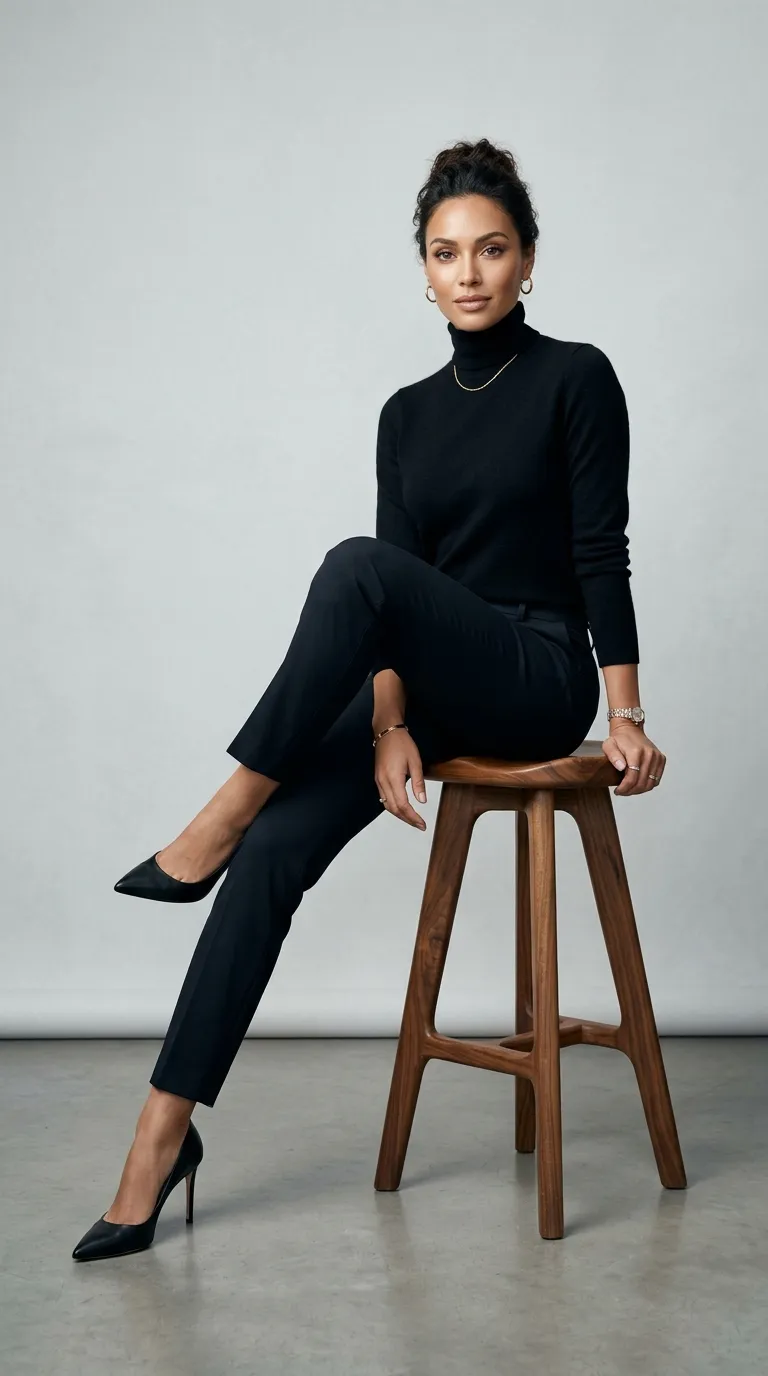
1. The Asymmetric Stool Perch
A high stool is arguably the most valuable prop in a professional studio. Instead of sitting flat and heavy on it, a “perch” involves resting only a portion of your weight on the seat while keeping one leg extended down to anchor your body to the floor, creating an immediate, flattering diagonal line.
- Who It Suits Best: Perfect for beginners, corporate professionals, and anyone who feels uncomfortable standing entirely freeform in front of a blank canvas backdrop.
- Benefits: Instantly improves your natural posture by forcing your spine to straighten, elongates the lower body, and gives you a clear structural anchor to eliminate awkward swaying.
- Posing & Styling Tips: Sit on the very edge of the stool. Extend one leg straight down toward the camera with your toe pointed softly, while bending your other leg at an angle to rest on the stool’s foot rung. Rest your hands loosely on your thighs or slip your thumbs lightly into your pockets. Angle your chest slightly away from the main light source to let soft shadows sculpt your features.
2. The Classic 45-Degree Twist
Standing perfectly square, flat-faced, and chest-forward toward a wide portrait lens can make anyone’s torso look blocky and wide. The 45-degree twist shifts your body line diagonally relative to the camera lens, creating an immediate, universally flattering narrowing effect.
- Who It Suits Best: This is the ultimate foundational pose for corporate executive headshots, LinkedIn profile updates, and standard commercial studio portrait sessions.
- Benefits: Creates a strong, confident, and highly approachable corporate silhouette while naturally narrowing the shoulders and chest for a streamlined appearance.
- Posing & Styling Tips: Position your feet so they are pointing at a 45-degree angle away from the camera lens. Then, twist your upper torso back toward the camera from your waist up. Drop your front shoulder down slightly, tuck your chin down softly, and look directly into the camera barrel. Keep your arms relaxed at your sides or cross them loosely over your chest with your elbows pulled slightly forward.

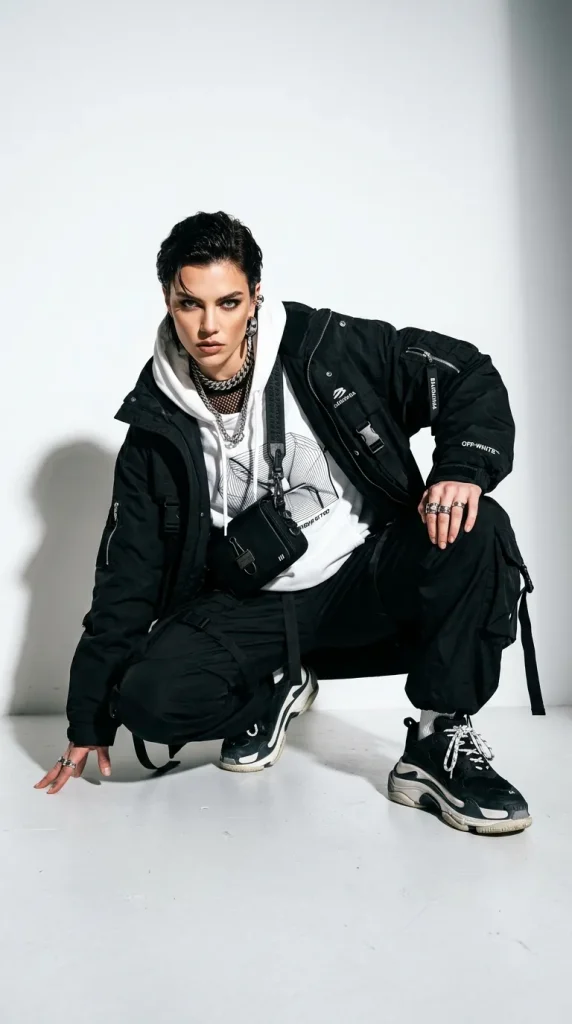
3. The Editorial Floor Crouch
If you are shooting a modern, streetwear-focused, or high-fashion look against a clean paper seamless backdrop roll, dropping down to a low crouch adds an instant layer of urban, edgy, and youth-centric energy to the composition.
- Who It Suits Best: Fitness models, streetwear enthusiasts, dancers, and creative artists looking to build a highly dynamic, contemporary modeling portfolio.
- Benefits: Creates incredible, compact geometric angles with your elbows and knees, breaking up the monotony of standard standing portraits and utilizing the empty space of the backdrop floor.
- Posing & Styling Tips: Lower yourself down into a crouch on the seamless paper floor, balancing on the balls of your feet. Keep one knee pointed directly up toward the ceiling while dropping the other knee lower at an angle. Rest one elbow casually across your high knee, and let your chin rest softly near your fingers. Have your photographer lower their camera tripod down to floor level to shoot upward at you for a powerful, larger-than-life perspective.
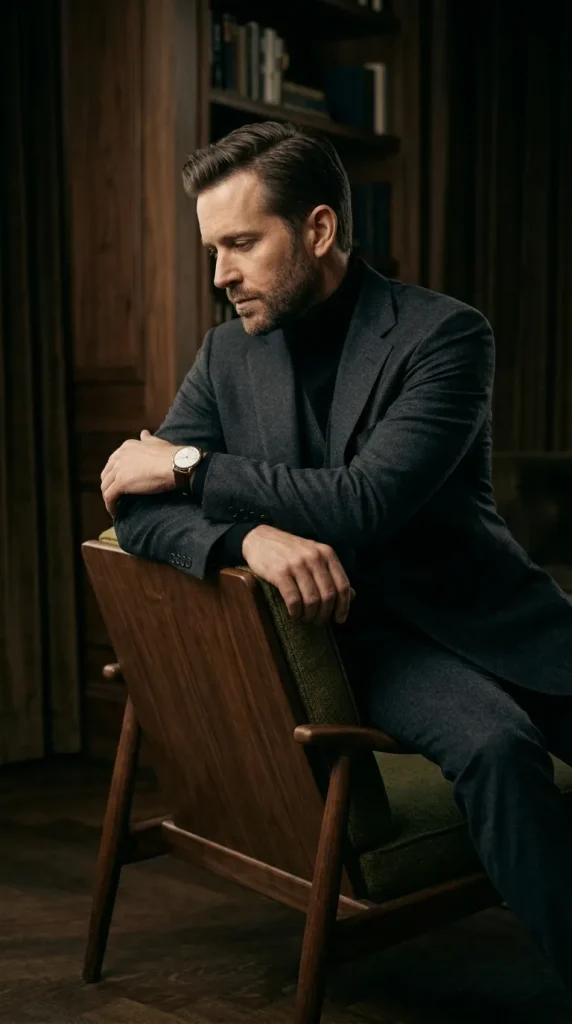
4. The Minimalist Chair Lean
Instead of sitting traditionally inside a studio chair, turning the chair backward or sideways allows you to interact with the backrest as a structural design element. Leaning your torso softly against the frame introduces a wonderful air of relaxed intellect.
- Who It Suits Best: Writers, academics, creative directors, and musicians who want an artistic, introspective portrait that communicates deep personality and intelligence over corporate stiffness.
- Benefits: Provides a comfortable, physical support structure to lean on, which naturally relaxes your neck and shoulder muscles, eliminating a forced or fake smile.
- Posing & Styling Tips: Turn a sleek, armless wooden or metal studio chair sideways. Sit down and lean your upper body casually forward over the backrest or arm support. Rest your forearms flat along the top edge of the chair back, and let your fingers drape naturally. Tilt your head softly to one side, looking slightly past the camera lens rather than staring directly down the barrel for a beautiful, pensive look.
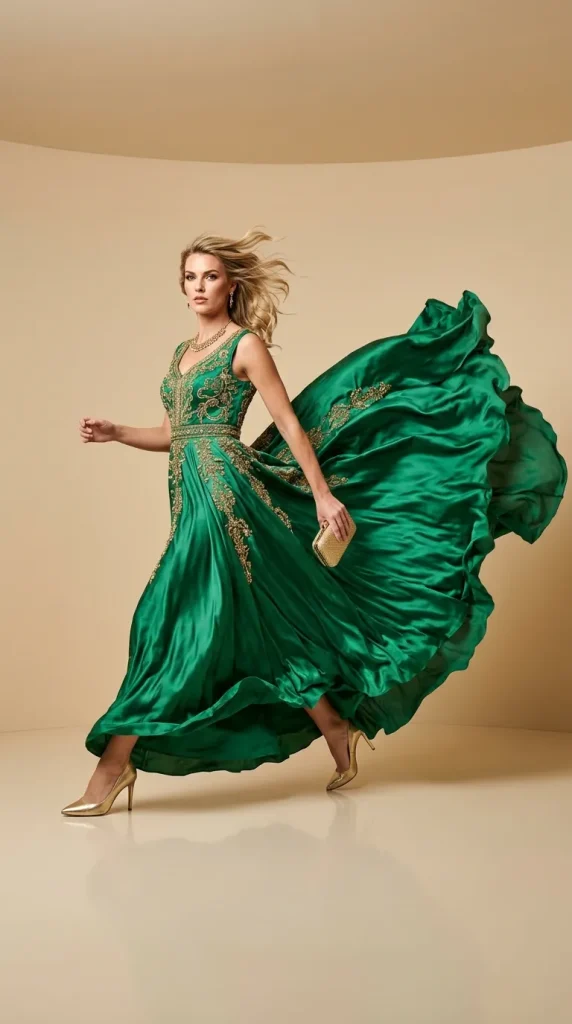
5. The Dynamic Walking Simulation
One of the fastest ways to eliminate stiff muscles in a photo studio is to introduce artificial motion. By simulating a slow, deliberate walk across the cyclorama wall or backdrop paper, the camera captures authentic muscle movement and fluid clothing texture.
- Who It Suits Best: Fashion bloggers, lifestyle creators, and anyone wearing flowing garments like long trench coats, silk dresses, or relaxed-fit linen suits.
- Benefits: Completely eliminates frozen body postures. The simulated motion results in incredibly authentic, candid facial expressions and natural, beautiful hair movement.
- Posing & Styling Tips: Set your main studio strobes to a high shutter speed or use continuous LED softboxes. Take a slow, exaggerated step forward toward the camera or across the frame. Keep your arms moving in a natural rhythm. Swing your head gently toward the lens mid-stride, keeping your jaw relaxed and lips slightly parted. The photographer should shoot continuously to catch the exact moment your foot lifts.
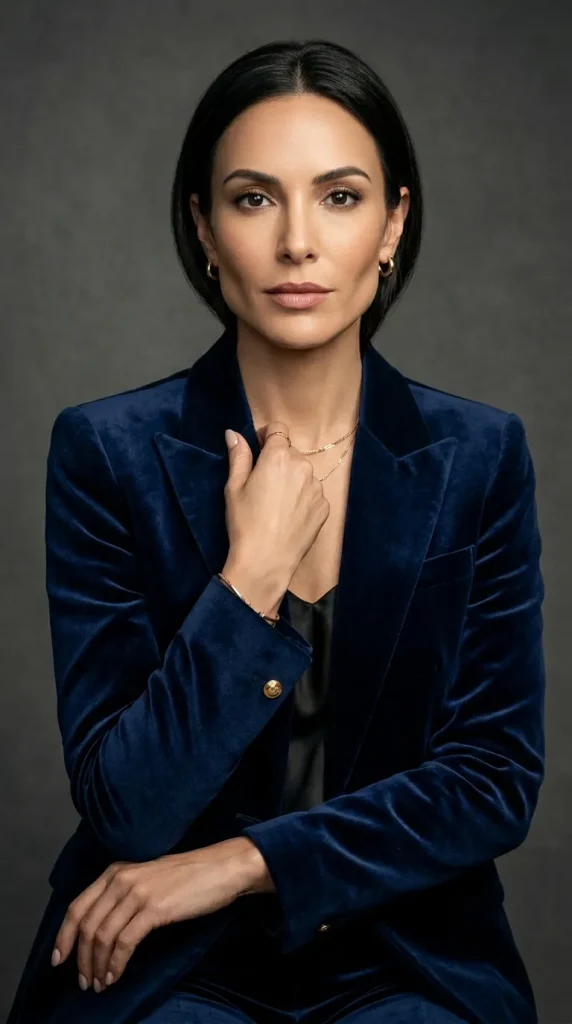
6. The Structured Suit Lapel Hold
If you are wearing structured formalwear, an elegant blazer, or a tailored winter coat, your hands have a natural tendency to look awkward hanging straight down. This classic pose utilizes the physical architecture of your garment to create clean arm triangles.
- Who It Suits Best: High-end business branding sessions, actors looking for dramatic headshots, and anyone wearing heavy, textured tailoring or formal luxury eveningwear.
- Benefits: Instantly clears up hand placement confusion by giving your fingers a purposeful task, while framing your face cleanly between your two arms.
- Posing & Styling Tips: Stand with your weight shifted firmly onto your back leg. Bring one or both hands up to chest level and lightly grasp the lapel or collar of your blazer or jacket. Do not squeeze tightly; keep your fingers light, soft, and slightly separated. Pull your elbows gently inward toward your waistline to maintain a clean, sharp, and commanding silhouette.
7. The Fine-Art Profile Silhouette
Studio photography provides absolute control over the direction of light. By turning your body completely sideways to the lens and turning off all front-facing key lights, you can use a single background rim light to trace the gorgeous outer contours of your silhouette.
- Who It Suits Best: Maternity portraits, professional dancers, athletes, and fine-art conceptual projects where the emphasis is on body structure, shape, and dramatic mood.
- Benefits: Offers a breathtaking, museum-quality minimalist aesthetic that values shadow, mystery, and elegant form over standard facial recognition.
- Posing & Styling Tips: Turn your body entirely profile relative to the camera lens. Place a powerful strobe light with a grid modifier directly behind your body, pointing toward the white backdrop, or place it directly to the side as a sharp rim light. Arch your lower back softly, lift your chin high toward the ceiling to create a clean line along your throat, and extend your arms gracefully downward or softly along your form.

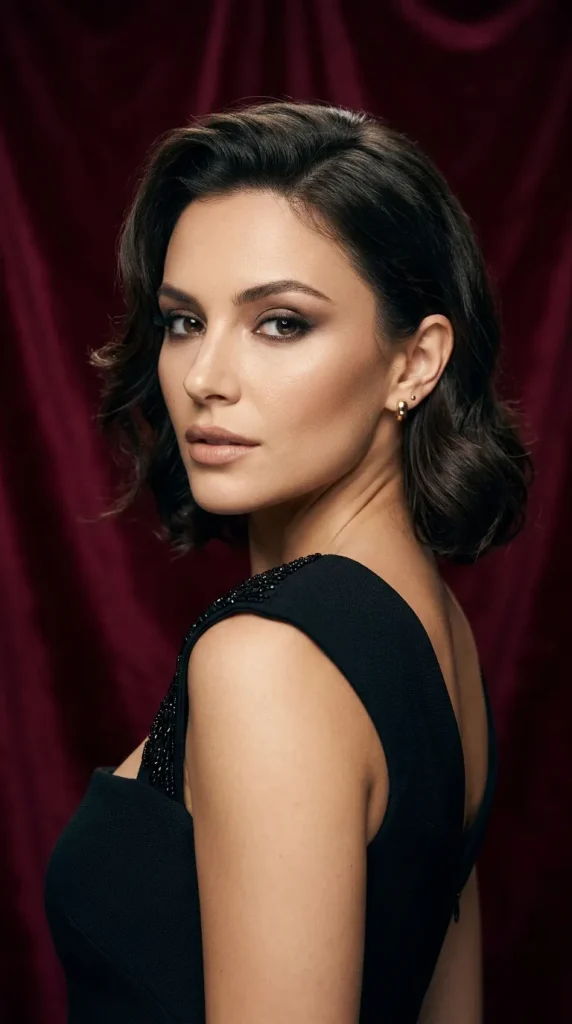
8. The Over-the-Shoulder Glance
This cinematic, highly expressive pose involves turning your back almost completely to the camera lens and looking back over your shoulder toward the photographer. It creates an immediate sense of intrigue, mystery, and connection.
- Who It Suits Best: High-glamour photoshoots, beauty blogging, and actors building an expressive portfolio. It looks phenomenal on individuals with textured hair or outfits with detailed back designs.
- Benefits: Showcases the back construction of designer clothing, naturally accentuates the jawline, and creates a highly dynamic, storytelling composition.
- Posing & Styling Tips: Stand facing straight toward the back wall of the studio. Slowly twist your neck and head back toward the camera lens, keeping your chin lifted high enough to clear the shoulder fabric. Relax your facial muscles and look into the camera with soft, relaxed eyes. Drop your leading shoulder slightly downward to prevent it from blocking your jawline in the final frame.
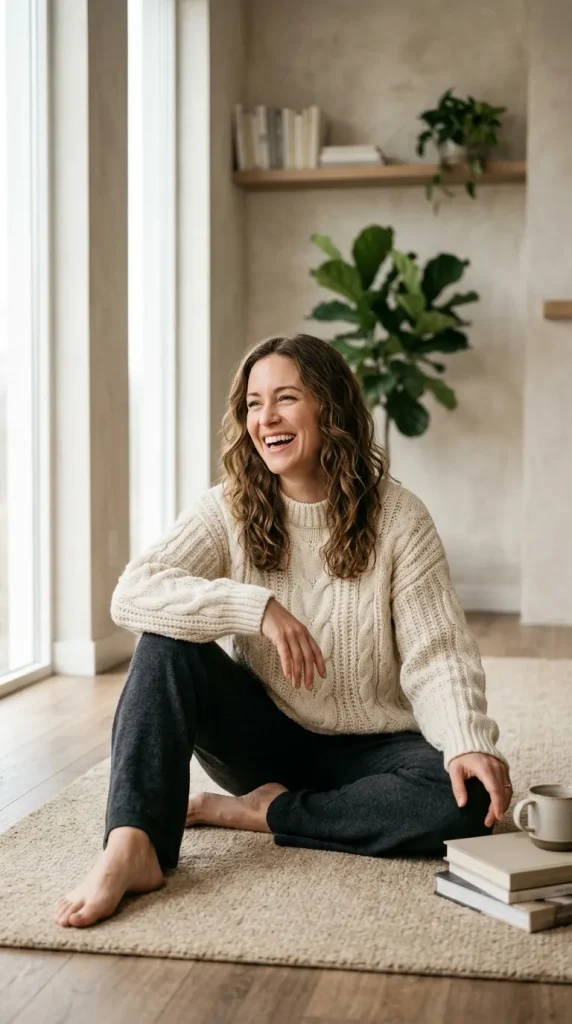
9. The Seated Cross-Legged Fold
Sitting flat on the floor or a low apple box brings a beautiful sense of grounding, intimacy, and approachability to a portrait session. It strips away the formal hierarchy of portraiture, making the viewer feel like they are sitting right across from you.
- Who It Suits Best: Artists, authors, independent designers, and anyone wearing casual, cozy textures like oversized wool knitwear, denim, or relaxed loungewear.
- Benefits: Highly relaxing for the model, completely removes leg length worries, and creates a compact, intimate composition that works wonderfully for square social media cropping.
- Posing & Styling Tips: Sit down comfortably on a clean paper seamless backdrop floor or a low padded cushion. Cross your legs naturally at the ankles. Lean your torso slightly forward toward the lens, resting your wrists or forearms softly on your knees. Keep your fingers loose and fluid. Smile warmly and tilt your head to connect authentically with the camera lens.
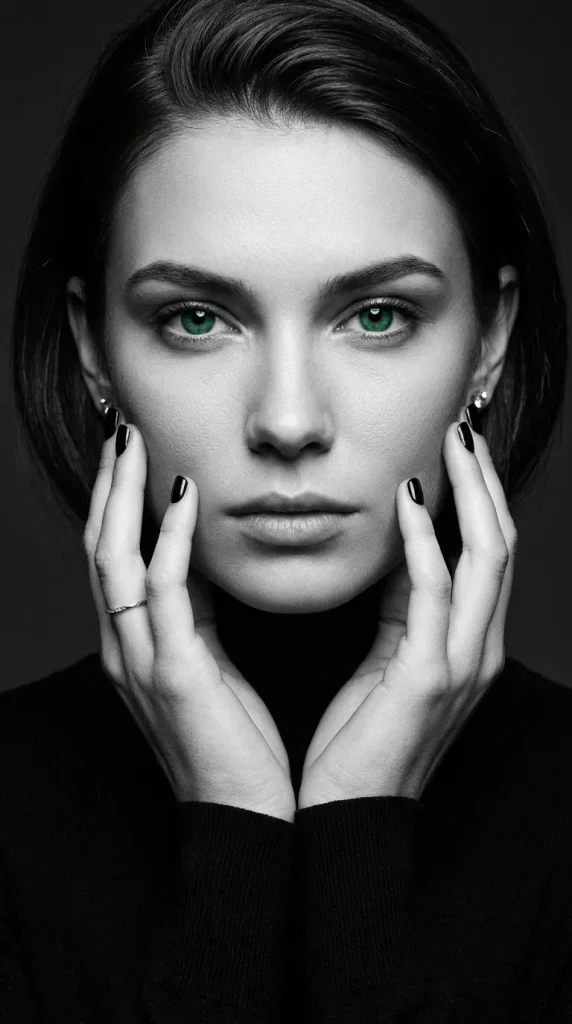
10. The Hands-on-Face Frame
When you want to capture a striking, high-impact close-up portrait that focuses purely on raw human expression, beauty details, or fine jewelry, bringing your hands up to frame your facial features creates a stunning focal point.
- Who It Suits Best: Beauty campaigns, editorial makeup artists, fine jewelry branding, and deep, high-contrast black-and-white art photography.
- Benefits: Draws the viewer’s eye instantly to the eyes and lips, breaks up open facial spaces, and creates intricate, beautiful framing elements using the fingers.
- Posing & Styling Tips: The photographer should pull in close using a macro or telephoto portrait lens. Bring your hands up to your face, resting your fingertips softly along your jawline, temple, or chin. Crucial rule: never apply real physical pressure to your face with your hands, as this will distort your skin; instead, let your fingers gently hover or feather across your skin for a weightless look.
Pro Tips for Studio Posing Success
💡 The Eye-Contact Trick
Staring continuously down the barrel of a studio camera lens while strobe lights flash can quickly cause your eyes to dry out, look tense, or appear completely glassy. To maintain a fresh, vibrant, and alive expression, look down at your feet between frames. When the photographer counts “Three, Two, One,” bring your eyes up to meet the lens instantly. Your expression will look remarkably sharp and engaged.
- Create Space with Your Limbs: Never press your arms tight against your torso or push your thighs flat against a chair seat. When limbs are pressed flat, they spread out against the skin and look significantly wider. Always leave a pocket of air between your upper arms and your ribs to maintain a clean, natural body silhouette.
- Understand the Key Light: Always look toward where your main softbox or beauty dish is positioned. The light should catch your pupils to create beautiful, sparkling “catchlights.” If you turn your face too far into the dark side of the studio, your eyes will lose their life and look hollow.
- The Tongue-on-Roof Hack: To instantly sharpen your jawline and eliminate any trace of a double chin in close-up beauty portraits, press your tongue firmly flat against the roof of your mouth right behind your front teeth just before the shutter clicks.
Common Studio Posing Mistakes to Avoid
- Freezing Like a Statue: A common studio pitfall is finding a good pose and holding it completely still for fifty shots. This results in robotic, lifeless frames. Instead, keep your body in microscopic motion—shift your weight slightly, tilt your head two millimeters, change your eye gaze, or adjust a finger between every single camera click.
- Squeezing Your Fingers Into Fists: When people get nervous under studio lights, their hands naturally clench into tight balls or stiff, wooden paddles. Keep your hands entirely relaxed. Imagine you are holding a delicate, raw egg or a gentle paint brush to ensure your fingers look long, elegant, and soft.
- Hiding Your Neck: Slouching your posture causes your head to sink into your shoulders, shortening your neck and creating awkward wrinkles under your chin. Always imagine a string attached to the crown of your head pulling your skull gently up toward the studio ceiling.
Frequently Asked Questions (FAQs)
What should I do with my hands during a studio photoshoot?
The best way to manage your hands is to give them a natural task. You can slip your thumbs lightly into your pockets, touch a piece of jewelry, adjust your coat lapel, rest them lightly on a high stool rung, or let them frame your jawline weightlessly. Keep your fingers soft, separated, and slightly curved to avoid a stiff appearance.
How do I stop looking stiff in indoor studio portraits?
To combat stiffness, focus on creating diagonal angles and continuous micro-movement rather than standing square to the lens. Utilize studio furniture like stools or chairs to rest your weight naturally, practice the walking simulation method, and remember to look down at your feet between shots to reset your facial expressions.
What colors are best to wear against a studio backdrop?
Against a classic white or light grey backdrop, solid jewel tones (like emerald, sapphire, and ruby), rich earth tones (olive, terracotta, tan), and stark black create beautiful, high-contrast, and timeless separation. Avoid wearing clothing that exactly matches the backdrop color unless you are purposefully aiming for a conceptual, high-fashion monotone blend.
How do I prepare my posture for a professional studio session?
Before stepping onto the backdrop roll, roll your shoulders back and down to release built-in neck tension. Engage your core muscles lightly to support your lower back, shift your weight onto your back leg to create natural hip curvature, and practice extending your chin slightly forward and down to define your jawline.
Wrap-Up: Unleash Your Studio Confidence
Stepping into a professional portrait studio doesn’t have to feel like a high-stress test. Once you understand that great modeling is simply a combination of structural body shapes, purposeful prop interaction, and light coordination, you can step onto any seamless backdrop roll with absolute authority. These studio photography poses ideas are designed to act as your creative framework—mix them together, adapt them to your clothing choices, and watch your indoor portraits transform into editorial artwork.
Which striking pose are you going to test out at your next indoor studio session? Grab a stylish stool, coordinate with your photographer, step directly into the beautiful glow of the softboxes, and capture your absolute best self with radiant pride and confidence!