There is something universally magical about butterflies. Their vibrant colors, delicate wings, and graceful flight have inspired artists for centuries, making them one of the most popular motifs in interior design and seasonal decorating. Bringing that whimsical charm into your home does not require an expensive trip to a home decor boutique.
However, finding high-quality, genuinely beautiful projects can be frustrating. If you have ever scrolled through endless crafting boards only to find confusing instructions, messy templates, or ideas that look too childish for your living room, you are not alone. Many DIY enthusiasts struggle to find paper crafting projects that strike the perfect balance between simple execution and sophisticated, elegant results.
The solution lies in mastering a curated selection of butterfly paper craft ideas. By understanding how to select the right paper weights, utilize precision cutting techniques, and apply smart structural manipulation, you can transform ordinary paper sheets into breathtaking, multi-dimensional artwork. This comprehensive guide walks you through 10 brilliant design concepts, provides professional assembly secrets, and offers troubleshooting advice to ensure your paper crafting journey is a resounding success.
The Foundation of Exquisite Paper Crafting
Before making your very first cut, establishing a strong foundation in material selection and tool mastery will completely elevate the final look of your projects.
Choosing Your Core Crafting Material
Not all paper sheets behave the same way under a blade or when folded. Selecting the correct medium determines whether your butterfly holds its shape gracefully or sags under its own weight:
- Premium Cardstock (65lb to 80lb): The gold standard for structural projects. It provides excellent rigidity for 3D wings and handles score lines perfectly without cracking or fraying.
- Vellum and Tracing Paper: Translucent, frosted papers that mimic the natural, delicate transparency of real insect wings. They look beautiful when layered over heavier solid cardstock.
- Origami Paper (Kami): Ultra-thin, perfectly square paper that is highly pliable and holds sharp, intricate creases beautifully without adding bulk.
- Recycled Materials: Upcycled book pages, old sheet music, and leftover tissue rolls add a beautiful, vintage, and eco-friendly texture to artistic home decor.
The Golden Rule of Precision Cutting
To achieve flawless, professional-looking wing details, crisp cuts are essential:
The Blade Sharpness Rule: When using a utility craft knife or a digital cutting machine, always use a fresh, brand-new blade. A dull blade does not cut cleanly; instead, it drags, tears the delicate paper fibers, and leaves fuzzy, ragged edges on your intricate wing patterns.

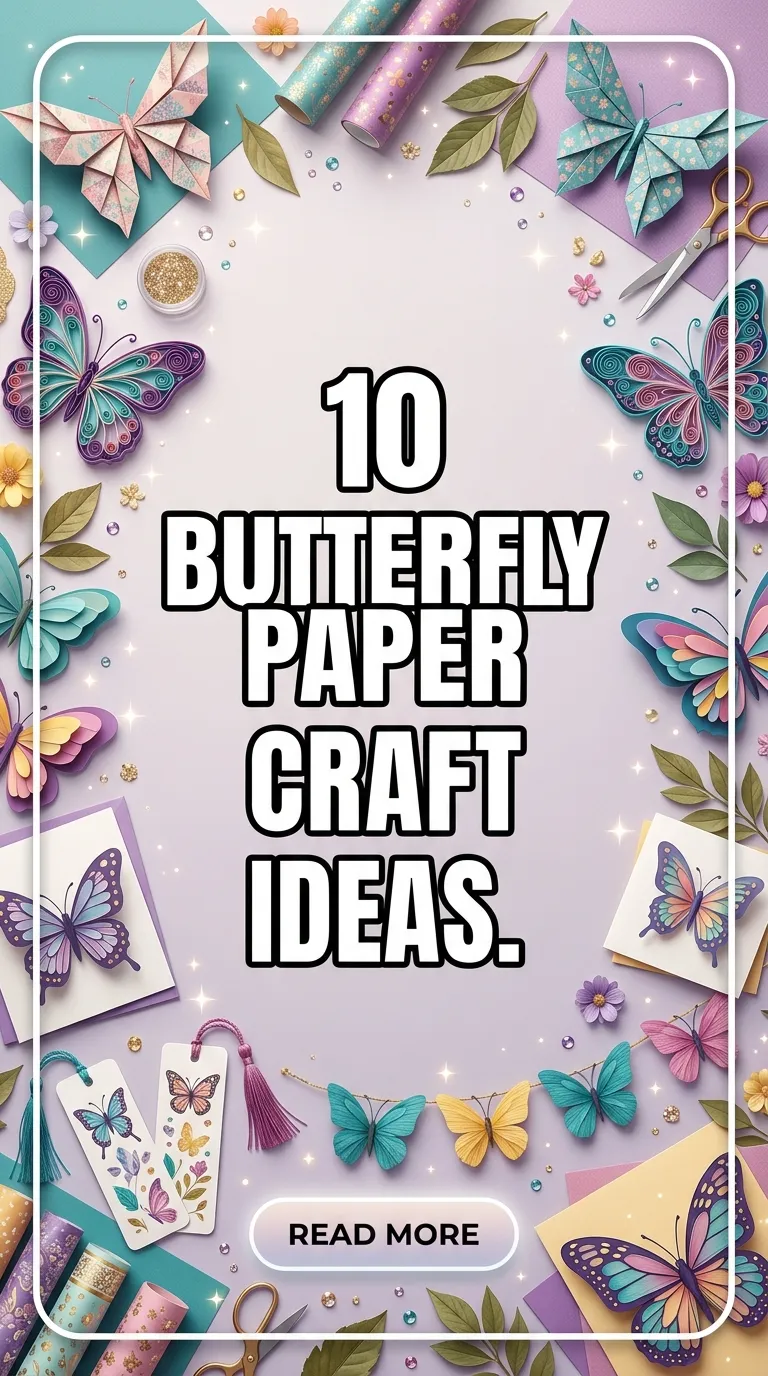
10 Stately Designs in Our Butterfly Paper Craft Ideas Gallery
Let’s explore 10 trendsetting butterfly paper craft ideas dominating the DIY interior design and crafting scenes. Each project breaks down the structural concept, ideal skill level compatibility, assembly tips, and aesthetic benefits.
1. 3D Monarch Layered Cardstock
This classic design uses three distinct layers of graduated cardstock stacked together to create an eye-catching 3D effect. The top layer features intricate, lace-like filigree cuts mimicking monarch wing veins, while the solid lower layers provide a vibrant background contrast.
- Who it suits best: Home decor enthusiasts looking to create elegant wall displays, shadow box art, or premium party backdrops.
- Assembly tips: Use tiny, double-sided foam adhesive squares right in the center body section between the paper layers. This physically separates the sheets and creates a dramatic shadow play when hung.
- Benefits: Highly structured and durable; the layered design provides excellent structural integrity so the wings never droop over time.

2. Traditional Origami Folded Harmony
Rooted in ancient paper-folding arts, this design coaxes a single square of light origami paper into a minimalist, clean-lined butterfly using nothing but precise geometric folds. No glue or scissors are allowed in this classic technique.
- Who it suits best: Mindful crafters who enjoy focused, meditative tasks, geometric symmetry, and clean Japanese-inspired minimalism.
- Assembly tips: Use a bone folder tool to press down on every fold line. Crisp, sharp creases are the secret to preventing the paper from bouncing back and losing its iconic shape.
- Benefits: Completely mess-free since it requires zero adhesives or paints; perfect for quick, relaxing crafting sessions anywhere.

3. Translucent Vellum and Watercolor Wings
A dreamy, ethereal approach that combines soft watercolor washes with frosted vellum paper. The wings are painted with delicate pastel gradients, dried, and then cut out to create a gorgeous, light-filtering aesthetic.
- Who it suits best: Fans of romantic, soft, and feminine design palettes. This style works beautifully as accents on wedding stationery, gift wrap, or delicate nursery mobiles.
- Assembly tips: Watercolor can cause vellum to warp if it gets too wet. Use a highly concentrated watercolor palette and a damp—not dripping—brush, or switch to alcohol inks for instant vibrant drying.
- Benefits: Mimics the true, gossamer nature of real butterfly wings; catches natural sunlight beautifully when placed near windows.

4. Minimalist Book Page Vintage Flight
A timeless design that upcycles old, yellowed book pages or vintage sheet music into simple, classic butterfly silhouettes. The black typography text creates a gorgeous, sophisticated contrast against plain white walls.
- Who it suits best: Lovers of rustic farmhouse decor, vintage book collectors, and eco-conscious crafters who enjoy repurposing old materials.
- Assembly tips: To prevent the delicate, aged paper from tearing, apply a very thin coat of matte Mod Podge to the back of the book page before cutting to reinforce it.
- Benefits: Exceptionally inexpensive to make in large quantities; blends seamlessly into neutral, cozy interior color schemes.

5. Whimsical Accordion Pleated Wings
This playful, high-texture style involves folding bright construction paper back and forth like a paper fan (accordion style). Two separate pleated sections are tied together in the middle with a pipe cleaner to form the upper and lower wings.
- Who it suits best: Parents, elementary school teachers, and young children looking for a fun, sensory-friendly afternoon craft project.
- Assembly tips: Use a vibrant metallic pipe cleaner for the center body, leaving two long ends twisting outward at the top to form playful, bouncy antennae.
- Benefits: Excellent for practicing fine motor skills with children; the deep pleats provide an instant, satisfying three-dimensional texture.

6. Crimson Silhouette Shadow Box Art
A dramatic, high-end display piece where dozens of monochromatic paper butterflies (often deep crimson, emerald, or black) are cut out and pinned inside a deep shadow box frame in a sweeping, spiraling flight pattern.
- Who it suits best: Intermediate crafters looking to make a stunning piece of statement wall art for a living room or dining area.
- Assembly tips: Use fine sewing pins to mount each butterfly inside the shadow box. Push the pins into a foam backing board at varying depths to give the illusion of an active, swirling flock.
- Benefits: Looks incredibly expensive and gallery-worthy; the glass cover keeps the delicate paper shapes completely dust-free for life.

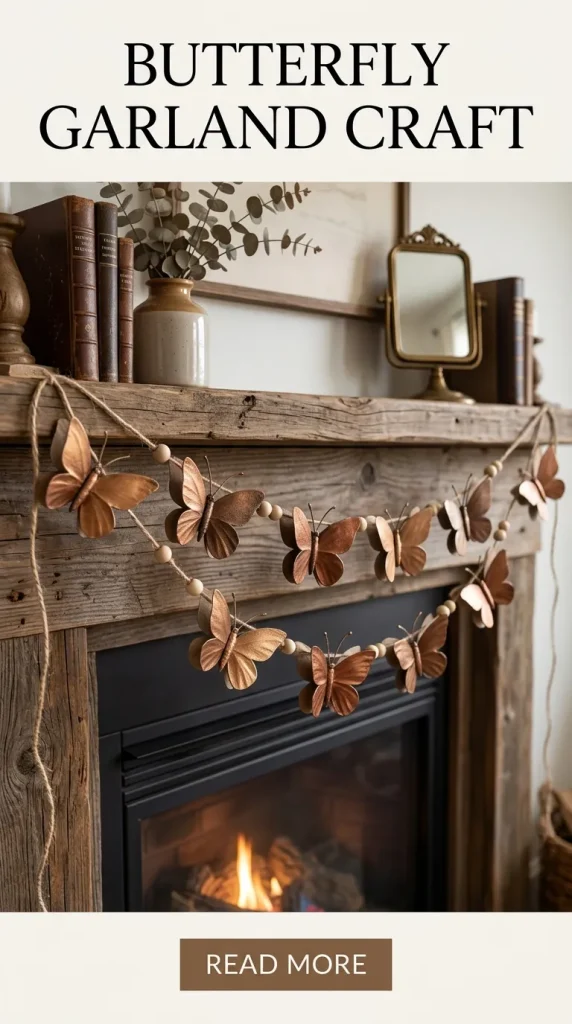
7. Upcycled Tissue Roll Garland
An eco-friendly, family-friendly project that slices cardboard toilet paper rolls or paper towel tubes into rings, shapes them into wing loops, paints them, and strings them along twine to create a rustic, durable holiday or spring garland.
- Who it suits best: Eco-crafters, sustainability advocates, and classrooms looking for low-cost, zero-waste decoration ideas.
- Assembly tips: Use a heavy-duty acrylic paint or metallic spray paint to thoroughly coat the cardboard. This completely hides the utility look of the recycled material.
- Benefits: Unbelievably sturdy and resistant to crushing; a fantastic way to teach children about the beauty of recycling and creative reuse.
8. Geometric Quilled Paper Mosaic
This intricate artisan technique uses thin, coiled strips of colorful paper rolled with a specialized tool, shaped into teardrops, and glued together on edge to form dense, mosaic-like butterfly wing patterns.
- Who it suits best: Patient, detail-oriented crafters and fine artists who enjoy high-precision work and intricate, textile-like patterns.
- Assembly tips: Work directly over a printed paper template inside a clear plastic sheet protector. Apply glue with a fine-tipped needle bottle to keep the delicate paper coils neat and smudge-free.
- Benefits: Offers incredible visual depth and texture; the finished piece functions as a true work of hand-crafted fine art.

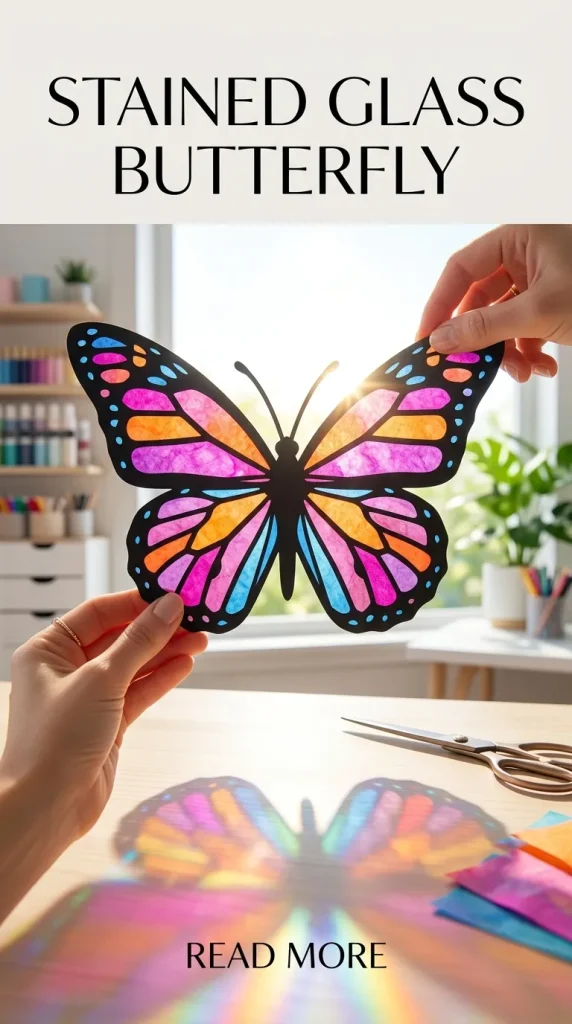
9. Delicate Tissue Paper Stained Glass
A nostalgic, vibrant craft where a black cardstock silhouette frame is filled with small, colorful squares of overlapping tissue paper, creating a beautiful stained-glass window effect when held up to the light.
- Who it suits best: Young families, preschool craft sessions, and anyone wanting to brighten up sunny kitchen windows for the spring and summer seasons.
- Assembly tips: Use a clear self-adhesive laminate sheet or contact paper as your base. Place the black frame down first, then let kids easily drop colorful tissue squares inside the lines.
- Benefits: Creates gorgeous, vibrant color reflections on interior floors when hit by direct sunlight; very easy and forgiving for tiny hands.
10. Shimmering Metallic Foil Mobile
A modern, luxury nursery or office accent featuring butterflies cut from high-shine metallic foil cardstock (gold, silver, or rose gold) suspended from a minimalist wooden hoop using invisible nylon fishing line.
- Who it suits best: Modern trendsetters and decorators who want to introduce kinetic movement and metallic chic accents into a contemporary room.
- Assembly tips: Glue two identical foil butterflies back-to-back with the fishing line sandwiched right in the middle. This ensures that as the mobile spins, a shiny foil surface is always visible.
- Benefits: Adds beautiful kinetic movement; the reflective foil surfaces catch low evening light and bounce dancing glints across the ceiling.

Technical Feature Comparison of Top Butterfly Craft Styles
Selecting your next weekend project depends heavily on your budget, available time, and patience levels. The table below outlines the practical metrics for each unique style:
| Crafting Style | Average Creation Time | Technical Skill Barrier | Durability & Lifespan |
| 3D Layered Cardstock | 30 – 45 Minutes | Medium (Needs precise cutting) | High (Maintains shape well) |
| Origami Folded | 10 – 15 Minutes | Medium (Requires crisp folds) | Medium (Can unfold if crushed) |
| Vellum & Watercolor | 45 – 60 Minutes | Medium (Requires drying time) | Medium (Moisture sensitive) |
| Vintage Book Page | 15 – 20 Minutes | Low (Simple silhouettes) | High (If sealed with varnish) |
| Accordion Pleated | 15 – 20 Minutes | Low (Great for beginners) | Medium (Fun for seasonal use) |
| Shadow Box Art | 2 – 3 Hours | High (Requires layout planning) | Excellent (Protected behind glass) |
| Upcycled Tissue Roll | 30 – 40 Minutes | Low (Family-friendly) | Excellent (Thick cardboard base) |
| Quilled Paper Mosaic | 3 – 5 Hours | Very High (Requires high patience) | High (When mounted flat) |
| Tissue Stained Glass | 20 – 30 Minutes | Low (Very easy for kids) | Medium |
| Metallic Foil Mobile | 60 – 90 Minutes | Medium (Balancing required) | High (Great kinetic life) |
Professional Pro Tips for Assembling Paper Art
- Gently Curl the Wings: Never leave your paper butterflies completely flat. Before gluing them down, hold the paper body and gently slide a round pencil or the edge of a bone folder along the underside of the wings. This coaxes the paper into a graceful, realistic upward curve that instantly mimics an active insect in flight.
- Invest in Low-Water Adhesives: Standard liquid school glue contains a high water content that instantly saturates and wrinkles thin papers. Instead, use a high-tack scrapbooking tape runner, hot glue, or a specialized neutral-pH PVA glue applied sparingly with a small paintbrush.
- Use Scoring for Straight Creases: If you are folding heavy cardstock, never attempt to fold it blindly. Always use a scoring board and a stylus tool to press a neat indentation path into the paper first. This breaks the internal structural tension of the thick paper fibers, allowing you to get a razor-sharp, crack-free fold line every single time.
Critical Paper Crafting Mistakes to Avoid
- Using Too Much Heavy Glue: Applying thick puddles of wet glue to delicate cardstock will cause the paper to buckle, warp, and leave shiny, ugly residue stains around the edges of your clean art piece. Less is always more when working with paper adhesive.
- Ignoring the Paper Grain: Paper fibers naturally run in one uniform direction during factory manufacturing. If you try to fold thick paper against its grain line, the edges will appear ragged and fractured. Always test a small scrap piece first to see which direction folds smoothly.
- Exposing Paper Art to Direct Dampness: Hanging fine paper craft displays inside a high-humidity environment like a small bathroom will quickly soften the paper fibers. Within weeks, your beautifully curved 3D wings will absorb moisture from the air, sag, and flatten out completely. Keep fine paper displays in dry, climate-controlled rooms.
Conclusion & Next Steps
Diving into butterfly paper craft ideas is a wonderful, highly accessible way to infuse your living space with customized color, texture, and movement. Whether you choose the sophisticated, timeless look of a Crimson Shadow Box display, the meditative precision of Traditional Origami, or the sustainable warmth of Upcycled Tissue Rolls, focusing on clean cutting edges and proper wing curling guarantees professional, beautiful results.
Are you ready to bring your walls to life with a stunning, personalized paper display? Download our free, beautifully shaped printable butterfly wing templates below to start your crafting journey today!
Download our Ultimate Butterfly Craft Template Pack now and start creating!
Frequently Asked Questions (FAQs)
What is the best glue for attaching paper butterflies to bedroom walls?
For a temporary or damage-free wall display, use premium removable mounting putty or specialized blue painter’s tape rolled into loops on the back of the paper body. If you want a more secure, semi-permanent attachment for a nursery wall, small dots of clear hot glue hold exceptionally well and can be popped off cleanly later with a steady, firm pull.
Can I use a regular printer to run heavy cardstock for cutting out templates?
Standard home inkjet printers can easily handle light cardstock up to 65lb weight. However, heavy cover stock thicker than 80lb may cause internal paper jams or fail to feed through narrow, curved printer rollers. Always check your specific home printer manual for its maximum paper weight limit before loading thick cardstock.
How do I clean and remove dust from delicate paper butterfly displays?
Never use wet cleaning wipes or liquid sprays, as water will instantly ruin paper surfaces. Instead, use a clean, dry, ultra-soft makeup powder brush or a specialized static feather duster to gently brush away surface dust once a week. Alternatively, you can use a handheld hair dryer set strictly on its lowest, coolest air speed setting from a distance of two feet to blow dust away safely.
Leave a Reply