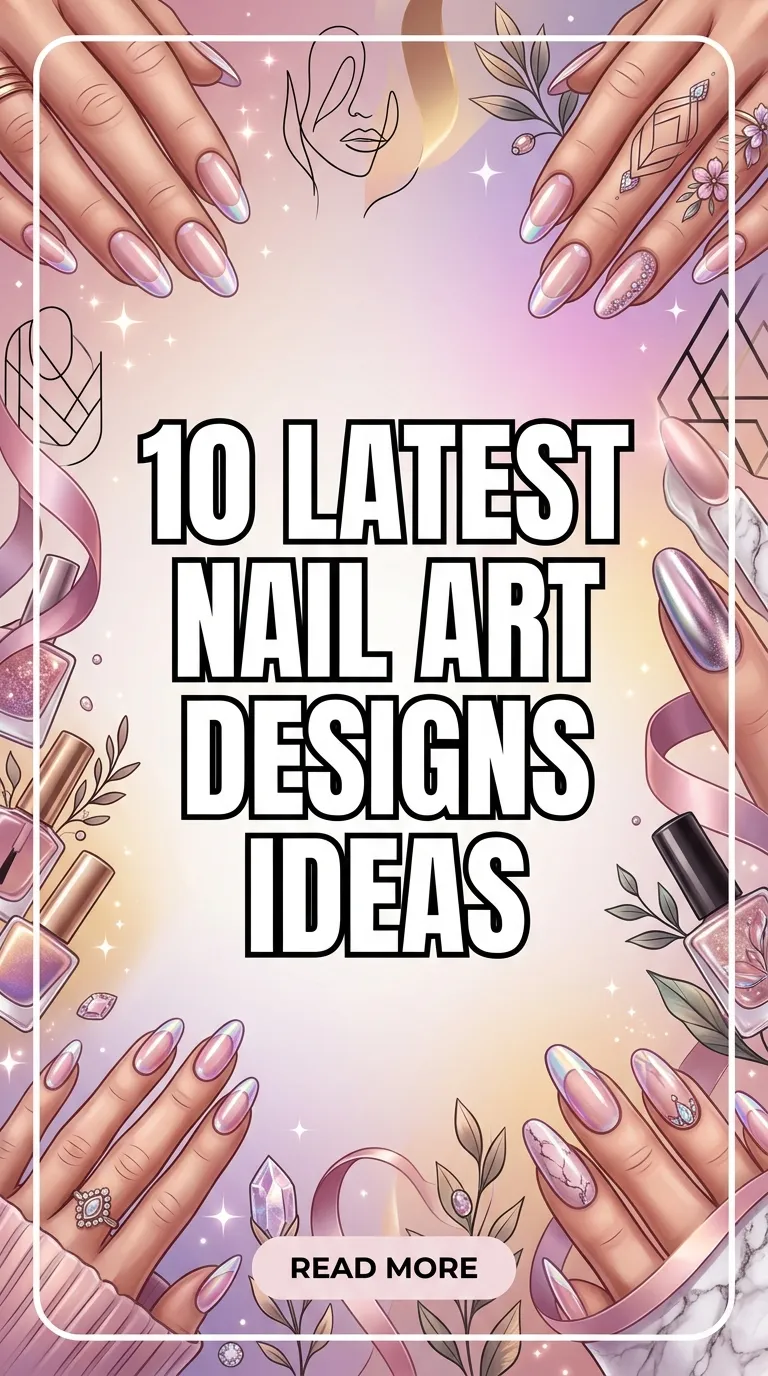
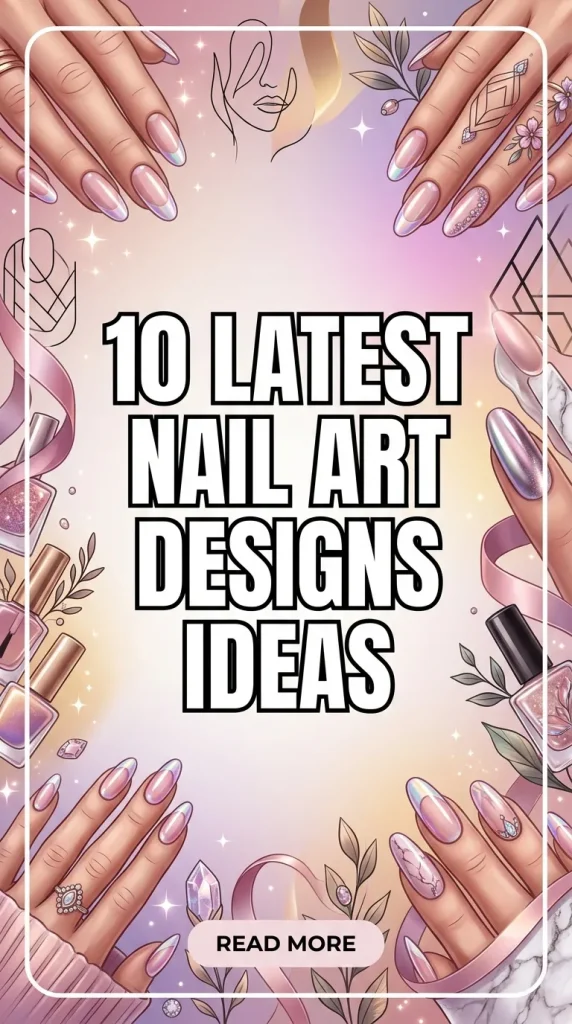
Your hands are an instant reflection of your personal style. A flawless, creative manicure does more than just complete an outfit—it acts as a major confidence booster and a dynamic form of self-expression.
However, keeping up with the rapidly shifting world of manicure trends can be dizzying. If you are tired of scrolling endlessly through social media feeds only to settle for the same basic nude or classic red at every single salon visit, you are not alone. Many nail enthusiasts struggle to find fresh, high-quality inspiration that balances modern runway trends with everyday, wearable durability.
The solution is exploring a curated, expert-approved latest nail art designs gallery. By understanding the best techniques—from structured builder gels to complex chrome finishes—you can transform your fingertips into miniature canvases. This comprehensive guide unveils 10 defining nail art trends of the season, uncovers professional application secrets, and offers troubleshooting advice to ensure your next manicure remains immaculate for weeks.
The Foundation of a Flawless Manicure Gallery
Before diving into complex artistic patterns and colors, achieving a long-lasting look requires proper nail anatomy preparation and healthy structural habits.
Choosing Your Core Nail Enhancement Method
Not all nail art techniques behave the same way on every natural nail plate. Choosing the correct base layer ensures your intricate art doesn’t chip off within 48 hours:
- Structured Builder Gel (BIAB): A thick, reinforcing gel applied over natural nails to add supreme strength and encourage growth. Ideal for long-lasting, hand-painted art.
- Apres Gel-X Extensions: Full-coverage soft-gel extensions applied with a specialized bonding gel. They offer instant, flawless length and a smooth surface perfect for chrome work.
- Traditional Acrylics: A dynamic combination of liquid monomer and powder polymer. Best for dramatic, ultra-long extensions and deep, embedded 3D sculpted elements.
The Golden Rule of Nail Prep
To prevent lift and bubble formation under your gel layers, a clean nail surface is mandatory:
The Dehydration Step: After gently pushing back the cuticles and buffing away surface shine, always use a high-purity isopropyl alcohol or acetone wipe to remove natural skin oils. Skipping this single step is the number one cause of premature gel peeling.
10 Stately Trends in Our Latest Nail Art Designs Gallery
Let’s dive into the 10 trendsetting aesthetic looks dominating high-end nail salons this season. Each breakdown outlines the concept, ideal hand compatibility, application tips, and performance benefits.
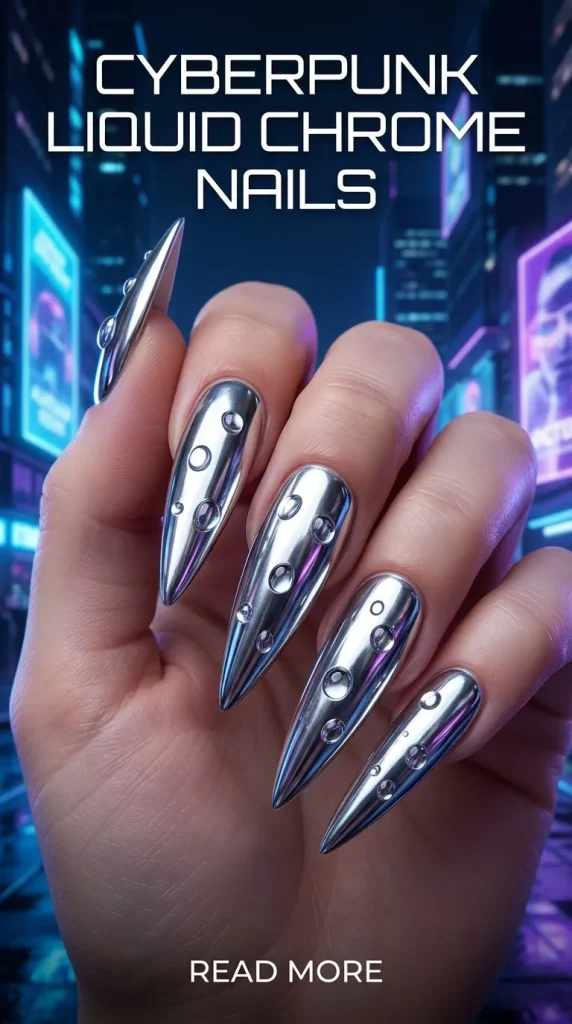
1. Cyberpunk Liquid Chrome
This futuristic style utilizes ultra-fine metallic pigments rubbed over a specialized no-wipe top coat to create a flawless, molten-metal mirror finish. It is often layered over sharp stiletto shapes or accented with raised 3D clear gel ripples that mimic liquid drops.
- Who it suits best: Bold trendsetters, concert-goers, and anyone with a fierce, edgy fashion style who loves catching the light with every movement.
- Application tips: Use a silicone sponge tool to vigorously buff the chrome powder onto a warm, freshly cured top coat. Seal the edges meticulously with a layer of clear base coat before your final top coat to completely prevent edge wear.
- Benefits: Unmatched metallic reflectivity that standard glitter polishes cannot achieve; creates an instant high-fashion statement that requires zero additional jewelry.
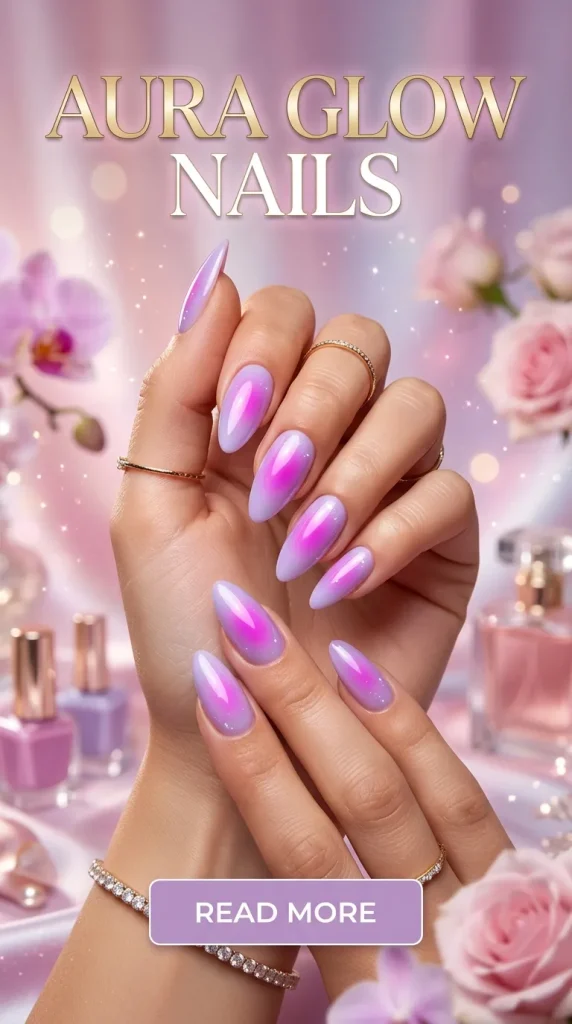
2. Aura Glow Watercolor Mist
Inspired by spiritual energy fields, this look features a soft, blurry gradient focal point in the center of the nail that dissolves beautifully into a contrasting base shade. It mimics the ethereal, airbrushed look of a glowing nebula.
- Who it suits best: Lovers of dreamy, mystical, and feminine aesthetics. It works incredibly well on medium-length almond or oval nail shapes.
- Application tips: If you don’t own a professional airbrush gun, achieve this seamlessly at home by applying a drop of colored gel onto a wet, uncured layer of clear blooming gel, allowing it to naturally expand outward before curing.
- Benefits: Highly customizable with endless color combinations; beautifully hides natural nail growth lines near the cuticle area due to its soft gradient nature.
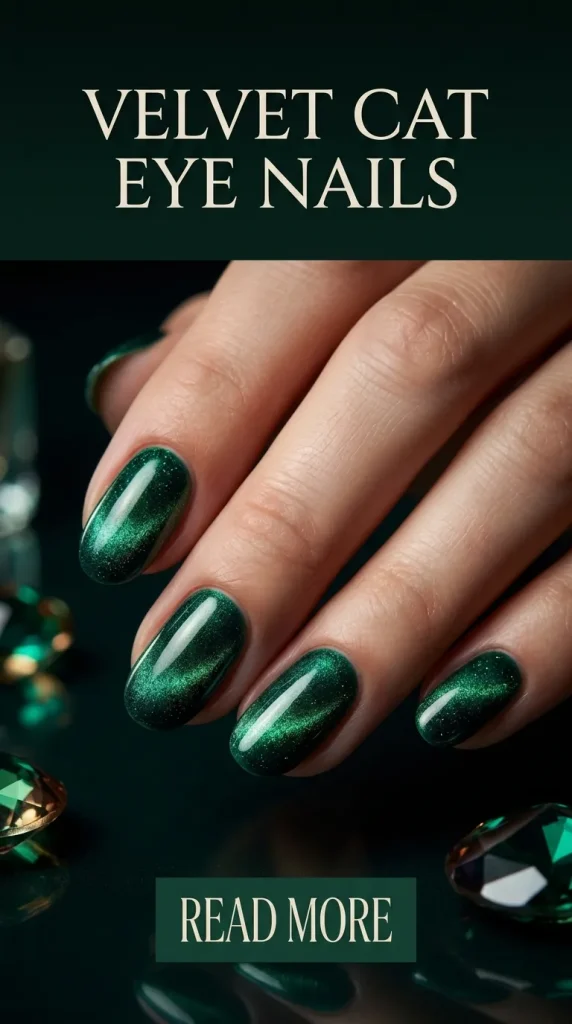
3. Velvet Cat-Eye Illumination
This texture uses heavy magnetic gel polishes containing microscopic iron particles. By waving a high-powered magnet over the wet polish, the metallic flakes align to form deep, multi-dimensional velvet textures that shift in changing light.
- Who it suits best: Anyone looking for a luxury look that is professional enough for the office but contains a mesmerizing, hidden sparkle for evening events.
- Application tips: Hold a dual-ended magnet diagonally about 5 millimeters away from the wet nail for a full 10 seconds. Immediately cure the nail in a UV lamp before the iron particles lose their crisp, velvety alignment.
- Benefits: Incredible depth and movement that shifts dynamically with your hands; looks complex but takes very little time to execute compared to freehand painting.
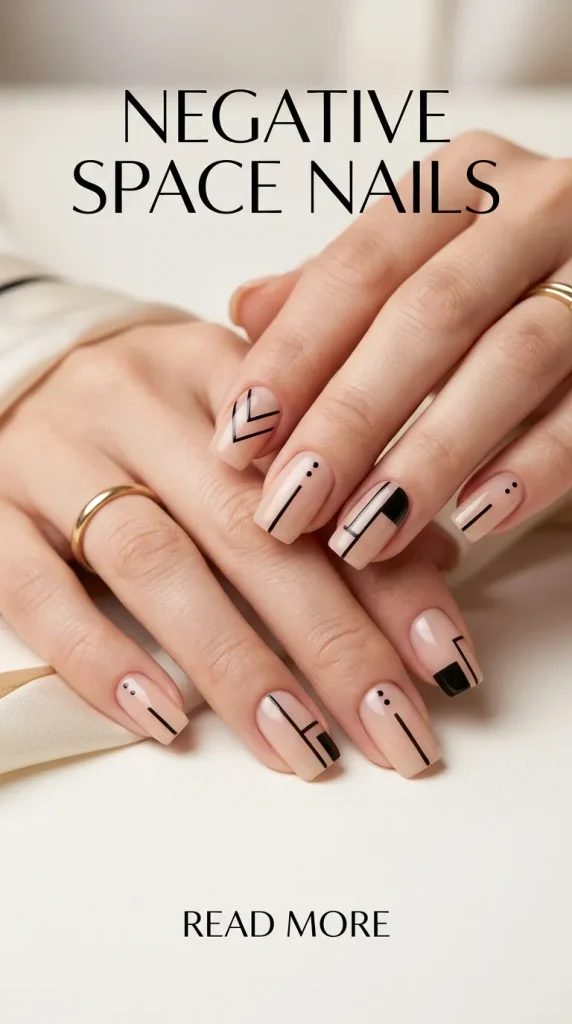
4. Minimalist Negative Space Chic
A sleek approach that integrates sections of your bare, healthy natural nail (or a matching sheer nude base) into the actual geometric artwork. It features clean lines, micro-dots, and abstract sweeps of color.
- Who it suits best: Busy professionals, corporate workers, and minimalists who need a clean, sophisticated look with very low maintenance requirements.
- Application tips: Use a long, ultra-thin striping brush to pull crisp, continuous lines across the nail plate without lifting the brush mid-stroke.
- Benefits: Exceptionally forgiving as your natural nails grow out; minimizes the look of a stark gap near your cuticles, making it wearable for up to four weeks.
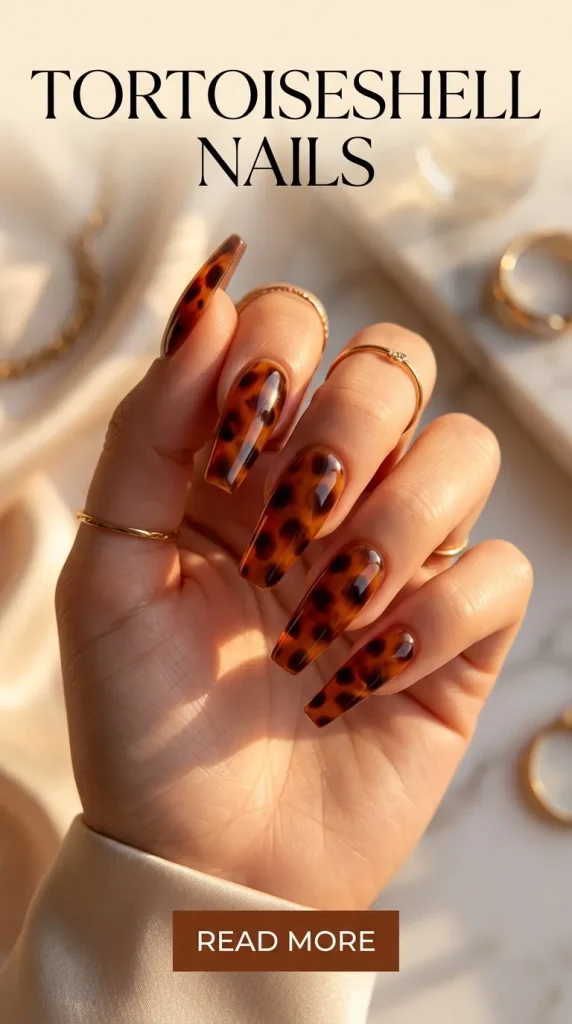
5. Terracotta Tortoiseshell Speckle
A timeless, warm-toned design that layers translucent amber, deep brown, and rich black gel polishes to mimic the organic, mottled depth of genuine tortoiseshell material.
- Who it suits best: Lovers of classic vintage style, autumnal fashion palettes, and rich, cozy clothing textures like wool and leather.
- Application tips: Build the design in thin, alternating layers. Apply a sheer amber base, dot irregular patches of dark brown, flash cure, add another sheer amber layer, and finish with smaller, concentrated black spots to create realistic 3D depth.
- Benefits: Acts as a beautiful neutral that pairs seamlessly with gold jewelry; dark colors mask any everyday stains or discoloration perfectly.
6. Baroque Textured 3D Pearl
A highly romantic design utilizing thick, non-leveling sculpting gels to create raised, touchable elements on the nail surface—such as vintage seashells, elegant frames, or swirling Victorian filigree finished with a pearlescent glaze.
- Who it suits best: Brides-to-be, vintage collectors, and anyone preparing for a formal event who wants their hands to look like classical European museum artwork.
- Application tips: Use a firm-bristled detail brush dipped in alcohol to mold thick 3D builder paste into crisp ridges. Cure completely before rubbing a soft white pearl pigment over the texture.
- Benefits: Adds a distinct tactile dimension; the raised ridges catch low evening light beautifully, making it an incredible conversation starter.

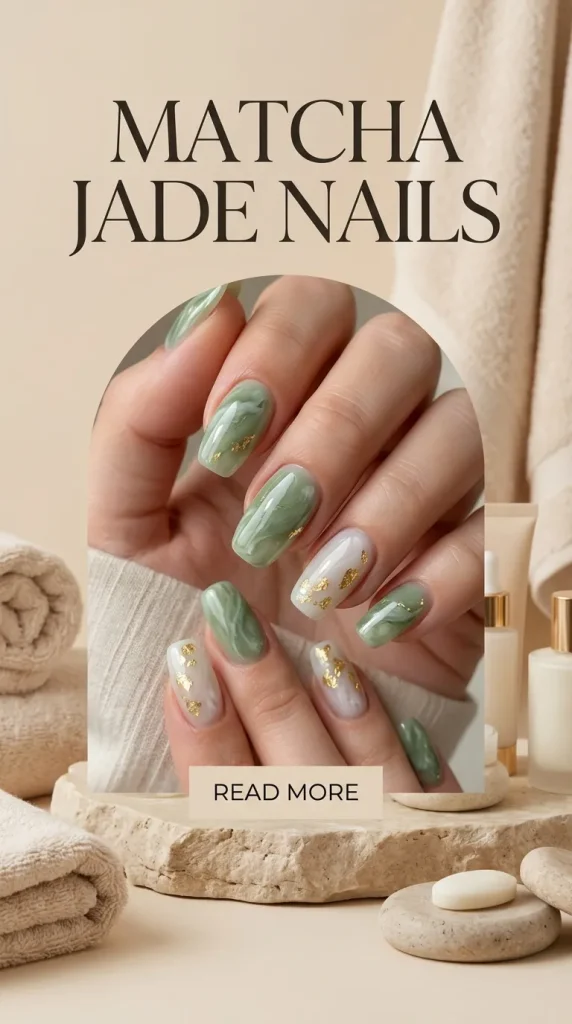
7. Milky Matcha Jade Inlay
This design replicates precious semi-precious jade stones. It blends soft sage greens, milky whites, and hints of metallic gold leaf foil trapped deep beneath a glassy, high-shine top coat.
- Who it suits best: Fans of clean-girl aesthetics, organic color palettes, and lovers of unique stone textures who want something fresh and soothing.
- Application tips: Tap tiny fragments of gold leaf flake directly onto the sticky inhibition layer of a soft green marble base before encapsulating the entire design in a thick layer of self-leveling clear gel.
- Benefits: Provides a calming, elegant look that stands out without relying on bright neon shades or loud glitter; flatters all skin undertones beautifully.
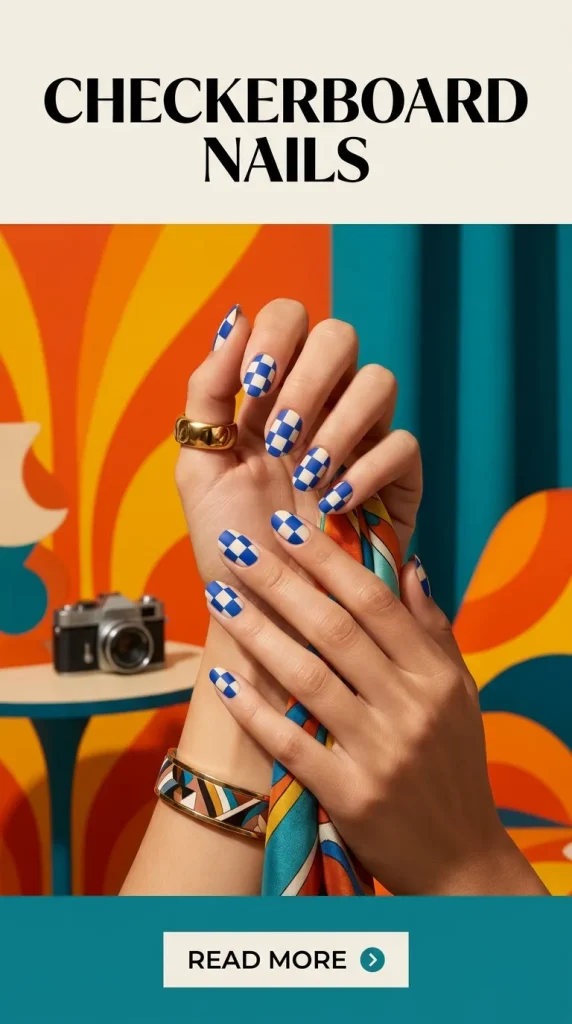
8. Retro Checkerboard Revival
A fun, high-contrast print that pulls inspiration from 1970s pop culture. It features crisp alternating squares of cream and unexpected accent colors like burnt orange, olive, or classic cobalt blue.
- Who it suits best: Creatives, artists, and lovers of quirky streetwear fashion who enjoy making bold, graphic statements with their accessories.
- Application tips: Paint a clean grid using a fine liner brush first. Fill in every alternating square carefully, flash-curing each section for 5 seconds as you go to prevent the contrasting colors from bleeding together.
- Benefits: Instantly injects a youthful, energetic vibe into casual outfits; works beautifully on shorter, square-shaped nail profiles.
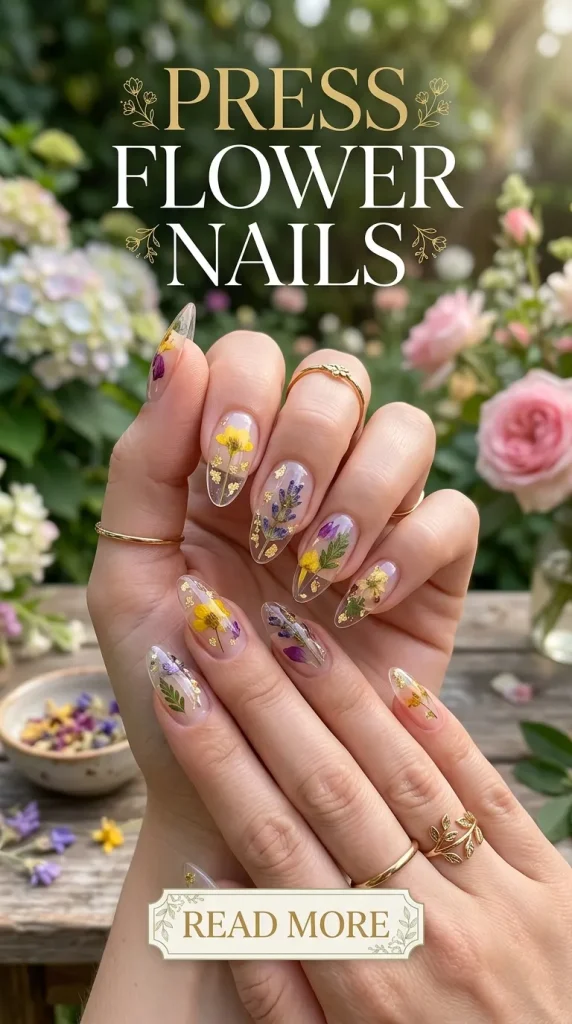
9. Hyper-Realistic Botanical Press
This delicate technique embeds real, microscopic dried wildflowers or highly detailed hand-painted botanical illustrations directly into clear, glass-like nail structures.
- Who it suits best: Nature lovers, spring and summer seasonal styling, and anyone who appreciates ultra-fine, delicate artisan details.
- Application tips: Gently press completely flat dried blossoms into a thin layer of uncured base gel. Use tweezers to smooth down any stubborn stem edges before curing, ensuring no sharp points poke through the final smooth surface.
- Benefits: Every single nail is entirely unique; the look offers a beautiful organic softness that machine-printed stickers cannot replicate.
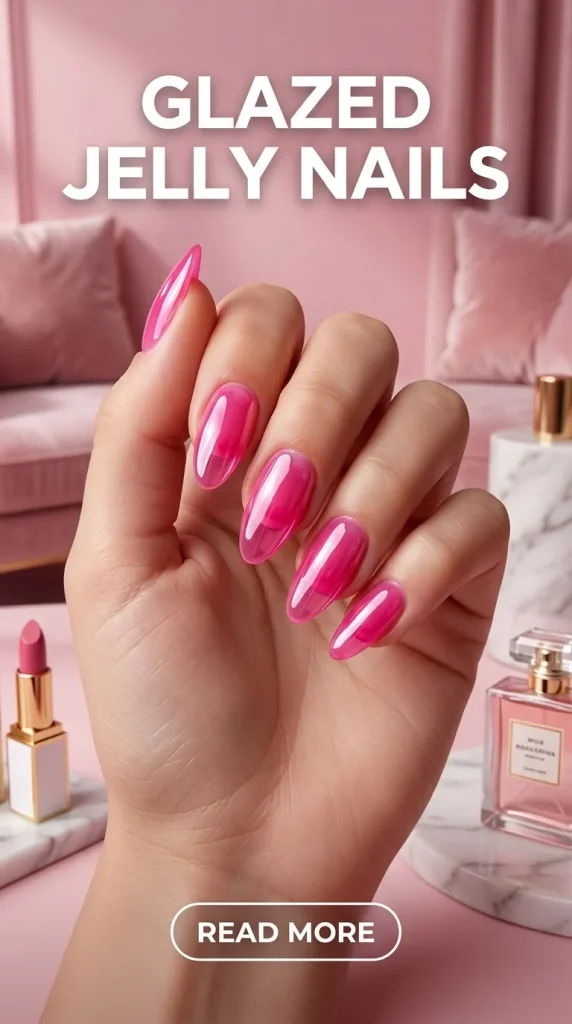
10. Glazed Jelly Candy Tints
A glossy look that uses sheer, candy-colored translucent polishes topped with an ultra-fine translucent shimmer powder. This creates a wet-look finish reminiscent of colorful glass or gummy candies.
- Who it suits best: Fans of playful, youthful, and sweet aesthetics who want a pop of vibrant color that isn’t heavy or opaque.
- Application tips: If your favorite gel color is too opaque, mix three drops of clear top coat with one drop of the colored polish on a palette to create your own custom translucent jelly tint.
- Benefits: Shows off the clean health of the underlying natural nail; the translucent color formulation makes small chips much less noticeable over time.
Technical Feature Comparison of Top Nail Trends
Selecting your next look depends heavily on how much time you want to spend in the salon chair and how active you are with your hands. The table below outlines the practical metrics for each style:
| Nail Art Style | Average Creation Time | Technical Skill Barrier | Expected Maintenance Interval |
| Cyberpunk Chrome | 45 – 60 Minutes | Medium (Needs precise sealing) | 2 – 3 Weeks (Edges can wear) |
| Aura Glow Gradient | 60 – 75 Minutes | Medium (Requires blending skills) | 3 – 4 Weeks (Very forgiving) |
| Velvet Cat-Eye | 30 – 45 Minutes | Low (Magnet does the work) | 3 – 4 Weeks |
| Minimal Space Chic | 45 – 60 Minutes | High (Requires steady line work) | 4+ Weeks (Excellent growth camouflage) |
| Terracotta Tortoise | 75 – 90 Minutes | High (Requires layer blending) | 3 – 4 Weeks |
| Baroque 3D Pearl | 90 – 120 Minutes | Very High (Sculpting expertise) | 2 – 3 Weeks (Textures can catch) |
| Milky Matcha Jade | 60 – 75 Minutes | Medium (Marble technique) | 3 – 4 Weeks |
| Retro Checkerboard | 75 – 90 Minutes | High (Symmetry dependent) | 3 Weeks |
| Botanical Press | 60 – 90 Minutes | Medium (Delicate placement) | 3 Weeks |
| Glazed Jelly Tints | 30 – 45 Minutes | Low (Simple layering) | 3 – 4 Weeks |
Pro Tips for Maintaining Salon-Quality Art at Home
- Apply Cuticle Oil Daily: Gel polish and acrylics require flexibility to resist snapping under impact. Applying a high-quality jojoba-based cuticle oil twice a day keeps the surrounding skin soft and prevents the underlying natural nail from drying out and curling away from the product.
- Wear Utility Gloves for Chores: Heavy household detergents, dish soap, and cleaning chemicals are solvents that slowly break down the chemical bonds of your shiny top coat. Always wear lined rubber gloves when washing dishes or cleaning surfaces.
- Never Use Your Nails as Tools: Your enhancements are jewels, not tools. Using your nail tips to pry open aluminum soda cans, scrape off labels, or open boxes puts immense stress on the stress area, leading to cracks and lifting.
Common Manicure Mistakes to Completely Avoid
- Peeling Off Your Polish: When a gel nail begins to lift at the edge, it is tempting to peel it completely off. Resist this urge at all costs. Peeling pulls away the delicate microscopic top layers of your natural keratin nail plate, leaving your natural nails thin, weak, and painful. Always soak off gel safely using pure acetone.
- Over-Filing the Lateral Sidewalls: When shaping square or coffin nails, filing too deeply into the side growth channels structurally weakens the nail. This creates a built-in stress point that causes the extensions to snap horizontally under minimal pressure.
- Flooding the Cuticle Area: Allowing wet polish to pool into the soft skin of the cuticle wall creates an instant bridge. As the natural skin sheds oils, air crawls under this bridge, causing the entire gel structure to lift away from the base within days.
Conclusion & Next Steps
Finding your signature look within a modern latest nail art designs gallery is all about matching artistic concepts with your lifestyle needs. Whether you choose the low-maintenance elegance of Minimalist Negative Space, the magnetic depth of Velvet Cat-Eye, or the bold statement of Cyberpunk Chrome, prioritizing proper nail health and edge protection keeps your hands looking pristine for weeks.
Are you excited to try these stunning trends on your next salon trip or DIY home session? Download our free, printable nail shape and color pairing mood board below to effortlessly plan your next look!
Download our Ultimate Manicure Style Selection Guide today and step up your style!
Frequently Asked Questions (FAQs)
Why does my chrome nail art always rub off at the free edge?
Chrome powder requires an ultra-smooth, non-porous top coat to stick correctly, which means it has no natural chemical bond to the nail. To stop it from rubbing off, use a fine-grit buffer to gently shave the chrome dust off the very tip edge of the nail, then apply a thin layer of clear acid-free primer or base coat over the chrome before sealing the entire nail with a final top coat. This locks the pigment safely inside a gel sandwich.
Can I achieve professional 3D nail art designs using regular air-dry polish?
True 3D textured elements require structural stability and fast setting times that only UV/LED curable gels or professional acrylic pastes can offer. Regular air-dry nail polish shrinks up to 50% as its solvents evaporate, which flattens out any raised ridges or textured swirls you try to build.
Leave a Reply