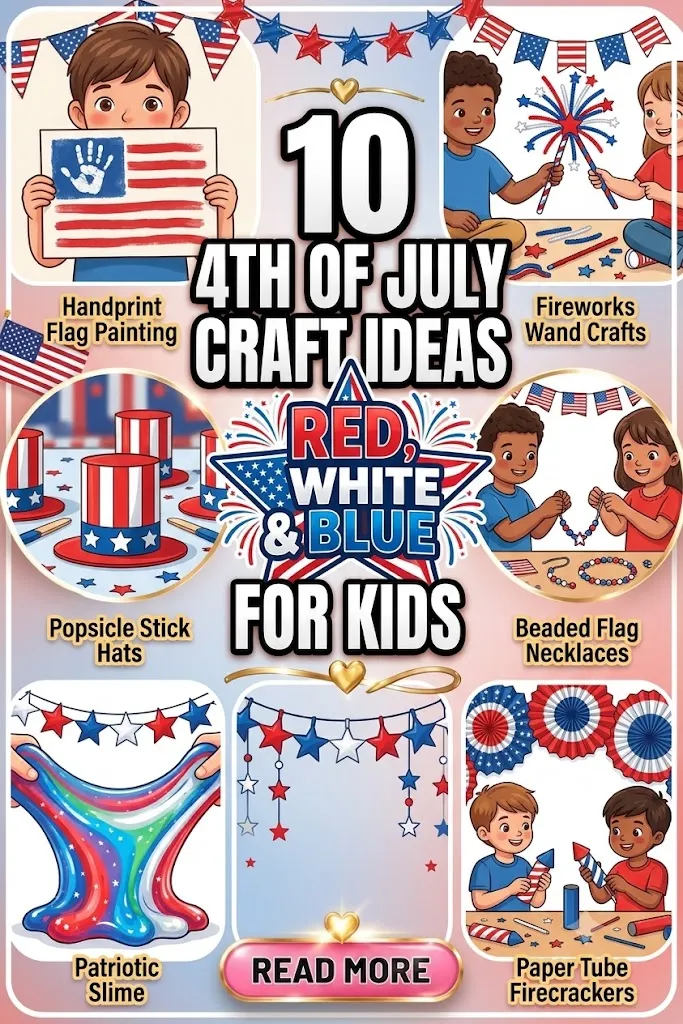
Keep your little ones entertained with these 10 fun, easy, and mess-free 4th of July craft ideas for kids. Perfect for toddlers, preschoolers, and older children!
4th of july craft ideas for kids, patriotic crafts for toddlers, easy independence day activities, red white and blue art projects, summer crafts for kids, DIY July 4th decorations.
Red, White, and Creative: 10 Fun and Easy 4th of July Craft Ideas for Kids
Picture this: It is mid-afternoon on Independence Day. The barbecue is warming up, the evening fireworks are hours away, and the summer heat is hitting its peak. Suddenly, you hear those dreaded words that every parent fears during summer vacation: “I’m bored!”
Keeping children entertained while you are prepping for holiday guests or waiting for local parades can feel like an impossible task. You want away-from-the-screen activities that capture the patriotic magic of the holiday, but you also want to avoid complicated projects that require expensive store trips, end in massive paint spills, or demand hours of intense adult supervision.
The secret to a stress-free holiday is having a strategic lineup of simple, highly engaging activities ready to go. By utilizing everyday household staples like paper plates, plastic forks, coffee filters, and construction paper, you can turn holiday downtime into a memorable family tradition.
Whether you are looking for quick projects to keep toddlers busy or more intricate designs to challenge older kids, we have curated the ultimate collection of 4th of July craft ideas for kids. These projects blend patriotic history with hands-on fun, ensuring your home is filled with pride and creativity all day long.
The Ultimate Holiday Craft Planning Sheet
Not all kid-friendly art projects are built the same. Some require a bit of patience for drying, while others offer instant gratification. Use this reference guide to match the right project with your child’s age group and your personal mess threshold.
| Craft Idea | Average Project Time | Difficulty Level | Mess Factor | Best Age Group |
| The Festive Ribbon Wand | 5 minutes | Toddler Friendly | Ultra-Low | 2 to 5 years |
| The Painted Fork Firework | 10 minutes | Beginner | Medium | 3 to 8 years |
| Tie-Dye Coffee Filter Star | 15 minutes | Beginner | Low-Medium | 4 to 10 years |
| The Uncle Sam Paper Plate | 12 minutes | Intermediate | Low | 4 to 7 years |
| The Patriotic Windsock | 8 minutes | Beginner | Low | 3 to 6 years |
| Popsicle Stick Flag Plaque | 15 minutes | Intermediate | Medium | 5 to 12 years |
| Glittering Firework Sensory Bottle | 10 minutes | Beginner | Low | 1 to 4 years (sensory) |
| The Handprint Eagle Canvas | 10 minutes | Beginner | Medium-High | All ages (Keepsake) |
| Beaded Star Sun Catchers | 20 minutes | Advanced | Low | 6 to 12 years |
| The Patriotic Mason Jar Lantern | 15 minutes | Intermediate | Medium | 5 to 10 years |
10 Festive 4th of July Craft Ideas for Kids
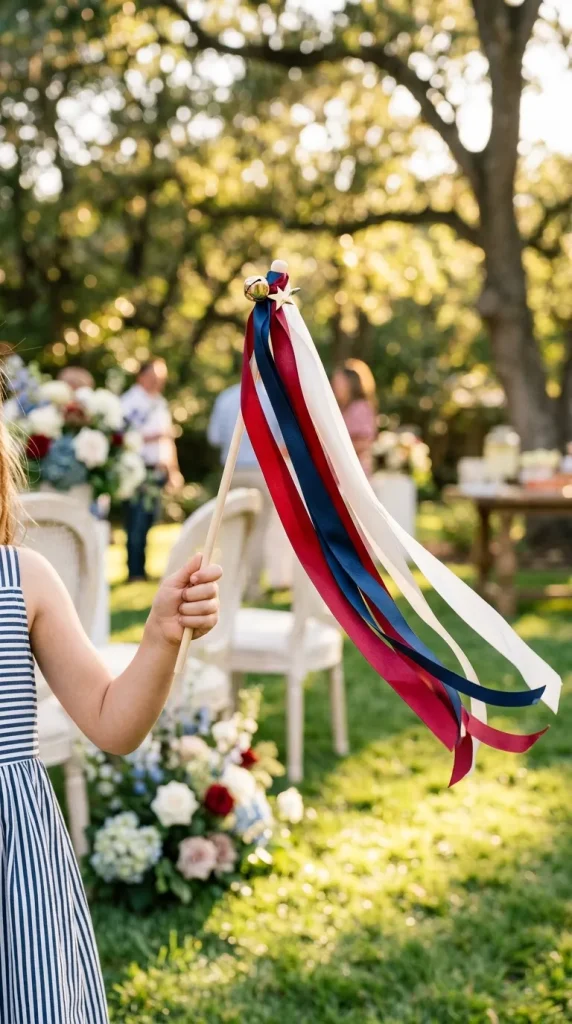
1. The Patriotic Ribbon Wand
Little kids love movement, and these patriotic ribbon wands are perfect for waving around during local neighborhood parades or backyard games. It gives young children a safe, sparkler-free option to celebrate the evening festivities.
- Who It Suits Best: Toddlers and preschoolers (Ages 2 to 5) who love active play and sensory motion.
- Benefits: Completely mess-free, helps develop fine-motor wrapping skills, and doubles as an active outdoor toy once completed.
- How to Style It: Take a sturdy wooden dowel or a clean stick from the backyard. Let your child wrap patriotic red, white, and blue ribbons around the top section. Secure the ribbons tightly to the tip of the stick using strong masking tape or a dab of craft glue. Leave long, flowing trails of ribbon hanging down so they dance beautifully in the summer breeze.
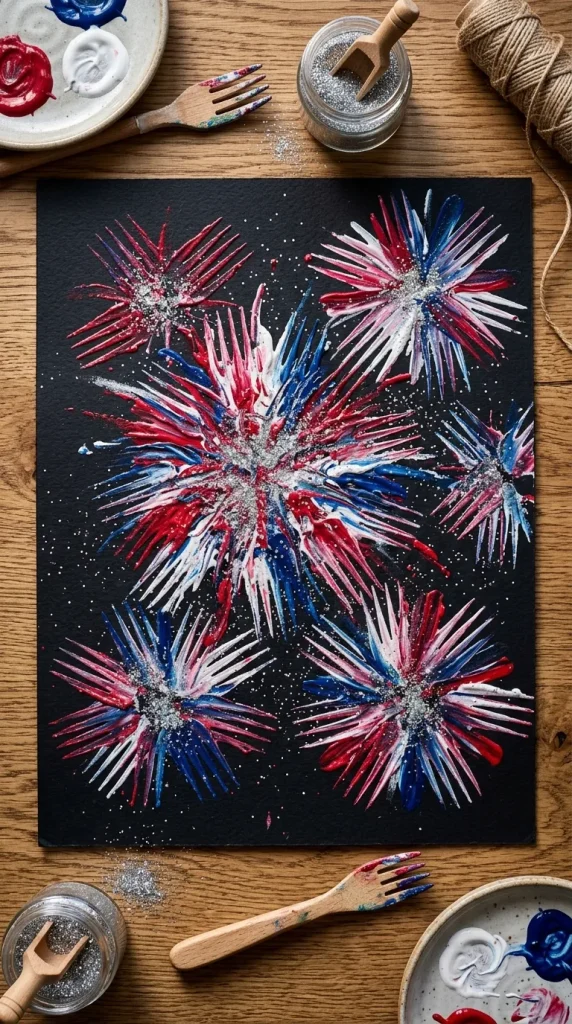
2. The Painted Fork Firework
If your children love getting messy with paint but you want a defined shape rather than chaotic abstract art, look no further than your kitchen drawer. A simple plastic fork makes the absolute perfect tool for printing textured, explosive firework patterns on dark paper.
- Who It Suits Best: Preschoolers and young elementary students (Ages 3 to 8) who love stamping and textured art projects.
- Benefits: Uses zero expensive paintbrushes, relies entirely on recyclable kitchen items, and yields a stunning visual result that looks exactly like a real night sky.
- How to Style It: Provide a sheet of black construction paper. Pour small puddles of red, white, and blue washable tempera paint onto a paper plate. Have your child dip the back prongs of a plastic fork into the paint, then press it firmly onto the black paper in a circular, radiating pattern to mimic a burst of fireworks. Add a dash of silver glitter while the paint is wet for extra holiday sparkle.
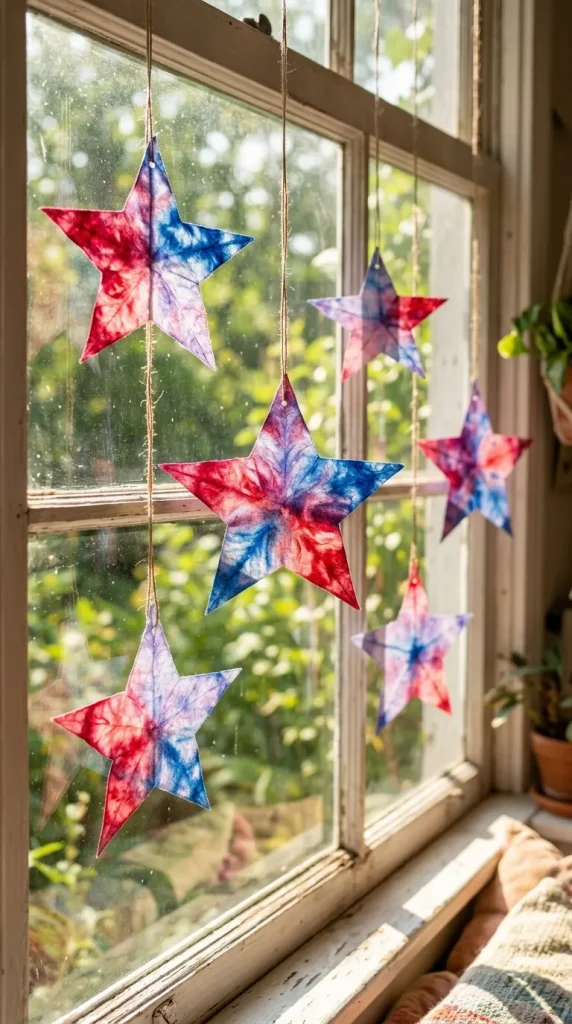
3. Tie-Dye Coffee Filter Stars
This project combines a simple science lesson with an artistic flair. Coffee filters feature highly absorbent fibers that bleed colors together beautifully when damp, creating a vibrant, soft tie-dye look that is incredibly satisfying for kids to watch.
- Who It Suits Best: Creative kids who love color experimentation and watching visual transformations (Ages 4 to 10).
- Benefits: Provides a beautiful translucent look that turns into a stained-glass window ornament when taped up against sunlight.
- How to Style It: Cut standard white coffee filters into star shapes. Have your child color the stars heavily using red and blue washable markers. Once colored, use a small spray bottle filled with water to lightly mist the filter. Watch as the colors instantly bleed, blend, and expand into a gorgeous tie-dye pattern. Let them dry completely on a baking sheet before hanging.
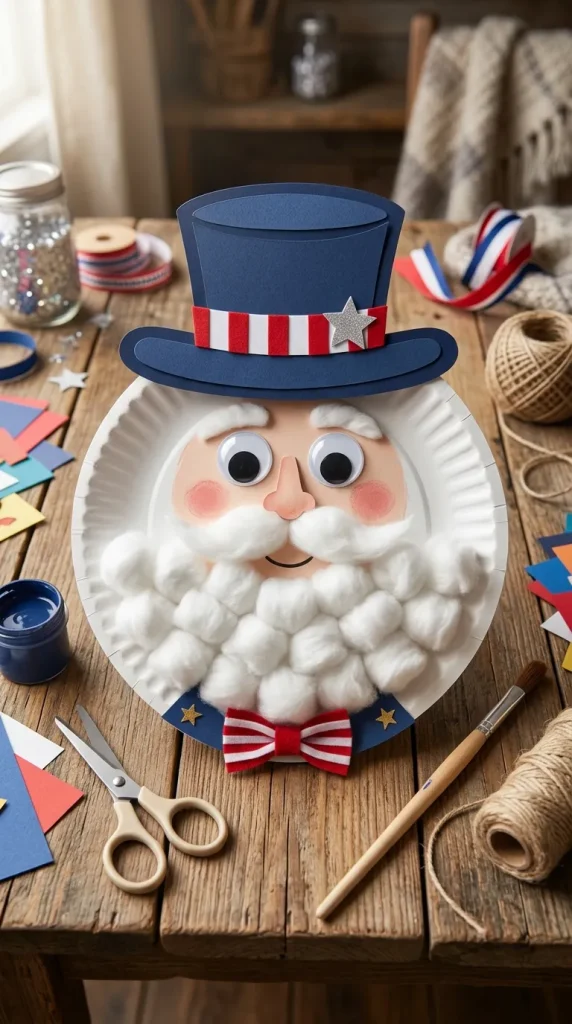
4. The Uncle Sam Paper Plate
Bring an iconic symbol of American history to life with this classic paper plate portrait. It is an excellent craft to use as a conversation starter about national history while giving children a chance to work with varied textures like cotton balls and paper shapes.
- Who It Suits Best: Kindergarten and early elementary students (Ages 4 to 7) who are practicing cutting shapes and following step-by-step assembly instructions.
- Benefits: Encourages tactile learning through the use of fluffy cotton balls, paper cutouts, and coloring.
- How to Style It: Use a classic white paper plate as Uncle Sam’s face. Draw a flesh-colored circle in the center. Cut a tall top hat shape out of blue and white construction paper and glue it to the top rim of the plate. Have your child glue fluffy white cotton balls all around the lower half of the plate to create a soft, voluminous patriotic beard. Add googly eyes and a red paper nose to finish.
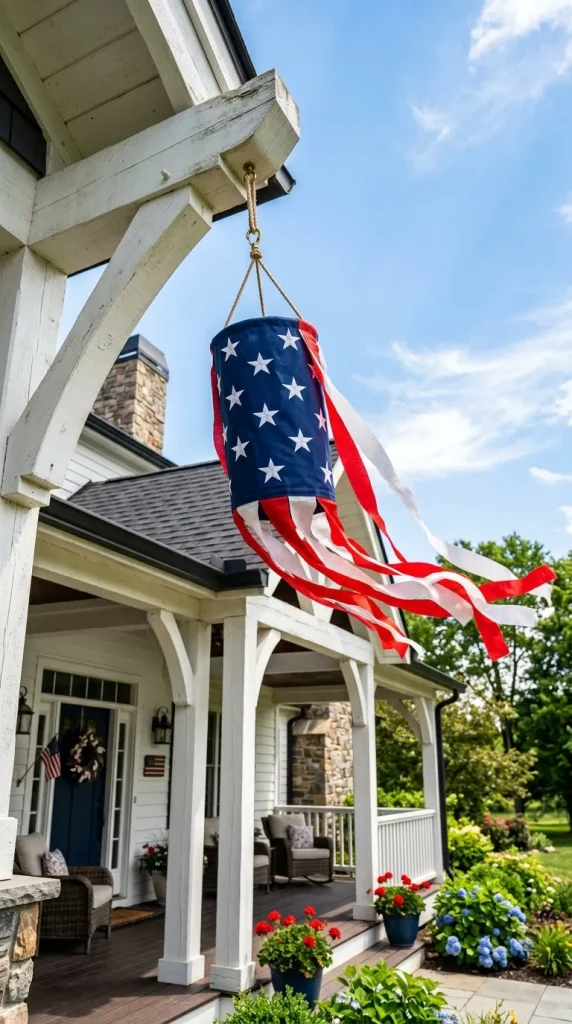
5. The Patriotic Windsock
Windsocks are fantastic holiday decorations that look wonderful hanging from a front porch or back patio. Kids will feel a massive sense of pride seeing their homemade decorations catch the wind throughout the holiday weekend.
- Who It Suits Best: Young children (Ages 3 to 6) who enjoy building items that move and interact with nature.
- Benefits: Helps teach basic geometric rolling concepts and creates an attractive, durable piece of holiday yard decor.
- How to Style It: Take a large sheet of blue construction paper and let your child decorate it with white star stickers or silver markers. Roll the paper into a cylinder shape and staple or tape the edges together. Glue long strips of red and white crepe paper streamer streams to the bottom inside rim of the cylinder. Punch two holes at the top, tie a string through them, and hang it up outside to watch it catch the summer breeze.
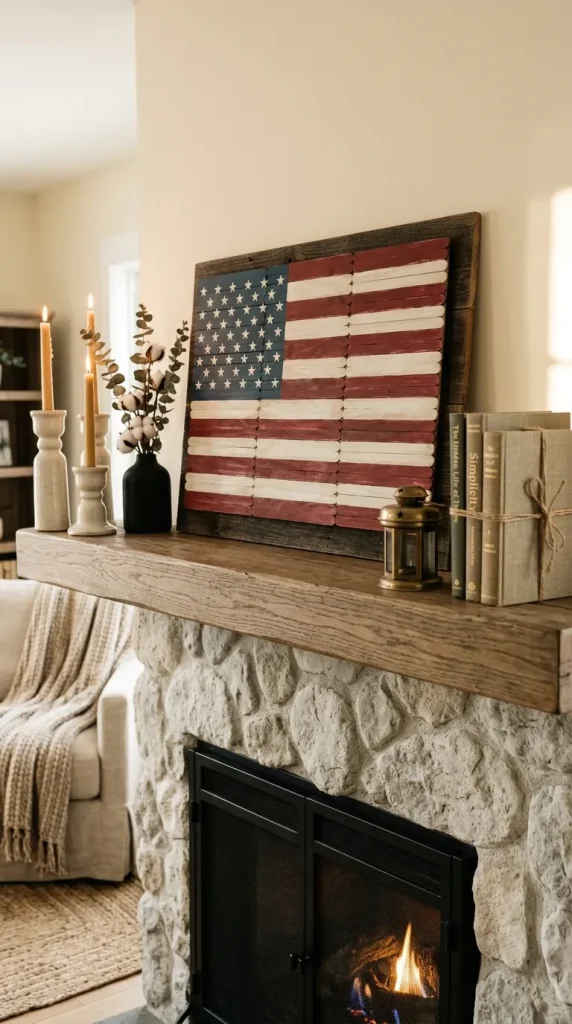
6. The Popsicle Stick Flag Plaque
This sturdy craft serves as a beautiful holiday keepsake that you can pack away and bring out year after year to decorate your mantelpiece. It offers a wonderful structure that teaches spatial arrangement and color patterns.
- Who It Suits Best: Older kids and pre-teens (Ages 5 to 12) who have the patience to arrange items and wait for wood glue to dry.
- Benefits: Highly durable, creates a classic rustic farmhouse decor look, and provides an excellent canvas for detail work.
- How to Style It: Line up 7 to 9 popsicle sticks horizontally. Glue two additional sticks vertically across the back to lock them together into a solid wooden plaque. Once dry, have your child paint the top-left quadrant blue. Paint the remaining lengths of the sticks in alternating red and white stripes. Once the base paint is fully dry, use white acrylic paint or star stickers to add the stars inside the blue quadrant.
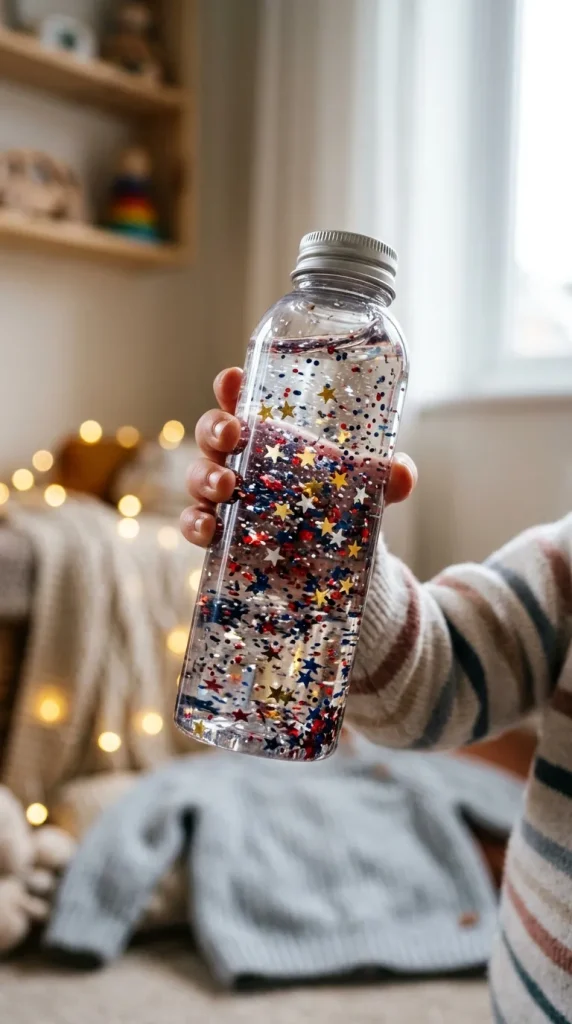
7. The Glittering Firework Sensory Bottle
Sensory bottles are an absolute lifesaver for toddlers who get overwhelmed by loud holiday noises or need a calming activity while adults are cooking. Watching the slow-motion swirl of red, white, and blue glitter provides immediate relaxation.
- Who It Suits Best: Toddlers, infants, and highly sensitive children (Ages 1 to 4) who benefit from soothing visual sensory stimulation.
- Benefits: Completely self-contained and mess-free once sealed, reusable for years, and excellent for emotional regulation during loud firework displays.
- How to Style It: Take a clean, clear plastic water bottle and remove the label. Fill the bottle 3/4 full with warm water, then add a generous amount of clear school glue or glycerin to thicken the liquid. Pour in metallic red, white, and blue glitter along with star-shaped sequins. Top off with water, screw the cap on, and secure it permanently using hot glue or super glue around the inside rim of the cap so it can never leak.
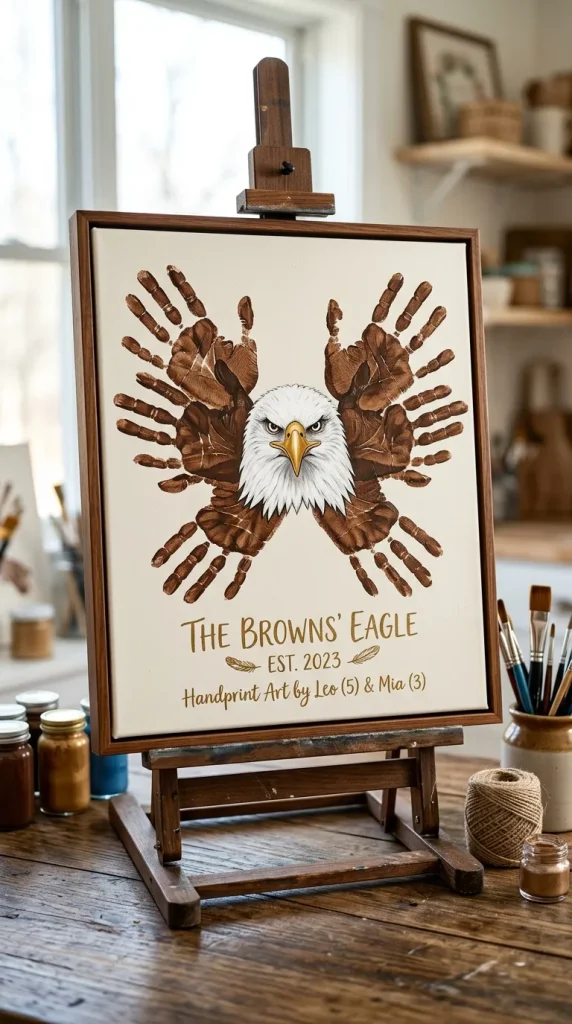
8. The Handprint Eagle Canvas
Nothing captures a moment in time quite like a handprint craft. Turning your child’s handprints into the magnificent wings of a majestic bald eagle makes for a beautiful, sentimental piece of holiday art that family members will treasure forever.
- Who It Suits Best: Families looking to create custom sentimental keepsakes; excellent for all age groups, including infants and toddlers.
- Benefits: Highly sentimental, tracks your child’s physical growth over the years, and serves as a gorgeous piece of custom holiday art.
- How to Style It: Paint your child’s palms and fingers with rich brown washable paint. Press their hands onto a white canvas or thick piece of cardstock with the thumbs pointing upward and fingers fanned out to form the eagle’s wings. Once the brown paint dries completely, use white paint to add the eagle’s iconic head in the center, and a touch of yellow paint for a sharp beak and sharp little talons.
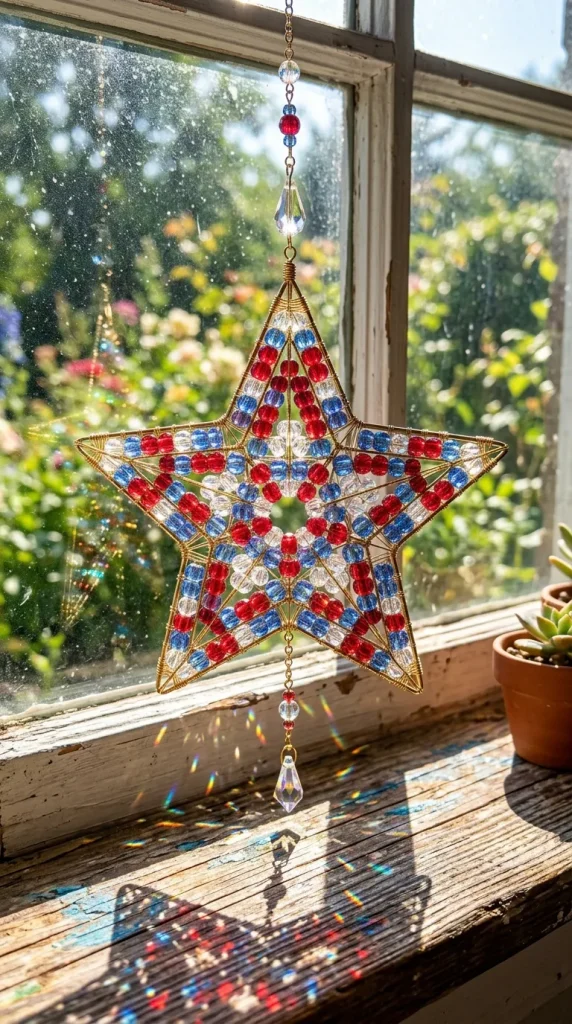
9. Beaded Star Sun Catchers
For older children who want a project that takes a bit of focus and precision, making beaded star shapes out of pipe cleaners and translucent pony beads is an exceptional choice. When hung in a sunny window, they scatter beautiful red and blue light across the room.
- Who It Suits Best: Older kids (Ages 6 to 12) who have excellent fine-motor control and enjoy pattern building.
- Benefits: Keeps older children focused for longer stretches of time, improves hand-eye coordination, and results in a stunning piece of window art.
- How to Style It: Take a metallic or white pipe cleaner and bend it carefully into a five-pointed star shape, leaving one end open. Have your child string translucent red, clear, and blue plastic pony beads onto the pipe cleaner in a repeating pattern. Once the star is filled with beads, twist the open ends of the pipe cleaner together tightly to seal it shut, tie a fishing line loop to the top, and hang it directly on a sunny windowpane.
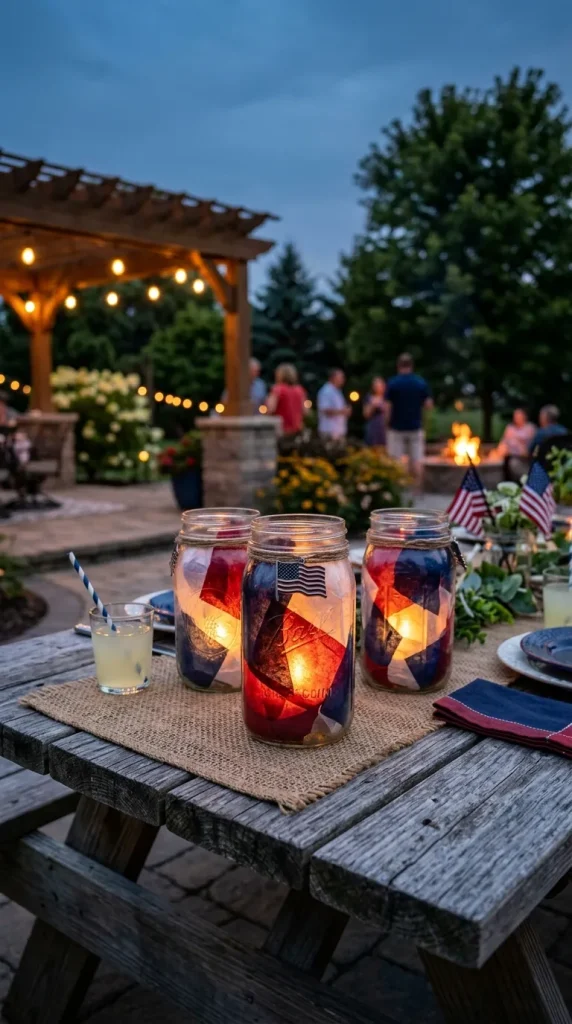
10. The Patriotic Mason Jar Lantern
As the sun goes down and families prepare for fireworks, these festive mason jar lanterns create a warm, magical atmosphere. Kids love seeing their creations glow in the dark using safe, battery-operated tea lights.
- Who It Suits Best: Older children and pre-teens (Ages 5 to 10) who enjoy crafting items that light up and have a practical nighttime use.
- Benefits: Safe alternative to real candles, teaches basic collage layering techniques, and provides beautiful illumination for outdoor evening picnics.
- How to Style It: Paint a light layer of liquid Mod Podge or school glue across the outside of a clean glass mason jar. Have your child stick squares of red, white, and blue tissue paper all over the jar, overlapping them to cover the glass completely. Paint a second sealing layer of Mod Podge over the tissue paper. Once dry, tie a rustic twine ribbon around the rim and place a battery-operated LED tea light inside to watch it glow.
Pro Tips for Stress-Free Crafting with Kids
💡 The Prep-Ahead Protocol
The secret to avoiding total chaos during holiday crafting is to pre-cut all shapes and lay out supplies before inviting the kids to the table. Children have short attention spans; if they have to sit and wait fifteen minutes while you hunt for scissors and tape, they will lose interest before the project even begins.
- Embrace Washable Materials: Always check your labels and ensure you are buying exclusively washable tempera paint and markers. Holiday clothes are expensive, and having peace of mind that paint will wash out makes the experience far more relaxing for you.
- Use Heavy Cardstock Over Paper: Cheap printer paper saturates rapidly and tears when exposed to wet glue or liquid paint. Always invest in heavy cardstock or construction paper to ensure your child’s hard work doesn’t rip apart when drying.
- Create a Dedicated Mess Zone: Lay down a cheap plastic disposable tablecloth from the dollar store or a few layers of old newspapers across your kitchen table before crafting. Once the projects are finished, you can simply roll up the tablecloth with all the scrap paper and discard it instantly.
Common Mistakes to Avoid with Kids’ Holiday Crafts
- Prioritizing Perfection Over Fun: It can be highly tempting to step in and fix your child’s crooked star or messy paint stroke to make the craft look “picture perfect.” Avoid this! The beauty of kids’ crafts lies in their unique, imperfect charm. Let them own their artistic process completely.
- Using Real Fire for Lanterns: Never place real wax candles inside jars decorated with tissue paper and flammable school glue. Always stick exclusively to cool-burning, battery-powered LED tea lights or glow sticks to keep your holiday completely fire-safe.
- Forgetting to Protect Clothing: Even washable paint can leave faint shadows on white fabrics if left to dry overnight. Always dress your children in old play clothes or use a simple oversized t-shirt as a protective smock before opening paint bottles.
Frequently Asked Questions (FAQs)
What are the best 4th of July crafts for toddlers?
The best crafts for toddlers are low-mess, high-motion projects like the Patriotic Ribbon Wand or the Glittering Firework Sensory Bottle. These projects avoid heavy paint use, are entirely self-contained, and focus on sensory stimulation and movement.
How can I make holiday crafting less messy?
To minimize mess, avoid liquid paint bottles and use washable markers, star stickers, pre-cut foam shapes, and colored construction paper instead. If you do use paint, swap traditional brushes for a plastic fork technique and always lay down a disposable plastic tablecloth first for instant cleanup.
What household items can I repurpose for 4th of July crafts?
You can repurpose an incredible array of daily household items! Paper plates make wonderful faces or hats, plastic forks create instant firework stamps, empty mason jars turn into glowing lanterns, and coffee filters make beautiful tie-dye star ornaments.
How long do these independent day crafts take to dry?
Projects using simple markers, tape, and stickers dry instantly. Crafts utilizing washable tempera paint or school glue typically require 30 to 60 minutes to dry completely, depending on the thickness of the application. Always set them aside on a flat baking sheet in a well-ventilated room.
Wrap-Up: Making Holiday Memories Together
Finding the perfect 4th of July craft ideas for kids is all about creating joyful moments of shared creativity while celebrating national pride. These easy projects do not require advanced art degrees or expensive trips to boutique hobby stores. By utilizing common household items and embracing simple, tactile assembly methods, you can keep your children blissfully entertained while adding a stunning touch of homemade charm to your holiday decor.
Which festive project is your little artist going to tackle first this Independence Day? Gather up your paper plates, lay out the red, white, and blue paint, and step into the holiday weekend with a house full of laughter, creativity, and proud patriotic spirit!
Leave a Reply